

Simple DIY root cellar design for storing garden harvests through winter?
As summer’s bounty overflows, many gardeners face the delightful dilemma of preserving their hard-earned harvests. While canning, freezing, and dehydrating are popular methods, a simple DIY root cellar offers an age-old, energy-efficient solution for storing produce like potatoes, carrots, apples, and onions through the frosty winter months. Imagine enjoying fresh, crisp vegetables from your garden long after the snow falls – a root cellar makes this a reality.
Why Build a Simple DIY Root Cellar?
The beauty of a root cellar lies in its natural ability to create a cool, humid, and dark environment—conditions ideal for slowing down the spoilage of many fruits and vegetables. Beyond extending the shelf life of your produce, building your own root cellar offers several compelling benefits:
- Reduced Food Waste: Keep your harvest fresh longer, minimizing spoilage.
- Cost Savings: Less reliance on store-bought produce during off-season.
- Energy Efficiency: No electricity needed for cooling, unlike refrigerators.
- Self-Sufficiency: A step towards greater food independence and homesteading goals.
Essential Principles of Root Cellar Design
Regardless of the specific design you choose, a successful root cellar adheres to a few core environmental principles:
- Cool Temperatures: Aim for 35-50°F (2-10°C). This slows respiration and microbial growth.
- High Humidity: 85-95% humidity prevents produce from shriveling and drying out.
- Darkness: Light can stimulate sprouting and degrade nutritional quality.
- Good Ventilation: Proper airflow helps regulate temperature and humidity, and prevents the buildup of ethylene gas (released by some fruits), which can accelerate ripening and spoilage in other produce.
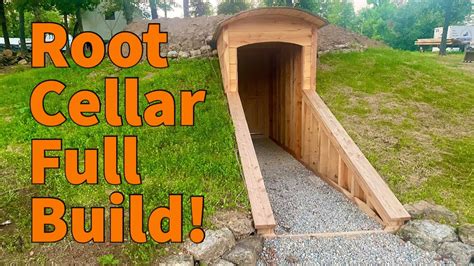
Simple DIY Root Cellar Ideas
You don’t need a massive underground structure to enjoy the benefits of a root cellar. Here are a few easy-to-implement DIY options:
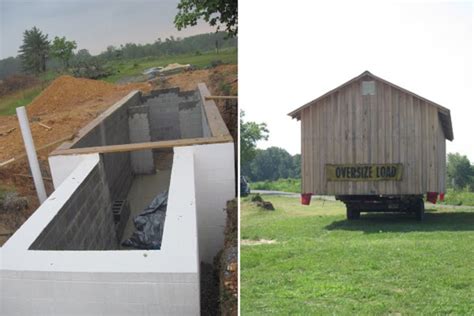
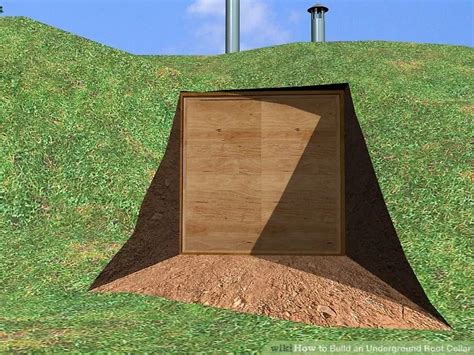
1. The Buried Container Root Cellar
This is one of the simplest and most popular DIY methods. You’ll need a large, food-grade container like a plastic trash can, an old chest freezer (emptied and cleaned), or a sturdy wooden barrel. This method works by leveraging the insulating properties of the earth.
Steps:
- Dig a Pit: Choose a well-drained spot and dig a hole slightly larger than your container, at least 3-4 feet deep.
- Prepare the Container: Drill drainage holes in the bottom if using a sealed container.
- Install Ventilation: Cut two holes near the top of your container. Insert PVC pipes for intake and exhaust vents. The intake pipe should extend closer to the bottom of the container, while the exhaust pipe should be shorter, allowing for air circulation. Cover the tops of the pipes with screens to keep pests out, and add caps to keep rain out.
- Place the Container: Position your container in the pit. You can add a layer of gravel at the bottom of the pit for extra drainage.
- Insulate and Cover: Backfill around the container with soil, straw, or wood chips, ensuring the top is well-insulated. Create an access hatch or cover for the top, ensuring it’s rodent-proof and well-insulated.
2. The Earth Mound Root Cellar (Hugel Root Cellar)
Similar to the buried container, but often on a larger scale and can incorporate a small chamber. You create a mound of earth over a frame or a pile of produce, using the earth’s natural insulation. This can be as simple as burying root vegetables directly in a mound of sand or straw and then covering with soil.

3. Modified Cold Frame or Shed
If you have an existing cold frame or a sturdy shed, you can adapt it. The key is to add significant insulation (straw bales, rigid foam) to the walls, floor, and ceiling, and ensure good ventilation. This type of cellar will be more susceptible to external temperature fluctuations than an underground one, so monitoring is crucial.
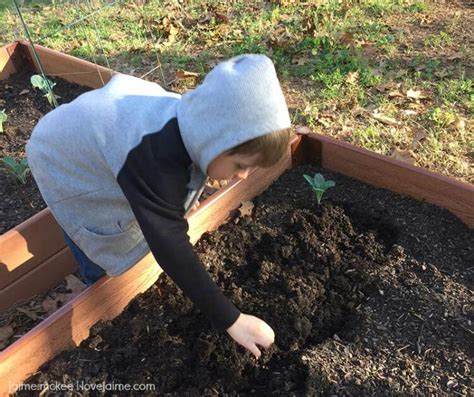
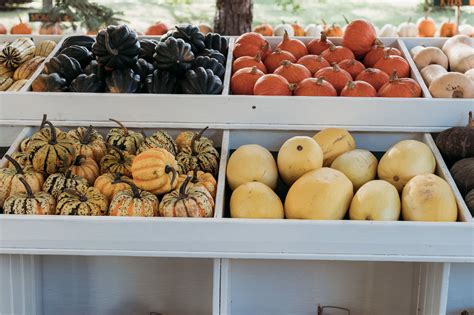
What to Store in Your Root Cellar
Not all produce is suitable for root cellar storage. Ideal candidates include:
- High Humidity (85-95%) & Cool (35-40°F): Carrots, beets, parsnips, turnips, potatoes, apples, pears, cabbage, celery, kohlrabi.
- Low Humidity (60-70%) & Cool (35-50°F): Onions, garlic, winter squash, pumpkins. Store these in a drier section if possible, or in a separate, less humid cellar.
Always store produce clean and dry. Avoid storing apples with potatoes, as apples release ethylene gas which can cause potatoes to sprout prematurely.
Maintenance for Optimal Storage
Once your root cellar is built, a little monitoring goes a long way. Regularly check the temperature and humidity using a thermometer and hygrometer. Adjust ventilation as needed to maintain ideal conditions. Remove any spoiled produce promptly to prevent it from affecting others.
Conclusion
Building a simple DIY root cellar is an empowering project that connects you to time-honored food preservation techniques. With a modest investment of time and materials, you can ensure a steady supply of fresh, homegrown produce throughout the winter, reducing waste and enjoying the fruits (and vegetables!) of your labor for months to come. Start planning your design today and embrace the bounty of your garden all year long.