

Easy DIY root cellar plans for storing garden vegetables long-term?

Harvesting a bountiful garden is incredibly rewarding, but figuring out how to store all that fresh produce can be a challenge. While canning and freezing are popular options, a root cellar offers a passive, energy-efficient way to keep many vegetables fresh for months, mimicking nature’s refrigeration. And the best part? You don’t need a massive budget or advanced construction skills to build one. This guide will walk you through easy DIY root cellar plans that anyone can tackle.
Understanding the Principles of Root Cellaring
A root cellar works by providing a stable, cool, dark, and humid environment that slows down the spoilage process in certain vegetables and fruits. The ideal conditions generally include:
- Temperature: Between 32-50°F (0-10°C). Colder temperatures are better for most root crops, while slightly warmer is good for squash and pumpkins.
- Humidity: High, typically 85-95%. This prevents produce from drying out and shriveling.
- Ventilation: Good airflow is crucial to prevent the buildup of ethylene gas (which can ripen produce prematurely) and stale air, reducing the risk of mold and rot.
- Darkness: Essential to prevent sprouting (especially potatoes) and to preserve nutritional content.

Super Simple Root Cellar Ideas for Beginners
You don’t need to dig a huge underground bunker to start preserving your harvest. Here are some incredibly easy methods:
1. Buried Trash Can Root Cellar
This is perhaps the simplest and most budget-friendly option. Find a large, heavy-duty plastic or galvanized metal trash can with a tight-fitting lid. Dig a hole in a shaded, well-drained spot in your garden, deep enough so that the lid is just above ground level. Drill a few small holes in the bottom for drainage and some larger holes around the top for ventilation (cover these with mesh to keep pests out). Line the bottom with a layer of sand or straw, then layer your root vegetables (like carrots, beets, or potatoes) separated by damp sand, sawdust, or straw. Place the lid on top and weigh it down. This method utilizes the earth’s natural insulation to maintain a consistent temperature and humidity.
2. Straw Bale Root Cellar
For a temporary but effective solution, especially in colder climates, a straw bale root cellar can work wonders. Stack straw bales to form an insulated enclosure against an existing wall (like a shed or garage). Create a small, door-like opening. Inside, you can store produce directly on pallets or in bins. The straw provides excellent insulation, and you can easily disassemble it when not needed. Ensure a top cover to keep rain out.
Building a Small, Dedicated Root Cellar
If you’re looking for something more permanent but still manageable, consider these options:
1. Modifying a Corner of a Basement or Shed
If you have an unused corner in an unheated basement or a sturdy garden shed, you can transform it. In a basement, partition off an area with insulated walls, ensuring good ventilation through a small window or a vent pipe leading outside. In a shed, build a smaller, insulated box within the shed, using rigid foam insulation for the walls, floor, and ceiling. Ensure a tight-fitting door and incorporate a simple intake and exhaust ventilation system.
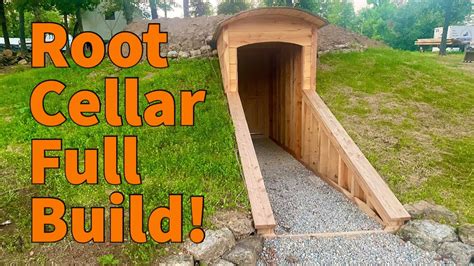
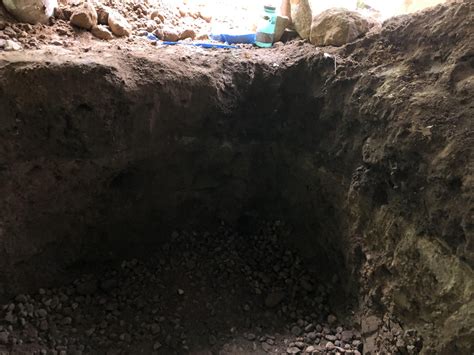
2. Earth Mound Root Cellar
This involves digging a shallow pit and building a small structure over it, then covering the entire thing with earth and sod. This offers excellent natural insulation. Start with a foundation (concrete block or treated lumber), build short walls, add a roof (often sloped for drainage), and then mound soil over the entire structure, leaving an access door and ventilation pipes exposed. This project requires a bit more effort but creates a highly effective and aesthetically pleasing root cellar.
Essential Components for Success
- Insulation: For any above-ground or partially buried structure, insulation is key. Rigid foam insulation (XPS or EPS) is highly effective and moisture-resistant. Straw bales also offer excellent natural insulation.
- Ventilation: At its simplest, this can be an intake pipe (low to the ground) and an exhaust pipe (high up), creating a convection current. For larger cellars, a small, solar-powered fan can enhance airflow. Always cover vents with mesh to prevent pest entry.
- Shelving: Use slatted shelves or plastic bins elevated off the floor to allow for air circulation. Avoid solid surfaces that can trap moisture.
- Moisture Control: If humidity is too low, placing a bucket of water or damp sand on the floor can help. For too much humidity or condensation, ensure better ventilation.

What to Store and How
Not all vegetables are suited for root cellaring, and some require specific conditions. Here’s a general guide:
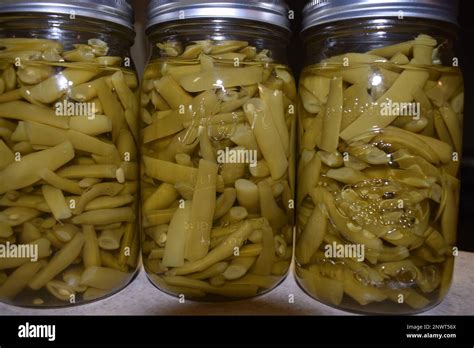
- Cool & Moist (32-40°F, 90-95% humidity): Carrots, beets, parsnips, turnips, radishes, cabbage, celery, kohlrabi. Store in bins layered with damp sand, sawdust, or peat moss.
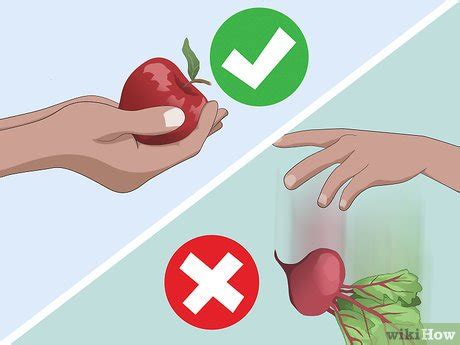
- Cool & Humid (35-40°F, 85-90% humidity): Potatoes (store in darkness to prevent greening), apples (keep separate from other produce as they release ethylene gas), pears, grapes.
- Cool & Dry (40-50°F, 60-70% humidity): Onions, garlic. Cure these for several weeks before storing. Hang them in mesh bags or braid them.
- Warm & Dry (50-60°F, 50-70% humidity): Winter squash, pumpkins, sweet potatoes. These prefer slightly warmer, drier conditions than typical root cellar environments. If your cellar is too cold for these, a cooler corner of your house or garage might be better.
Always inspect produce before storing; remove any bruised or damaged items, as one bad apple can spoil the bunch. Do not wash root vegetables before storing; just brush off excess dirt.
Maintenance and Monitoring
Once your root cellar is set up, don’t just forget about it. Regular checks are vital:
- Monitor Temperature and Humidity: Use a simple thermometer/hygrometer to ensure conditions remain stable.
- Inspect Produce: Periodically check your stored vegetables for any signs of spoilage, mold, or pests. Remove and discard anything that’s going bad immediately to prevent it from affecting other produce.
- Ensure Ventilation: Make sure vents are clear and airflow is maintained.
Conclusion
Building an easy DIY root cellar is a fantastic step towards greater food self-sufficiency and sustainable living. Whether you opt for a buried trash can, a straw bale enclosure, or a more permanent earth mound, the principles remain the same: provide a cool, dark, humid, and well-ventilated space. With a little effort, you can enjoy your garden’s bounty long after the growing season has ended, reducing waste and savoring the taste of homegrown goodness all winter long.