


Best beginner tips for canning garden tomatoes safely for winter storage?

Introduction: Why Can Your Garden Tomatoes?
Fresh, ripe tomatoes from your garden are a summer delight, but their season is fleeting. Canning them allows you to capture that vibrant flavor and nutritional goodness, preserving it for the colder months. It’s a rewarding process that might seem daunting at first, but with the right guidance, even beginners can safely enjoy the bounty of their harvest year-round. This guide will walk you through the essential steps to ensure your canned tomatoes are delicious and safe for consumption.
Gather Your Essentials: Equipment and Ingredients
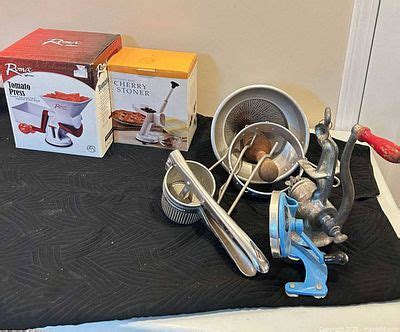
Before you start, gather all necessary equipment and ingredients. Having everything at hand makes the process smoother and more efficient. You’ll need fresh, ripe tomatoes, canning jars with new lids and bands, a large water bath canner, a jar lifter, a canning funnel, headspace tool, bubble remover, clean kitchen towels, and importantly, lemon juice or citric acid for acidification.
Choosing the Best Tomatoes
Select firm, ripe, unblemished tomatoes. Avoid any with soft spots, mold, or visible damage. Roma or paste tomatoes are often preferred due to their meatier texture and lower water content, but any ripe slicing tomato can be canned.
Prepping Your Tomatoes for Canning
Proper preparation is key to both safety and quality. Start by thoroughly washing your tomatoes under cool running water. For most canning recipes, you’ll need to peel and core them. To easily peel tomatoes, score an “X” on the bottom, blanch them in boiling water for 30-60 seconds, then immediately transfer to an ice bath. The skins should slip off easily. After peeling, core the tomatoes and decide whether you want to can them whole, halved, crushed, or as sauce.

The Critical Step: Acidification for Safety
Tomatoes are a borderline acidic food, meaning their pH can vary. To ensure safety and prevent the growth of harmful bacteria (like Clostridium botulinum), you must add an acidifying agent. This is non-negotiable for water bath canning.
Acidification Options:
- Bottled Lemon Juice: Add 2 tablespoons per quart jar or 1 tablespoon per pint jar. Always use bottled lemon juice, as its acidity is standardized, unlike fresh lemon juice.
- Citric Acid: Add 1/2 teaspoon per quart jar or 1/4 teaspoon per pint jar.
- Vinegar: Not recommended as a primary acidifier for tomatoes due to its strong flavor, but can be used in pickles or relishes where the flavor is desired.
You can also add salt for flavor, if desired, but it does not contribute to the preservation process.
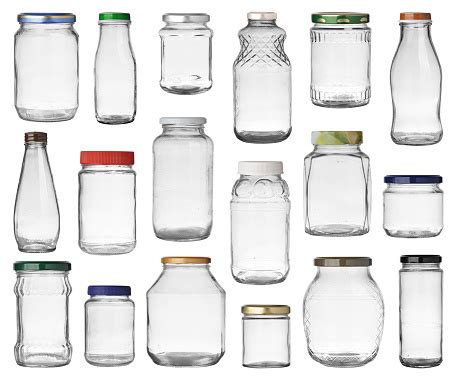
Packing and Processing Your Jars
Once your tomatoes are prepped and acidified, it’s time to pack your jars. Make sure your canning jars are clean and hot (sterilizing is only necessary if processing time is less than 10 minutes, but hot jars prevent thermal shock).
Steps for Packing and Processing:
- Fill Jars: Ladle hot tomatoes into hot jars, leaving 1/2 inch headspace. If canning whole or halved tomatoes, you can either hot pack (fill with hot water or tomato juice) or raw pack (fill with raw tomatoes, then hot water/juice). Raw packing often results in more “floating” tomatoes.
- Remove Air Bubbles: Use a non-metallic spatula or bubble remover to remove air bubbles by running it around the inside of the jar. Add more liquid/tomatoes if necessary to maintain headspace.
- Clean Rims: Wipe jar rims thoroughly with a clean, damp cloth to ensure a good seal.
- Apply Lids and Bands: Place a new, clean lid on each jar, centering it. Screw on the bands “fingertip tight” – just enough to hold the lid in place, but not too tight.
- Process in Water Bath Canner: Carefully place jars onto the rack in your water bath canner. Ensure water covers the tops of the jars by at least 1-2 inches. Bring water to a rolling boil and process for the recommended time (typically 35-45 minutes for pints and 40-50 minutes for quarts, adjusting for altitude). Consult a reliable canning guide for precise times.
Cooling, Checking Seals, and Storage
After the processing time is complete, turn off the heat and let the jars sit in the canner for 5 minutes before carefully removing them with a jar lifter. Place them on a towel-lined surface, ensuring there’s space between jars for air circulation. Do not disturb them for 12-24 hours.
Checking for a Proper Seal:
After cooling, check for a proper seal. The center of the lid should be concave and not flex when pressed. If a lid is still convex or pops up and down, it has not sealed. Refrigerator unsealed jars and use them within a week, or reprocess them within 24 hours with a new lid.
Storage:
Once sealed, remove the bands (they can trap moisture and cause rust). Wipe jars clean and label them with the date and contents. Store your canned tomatoes in a cool, dark, dry place. Properly canned tomatoes can last for up to 12-18 months, allowing you to enjoy your garden’s bounty all winter long.

Conclusion
Canning garden tomatoes is a rewarding skill that extends the joy of your harvest. By following these beginner tips, paying close attention to hygiene, acidification, and processing times, you can safely preserve delicious tomatoes for winter storage. Enjoy the taste of summer, even in the coldest months!


