Best DIY cold frame for year-round garden greens?

Unlock Year-Round Harvests with a DIY Cold Frame
Imagine harvesting fresh, crisp garden greens even when snow blankets the ground. This dream becomes a reality with a well-designed DIY cold frame. A cold frame is essentially a bottomless box with a transparent lid, placed over garden plants to protect them from cold weather while allowing sunlight to warm the soil and air inside. It’s an indispensable tool for extending your growing season, making year-round cultivation of hardy greens like lettuce, spinach, kale, and arugula entirely achievable.
Why a DIY Cold Frame is Your Garden’s Best Friend
Opting for a DIY cold frame offers a multitude of benefits for the enthusiastic gardener. Firstly, it provides significant cost savings compared to purchasing a pre-made unit. You can often use repurposed materials, making it an eco-friendly project. Beyond cost, a cold frame extends your planting and harvesting seasons, allowing you to get an early start in spring and continue harvesting well into winter. It protects tender plants from frost, harsh winds, and heavy rain, creating a microclimate that shields them from temperature extremes. This means fewer losses and a more consistent supply of fresh produce right from your backyard.
Key Considerations Before You Build
Before you dive into construction, thoughtful planning will ensure your cold frame performs optimally:
- Location: Choose a south-facing spot that receives maximum winter sunlight. Ensure good drainage to prevent waterlogging.
- Size: Determine the dimensions based on the amount of greens you wish to grow and the available space. Remember to make it wide enough for easy access.
- Materials: The base needs to be insulating (wood, bricks, straw bales) and the lid transparent (old windows, polycarbonate panels, acrylic sheets). Durability and heat retention are key.
- Ventilation: Crucial for preventing overheating on sunny days and controlling humidity. The lid must be easy to open or prop up.
- Access: Design the lid to open easily for watering, harvesting, and ventilation. Hinges are highly recommended.
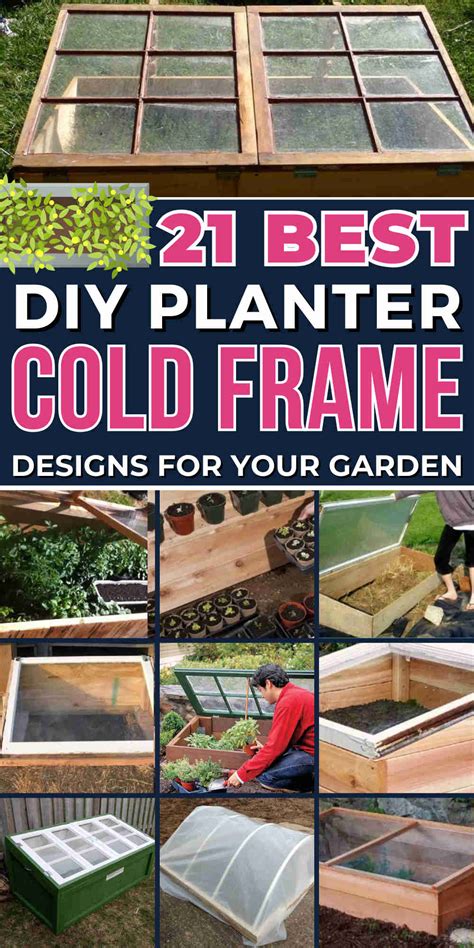
Popular DIY Cold Frame Designs and Materials
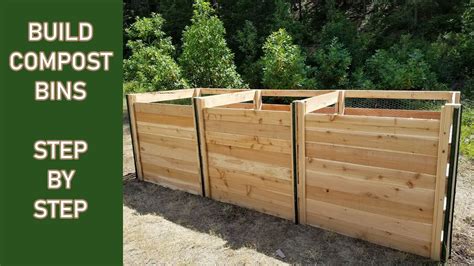
Repurposed Window Cold Frame
One of the most popular and cost-effective designs utilizes old windows for the lid. The base can be constructed from scrap lumber, bricks, concrete blocks, or even old pallets. The sloped angle of a window pane naturally helps shed water and maximize sun exposure. This design is relatively simple and environmentally friendly.
Straw Bale Cold Frame
For an incredibly insulating and temporary solution, stack straw bales to form the walls of your cold frame. The bales provide excellent thermal mass, regulating internal temperatures. Top this with an old window or a clear plastic sheet secured over a simple frame. This is a great option for a quick setup in autumn.
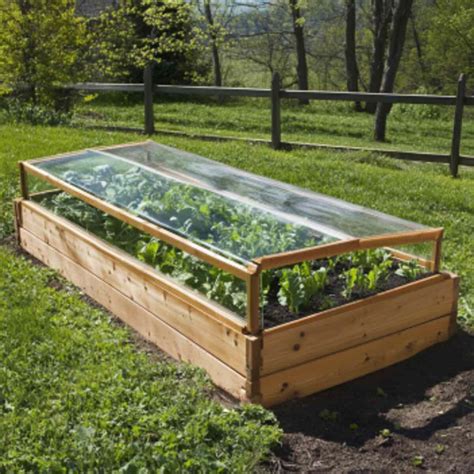
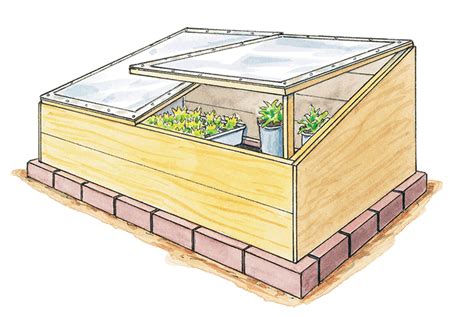
Plywood and Polycarbonate Cold Frame
For a more robust and permanent structure, plywood forms a sturdy base. Cut the plywood at an angle for a sloped lid, then attach clear polycarbonate sheets (which offer good insulation and durability) with hinges. This design allows for precise control over dimensions and a professional finish.
Step-by-Step Guide to Building Your Cold Frame (General)
- Plan and Gather Materials: Sketch your design, measure your space, and collect all necessary lumber, windows, hinges, and fasteners.
- Prepare the Site: Clear the chosen area, ensuring it’s level and well-drained. You might want to dig a shallow trench for the base to sit firmly.
- Build the Base: Construct the four walls, making the back wall taller than the front wall to create a slope for the lid. Ensure corners are square and sturdy.
- Attach the Lid: Secure hinges to the top edge of the back wall and the lid. Ensure the lid fits snugly over the base with minimal gaps.
- Seal and Secure: Use weatherstripping or caulk to seal any significant gaps between the lid and the frame to prevent heat loss. Add a prop stick or automatic vent opener for ventilation.

Managing Your Greens in a Cold Frame
Once your cold frame is built, success hinges on proper management:
- Plant Selection: Focus on cold-hardy greens like spinach, kale, lettuce (especially Romaine and butterhead varieties), arugula, mache, and Swiss chard.
- Watering: Plants in a cold frame require less frequent watering than outdoor plants, especially in winter. Water thoroughly when the top inch of soil is dry.
- Ventilation: This is critical! On sunny days, even in winter, temperatures inside can quickly soar. Prop open the lid slightly when temperatures are above freezing to prevent overheating and fungal diseases. Close it before sunset or when temperatures drop.
- Harvesting: Harvest outer leaves of greens to encourage continuous production. Avoid taking more than a third of the plant at once.

Conclusion
Building a DIY cold frame is a rewarding project that transforms your gardening potential. It’s a sustainable way to enjoy fresh, homegrown greens year-round, reduce your grocery bill, and connect more deeply with your food source. With careful planning and a little effort, you can create a productive micro-greenhouse that serves your garden for many seasons to come.