Best DIY compost recipe for nutrient-rich garden soil?

Creating your own nutrient-rich compost is one of the most rewarding and impactful actions you can take for your garden. Not only does it divert waste from landfills, but it also produces a powerful soil amendment that improves soil structure, boosts fertility, and promotes robust plant health naturally. Forget expensive chemical fertilizers; the best food for your garden is often found in your own backyard and kitchen.
The Magic of Composting: Why Bother?
Compost, often called ‘black gold,’ is decomposed organic matter that acts as a superfood for your garden. It enhances soil structure, improving drainage in heavy clay soils and increasing water retention in sandy soils. Beyond its physical benefits, compost is teeming with beneficial microbes that help plants access nutrients, suppress diseases, and withstand environmental stresses. Incorporating compost means healthier plants, fewer pests, and vibrant blooms or bountiful harvests without synthetic inputs.

Understanding the Core Ingredients: Greens and Browns
The success of any compost recipe hinges on the proper balance of ‘greens’ (nitrogen-rich) and ‘browns’ (carbon-rich). Think of greens as the fuel for microbial activity and browns as the structure and long-term energy source. A common recommended ratio is roughly 2-3 parts browns to 1 part greens by volume, though strict adherence isn’t necessary for a functional pile.
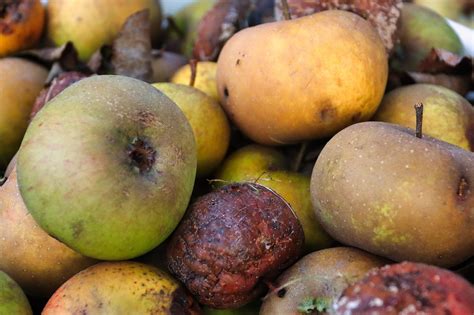
Typical ‘Green’ Materials (Nitrogen):
- Fruit and vegetable scraps
- Coffee grounds and tea bags
- Fresh grass clippings (in moderation to avoid matting)
- Garden plant trimmings (non-diseased)
- Manure from herbivores (chicken, cow, horse, rabbit)
Typical ‘Brown’ Materials (Carbon):
- Dried leaves
- Shredded cardboard and paper (non-glossy, non-colored)
- Straw or hay
- Wood chips and sawdust (in moderation, can take longer to break down)
- Dead plants and stalks
The Ultimate DIY Compost Recipe: Layer by Layer
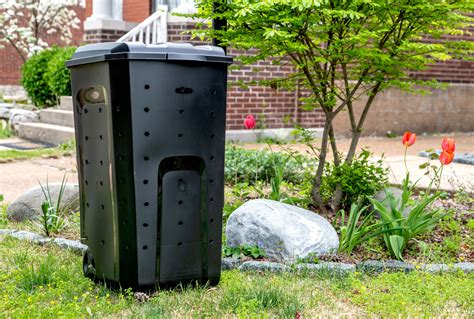
While composting can happen in various setups (bins, tumblers, piles), the principles remain the same. Here’s a simple, effective recipe for a productive compost pile:
- Choose Your Location: Select a well-drained spot, preferably partially shaded, and easily accessible for adding materials and turning.
- Start with a Base Layer: Begin with 4-6 inches of coarse brown materials (small branches, straw, wood chips) to ensure good airflow at the bottom.
- Layer Browns: Add a layer of 6-8 inches of mixed brown materials like dried leaves, shredded paper, or straw.
- Layer Greens: Follow with a 3-4 inch layer of green materials such as kitchen scraps, grass clippings, or fresh garden waste.
- Add Soil or Finished Compost: Sprinkle a thin layer (1 inch) of garden soil or a handful of finished compost. This introduces beneficial microorganisms to kickstart decomposition.
- Moisten: Lightly water each layer as you build, aiming for the consistency of a damp sponge – moist but not soggy.
- Repeat Layers: Continue alternating brown and green layers, adding a sprinkle of soil/compost and water, until your pile reaches at least 3x3x3 feet for optimal heat generation.
- Cap with Browns: Always finish your pile with a thick layer of brown materials to deter pests and keep moisture in.
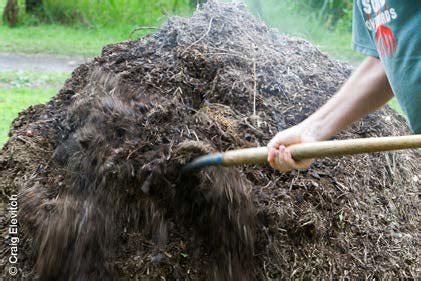
Maintaining Your Compost Pile for Success
Once built, your compost pile requires a little attention to ensure efficient decomposition:
- Keep it Moist: Check the moisture regularly. If it feels dry, add water. If it’s too wet and smells putrid, add more brown materials.
- Turn for Aeration: Turning your pile every 1-2 weeks (or monthly) with a pitchfork introduces oxygen, preventing anaerobic conditions (which cause bad odors) and speeding up decomposition. The center of the pile should be moved to the outside, and vice versa.
- Heat is Good: A well-balanced and aerated pile will often heat up significantly (120-160°F), indicating active microbial breakdown.
Harvesting and Using Your Nutrient-Rich Compost
Your compost is ready when it is dark brown, crumbly, has an earthy smell, and you can no longer identify the original materials. Depending on conditions and turning frequency, this can take anywhere from 2 months to a year.
- Amending Garden Beds: Dig or lightly till a 2-4 inch layer of compost into your garden beds before planting.
- Top-Dressing: Spread a thin layer (1/2 to 1 inch) around existing plants, trees, and shrubs.
- Potting Mix: Mix compost with an equal part of peat moss or coco coir and perlite for a fantastic homemade potting mix.
- Lawns: Top-dress your lawn with a thin layer of compost, then rake it in.
By following this DIY compost recipe, you’ll be well on your way to creating a sustainable, nutrient-rich source that will nourish your garden for years to come, leading to healthier plants and more vibrant blooms or abundant harvests. Happy composting!