


Best DIY method for building sturdy raised garden beds on a budget?

Why Choose Raised Garden Beds for Your Garden?
Raised garden beds offer a myriad of benefits for any gardener, from beginner to expert. They provide better soil drainage, extend the growing season by warming up faster in spring, reduce weed pressure, and make gardening more accessible by minimizing bending and kneeling. However, the cost of pre-made kits or premium lumber can quickly add up, making budget-friendly DIY solutions highly appealing. The key is to build a bed that isn’t just cheap, but also sturdy enough to withstand the elements and the weight of soil for many seasons.

The Budget-Friendly & Sturdy Secret: Common Lumber & Smart Joinery
The best method for building sturdy raised beds on a budget revolves around using readily available, cost-effective lumber combined with robust construction techniques. Untreated pine, fir, or even reclaimed timber (such as pallet wood – ensure it’s heat-treated and not chemically treated, marked ‘HT’) are excellent choices. While they may not last as long as cedar or redwood without treatment, clever design and optional internal liners can significantly extend their lifespan.
The secret to sturdiness lies in the joinery. Simple butt joints fastened with a few screws won’t hold up over time. Instead, focus on techniques that provide mechanical strength, such as overlapping corners, adding internal corner posts, or using L-brackets for reinforcement.
Gathering Your Materials Wisely
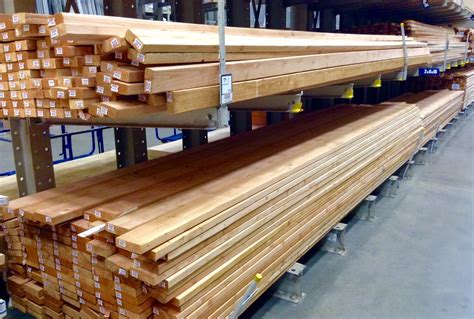
To keep costs down, consider sourcing materials from local lumber yards, sawmills, or even checking for construction site discards (always ask permission!).
- Lumber: Untreated 2×6, 2×8, or 2×10 boards (pine, fir, spruce). The wider the board, the deeper your bed.
- Fasteners: 2.5-inch or 3-inch exterior-grade screws (galvanized or stainless steel to prevent rust).
- Internal Corner Bracing: Additional 2×2 or 4×4 posts (optional, but highly recommended for sturdiness).
- Weed Barrier Fabric: Landscape fabric or cardboard for the bottom (optional, but helps with weeds).
- Plastic Liner (Optional): 6-mil polyethylene sheeting to protect wood from soil moisture, extending life.
Essential Tools for Construction
You won’t need specialized tools for this project:
- Measuring tape
- Pencil
- Circular saw or miter saw (hand saw can work, but takes more effort)
- Drill/driver with appropriate bits
- Level
- Speed square or carpenter’s square
Step-by-Step Build Guide
1. Plan Your Layout & Prepare the Site
Determine the desired dimensions for your raised bed. Common sizes are 4×4 feet or 4×8 feet, as a 4-foot width allows easy access to the center from either side. Clear the chosen area of debris, weeds, and level the ground as much as possible. This ensures your bed sits evenly and is less prone to shifting.
2. Measure, Cut, and Pre-Drill
Based on your plan, measure and cut your lumber. For a 4×8 foot bed, you’ll need two 8-foot boards and two 4-foot boards per layer. Always pre-drill pilot holes before driving screws, especially near the ends of boards, to prevent splitting.
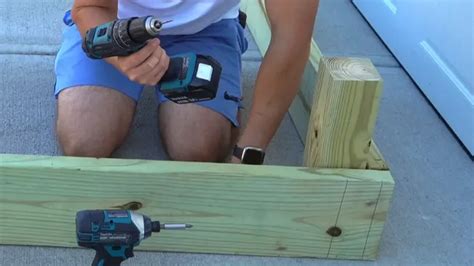
3. Assemble the Frame: The Key to Sturdiness
This is where durability is built. For the most budget-friendly and sturdy method:
- Option A: Overlapping Corners (Simple & Strong): For each layer, overlap the long boards over the ends of the short boards. Drive 3-4 screws through the face of the long board into the end of the short board. This creates a strong corner joint.
- Option B: Internal Corner Posts (Maximum Sturdiness): Cut 2×2 or 4×4 lumber into short posts equal to the height of your bed. For each corner, place a post inside, flush with the ends of your side boards. Drive 2-3 screws through the face of each side board into the post. This method provides excellent structural integrity.
Stack additional layers, if desired, securing each layer to the one below with screws and ensuring corners are aligned. Use a level to check for plumb and square as you go.
4. Add Internal Protection (Optional but Recommended)
If using untreated lumber, line the inside walls of your raised bed with 6-mil polyethylene sheeting. Staple it to the inside of the wood, ensuring it covers the wood that will be in contact with soil. Leave the bottom open for drainage. This barrier prevents moisture from the soil from rotting the wood, significantly extending the life of your bed. Alternatively, paint the interior with a non-toxic, food-safe sealant.
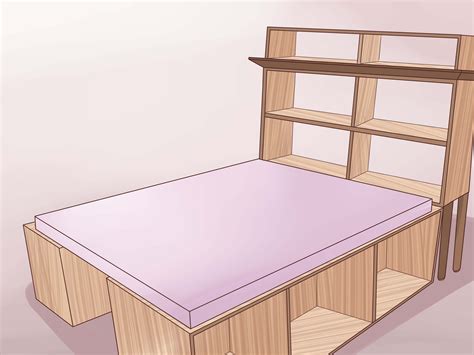
5. Final Touches and Filling
Once your frame is assembled and protected, place a layer of weed barrier fabric or cardboard at the bottom if desired. This helps suppress weeds from growing up into your bed. Then, fill your raised bed with a quality soil mix suitable for gardening. A good mix typically consists of compost, topsoil, and an aeration amendment like perlite or vermiculite.
Maximizing Durability on a Dime
- Drainage: Ensure your bed has adequate drainage. Never line the bottom with plastic, as it will trap water and cause root rot.
- Elevation: If possible, raise your bed slightly off the ground using pavers or bricks. This improves airflow and further protects the bottom lumber from ground moisture.
- Maintenance: Periodically check fasteners and tighten any loose screws. Reapply a food-safe wood sealant to the exterior every few years if desired.
- Smart Filling: Layer the bottom with branches, leaves, and other organic matter (the ‘Hugelkultur’ method) before adding soil. This reduces the amount of expensive soil needed and provides long-term nutrients.

Get Growing!
Building sturdy raised garden beds on a budget is entirely achievable with the right approach. By choosing common lumber, focusing on strong joinery, and incorporating simple protective measures, you can create a beautiful and long-lasting gardening space without breaking the bank. So gather your materials, fire up your saw, and get ready to enjoy bountiful harvests from your DIY masterpiece!


