


Best DIY method for building sturdy, rot-resistant raised garden beds?

Why Choose Raised Garden Beds?
Raised garden beds have become a cornerstone for many home gardeners, offering a multitude of benefits over traditional in-ground planting. They provide better drainage, allow for precise control over soil quality, reduce bending and kneeling, and can even deter some pests. However, the key to long-term success lies in building them to be sturdy and, critically, resistant to rot, ensuring they withstand the elements and provide years of bountiful harvests.

Choosing the Right Materials for Longevity
The foundation of a rot-resistant raised bed begins with material selection. Opting for the right lumber or alternative material can significantly extend the lifespan of your garden structure.
Wood Options: Natural Rot Resistance is Key
When selecting wood, prioritize naturally rot-resistant species. These woods contain natural oils and compounds that repel moisture and inhibit fungal growth, making them ideal for ground contact. Untreated lumber is crucial here, as chemically treated wood (like CCA-treated lumber) can leach harmful substances into your soil, affecting plant health and edibility.
- Cedar (Western Red Cedar, Eastern Red Cedar): Often considered the gold standard for raised beds due to its excellent rot and insect resistance, lightweight nature, and attractive appearance. It’s readily available but can be more expensive.
- Redwood: Similar to cedar in its natural resistance and beauty, redwood is an exceptional choice where available, though often pricier and less common outside of certain regions.
- Juniper: An increasingly popular option, juniper offers superior rot resistance and is often a more sustainable, locally sourced choice in some areas.
- Black Locust: Extremely dense and naturally rot-resistant, black locust is an incredibly durable but harder-to-work-with wood. It’s often used for fence posts and can last for decades.
Avoid: Pine, fir, and spruce unless pressure-treated with non-toxic alternatives (like ACQ) and even then, consider lining the bed to prevent soil contact with the wood. Untreated versions of these woods will rot quickly.
Alternative Materials for Ultimate Durability
For those seeking maximum longevity with minimal maintenance, consider alternatives to wood:
- Galvanized Steel Panels: Increasingly popular, these corrugated metal panels are rust-resistant, lightweight, and offer a modern aesthetic. They reflect heat well and last for many years.
- Composite Decking: Made from recycled plastics and wood fibers, composite decking is impervious to rot, insects, and requires no sealing or painting. It can be more expensive upfront but offers unmatched durability.
- Stone, Brick, or Concrete Blocks: These materials are incredibly durable, won’t rot, and offer a timeless, robust look. Construction can be more labor-intensive and require mortar for stability, but the beds will last virtually forever.
- Recycled Plastic Lumber: Made from 100% recycled plastic, this material is completely rot-proof, splinter-free, and requires zero maintenance. It’s a sustainable and incredibly long-lasting option.

Essential Construction Techniques for Sturdiness
Even with the best materials, poor construction can lead to a flimsy bed. Strong joints and proper bracing are crucial.
Secure Corner Joints
The corners are the most critical points for structural integrity. As the soil settles and expands, it exerts outward pressure. Robust corner construction prevents bowing and collapse.
- Overlap/Lap Joints: A simple and strong method where boards overlap, secured with galvanized screws (minimum 2.5-3 inches long) or bolts. Predrill holes to prevent splitting.
- Corner Brackets: Heavy-duty galvanized steel corner brackets, either internal or external, provide excellent reinforcement.
- Rebar or Stakes: Driving rebar or sturdy wooden stakes (e.g., cedar or black locust) into the ground at each corner, then screwing the bed sides into them, offers exceptional stability against outward pressure and shifting.
Reinforcing Long Beds
Beds longer than 6-8 feet will benefit from additional bracing to prevent the long sides from bowing outwards under the weight of the soil. Install cross-braces or support posts along the length, spaced every 4-6 feet. These can be simple boards spanning the width of the bed, secured to the side walls, or vertical posts screwed into the sides and driven into the ground.
Foundation and Drainage
While the focus is on the bed walls, the foundation is also key to sturdiness and rot prevention. Ensure the ground where the bed sits is level. For heavy clay soils or areas with poor drainage, consider laying a base of gravel before placing the bed to improve subsurface drainage and prevent water from pooling around the bottom of the wood.

Step-by-Step Guide to Building Your Bed
Here’s a simplified outline for constructing a sturdy, rot-resistant raised garden bed:
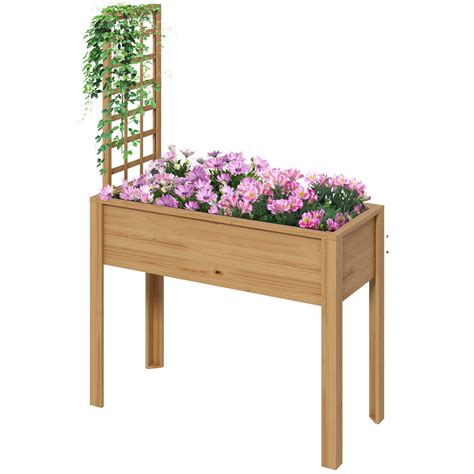
- Plan Your Design and Location: Decide on the dimensions (length, width, height – typically 10-12 inches high for one board, 20-24 inches for two boards) and ideal spot in your garden, considering sunlight.
- Gather Your Materials: Purchase your chosen lumber (e.g., untreated cedar 2x10s or 2x12s), galvanized screws (deck screws work well), a drill, saw, measuring tape, and a level.
- Cut and Prepare Components: Cut your lumber to the desired lengths for the long and short sides. If using stakes/rebar, prepare those.
- Assemble the Sides and Corners: Lay out your boards. Attach the short sides to the long sides using your chosen corner joint method (overlap joint with predrilled holes and screws is common). Ensure corners are square.
- Add Reinforcement and Bracing: Install any necessary internal corner brackets, rebar stakes driven into the ground through the corners, or cross-braces for longer beds.
- Prepare the Base and Fill: Place the assembled bed in its final location. Ensure it’s level. If desired, line the bottom with cardboard to suppress weeds (it will decompose) or a layer of hardware cloth to deter burrowing pests. Fill with a high-quality soil mix formulated for raised beds.
Maintenance Tips for Lasting Performance
Even the most robustly built raised bed will benefit from a little care to maximize its lifespan:
- Good Drainage: Ensure the soil mix drains well. Waterlogging can accelerate rot even in resistant materials.
- Avoid Constant Wet Soil Contact: While resistant, direct contact with perpetually wet soil can wear down any material. Proper drainage helps.
- Inspect Annually: Check screw tightness, look for any signs of bowing, and address them proactively.
- Replenish Soil: Top off the soil annually with compost to maintain nutrient levels and prevent soil compaction.
Conclusion
Building a sturdy, rot-resistant raised garden bed is a rewarding DIY project that will serve your gardening endeavors for many seasons. By carefully selecting naturally resistant materials like cedar, redwood, or durable alternatives, and employing robust construction techniques for corners and bracing, you can create a lasting foundation for a thriving garden. Invest the time in thoughtful material selection and construction, and your raised beds will stand strong, delivering delicious produce and beautiful blooms year after year.


