


Best DIY method for sturdy shelves to organize canning jars & harvest?

Why Sturdy Shelves Are Non-Negotiable for Canning Jars
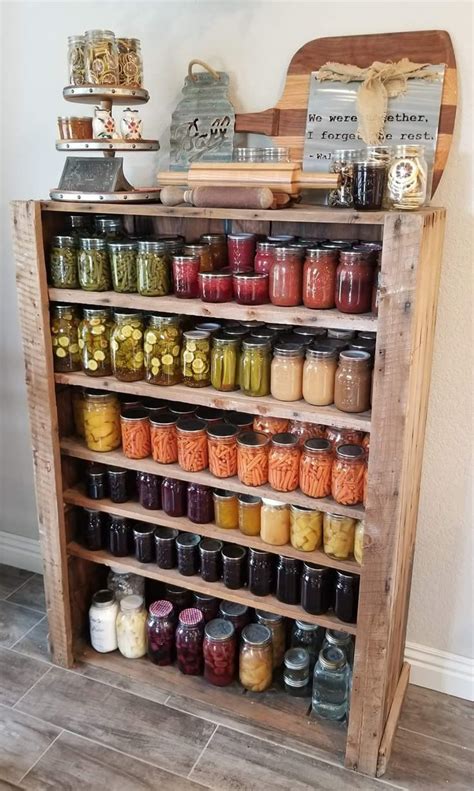
For any dedicated canner or home gardener, the annual harvest brings a bounty of fresh produce, often destined for preservation in glass jars. While the satisfaction of rows of colorful jams, pickles, and preserves is immense, the sheer weight of these jars can quickly overwhelm standard shelving. A single quart jar filled with food can weigh over 3 pounds, and a gallon jar can exceed 8 pounds. Multiply that by dozens, or even hundreds, and you’re looking at hundreds of pounds of pressure on your storage system. Investing in truly sturdy DIY shelves isn’t just about organization; it’s about safety and protecting your hard work from potential collapse.
The Gold Standard: Heavy-Duty 2×4 and Plywood Shelving
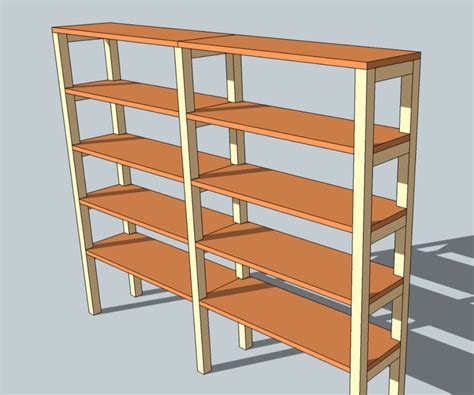
When it comes to building shelves that can withstand the substantial weight of canning jars and garden harvests, a robust framework constructed from 2×4 lumber with thick plywood shelves is the undisputed champion for DIYers. This method offers unparalleled strength, stability, and a cost-effective solution compared to many commercial alternatives.
Design Considerations for Optimal Strength
- Depth: Aim for 12-16 inches deep. This is perfect for single or double rows of most canning jars and prevents wasted space.
- Height: Plan your shelf spacing based on the height of your tallest jars (gallon jars, wine bottles, etc.), adding an inch or two for ease of access. Don’t make them too tall; short, frequent shelves are stronger than wide, open spans.
- Width: Design the overall width to fit your space, but remember that shorter spans between vertical supports will increase load capacity. For heavy loads, a span of 36-48 inches between supports is ideal.
- Anchoring: While a well-built 2×4 unit is incredibly stable, anchoring it to wall studs (especially if it’s tall) adds an extra layer of safety.
Materials and Tools You’ll Need
Materials:
- 2×4 lumber (treated if in a damp area like a basement)
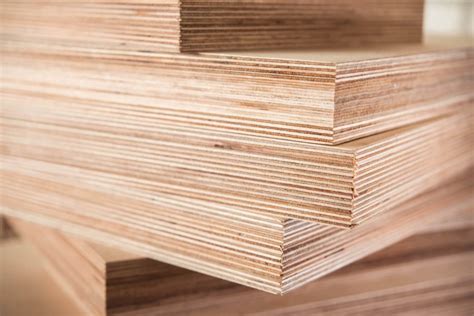
- 3/4-inch plywood (for shelf surfaces) – OSB can also be used, but plywood offers a smoother finish.
- 3-inch wood screws (deck screws work great)
- Wood glue (optional, but highly recommended for added strength)
- L-brackets (for wall anchoring, optional)
Tools:
- Measuring tape and pencil
- Circular saw or miter saw (for cutting lumber)
- Drill/driver with appropriate bits
- Level
- Safety glasses and hearing protection
Step-by-Step Construction Guide
- Cut Your Lumber: Begin by cutting all your 2x4s to size. You’ll need four vertical posts (for the height of your unit), and numerous horizontal supports for the front, back, and sides of each shelf. Remember, each shelf will sit on a perimeter of 2x4s.
- Assemble Side Frames: Lay two vertical posts parallel on the ground. Attach your horizontal supports (cut to the desired depth of your shelves) between them using two 3-inch screws per joint, pre-drilling to prevent splitting. Use wood glue for extra strength. Repeat for the other side frame.
- Connect the Side Frames: Stand your two assembled side frames upright. Connect them with horizontal 2x4s across the front and back at each shelf level. Use a level to ensure everything is plumb and square as you go. This forms the basic box frame.
- Add Inner Shelf Supports: For extra heavy loads, you can add 2×4 cross-supports perpendicular to the front and back supports, running from front to back, especially for wider shelves, to prevent plywood sag.
- Cut and Attach Plywood Shelves: Measure and cut your 3/4-inch plywood to fit snugly over your 2×4 framework at each shelf level. Secure the plywood to the 2×4 frame with 1 1/4-inch screws, spaced every 8-12 inches around the perimeter and into any inner supports.
Maximizing Your Storage and Organization
Once your sturdy shelves are built, efficient organization is key to making the most of your space and your harvest. Labeling is paramount – whether it’s handwritten tags, printed labels, or even color-coded lids. Group similar items together (e.g., all tomato products, all jams). Rotate your stock by placing newer items at the back and older ones at the front (First-In, First-Out principle) to ensure nothing goes to waste.

Maintenance and Safety Checks
Even the sturdiest shelves benefit from occasional checks. Periodically inspect your shelves for any signs of sagging, loose screws, or damaged wood. If your shelves are anchored to the wall, check those connections too. Keeping your storage area clean and dry will also prolong the life of your shelves and the integrity of your preserves.

Conclusion
Building your own heavy-duty shelves for canning jars and harvest storage is a rewarding DIY project that pays dividends in organization, safety, and peace of mind. By choosing robust materials like 2x4s and 3/4-inch plywood, and following careful construction techniques, you can create a storage solution that will serve your home for decades, keeping your preserved goods safe and accessible.


