


Best DIY pantry shelves for heavy canning jars?

Why Sturdy Pantry Shelves are Essential for Canning Jars
For home canners, a well-organized and robust pantry is not just a convenience—it’s a necessity. Canning jars, especially when full, are incredibly heavy. A single quart jar can weigh over three pounds, and a shelf laden with dozens of these can quickly exceed hundreds of pounds. Standard flimsy shelving simply won’t cut it, risking collapse, damage to your precious preserved foods, and potential injury. Building your own heavy-duty shelves ensures they meet the specific demands of your canning collection, providing peace of mind and efficient storage.

Key Considerations for Heavy-Duty Canning Shelf Design
Before you even pick up a saw, thoughtful planning is crucial. The primary goal is strength and stability, but also accessibility and maximizing space. Consider the total weight you expect each shelf to hold. A good rule of thumb is to over-engineer; if you think it needs to hold 50 pounds per linear foot, build it to hold 100. Shelf depth is also important – ensure it’s deep enough for your largest jars but not so deep that items get lost in the back. Standard depths often range from 12 to 16 inches for pantry shelving.
Material Choices for Maximum Strength
The foundation of any strong shelf lies in its materials. For heavy canning jars, you’ll want to avoid particle board or thin MDF, as these lack the structural integrity needed. Instead, focus on these robust options:
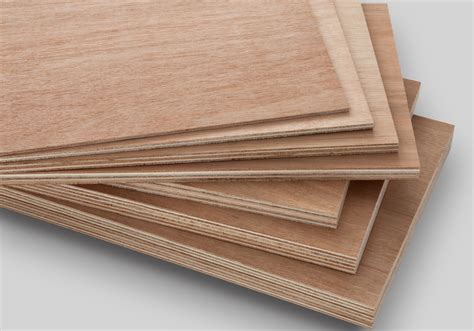
- Plywood: High-quality plywood, especially ¾-inch thick cabinet-grade birch or pine, is an excellent choice. Its layered construction makes it resistant to warping and incredibly strong. For extra heavy loads, consider doubling up on the thickness or using a strong lip.
- Solid Wood: Dimensional lumber like 2x4s for framing and 1×12 or 1×16 pine boards for the shelves themselves are also highly effective. Hardwoods like oak can offer superior strength but come at a higher cost and are harder to work with. Softwoods like pine are more budget-friendly and still provide ample support when properly reinforced.
- Metal Brackets and Supports: While the shelves themselves might be wood, heavy-duty metal shelf brackets or L-brackets are invaluable for wall-mounted units. Look for brackets designed for high weight capacities.
Robust Construction Methods and Support Systems
The way you construct and support your shelves is just as critical as the materials. Here are some of the most reliable methods:
Wall-Mounted Shelves with Cleats
This is a popular and very strong method. Attach 2×2 or 2×4 lumber (cleats) horizontally to wall studs using long, heavy-duty screws. The shelves then rest on these cleats and are typically screwed down into them for added stability. For extra rigidity, you can add vertical supports at the front of the shelves, attaching them to the front edge of the shelf and the cleat below.
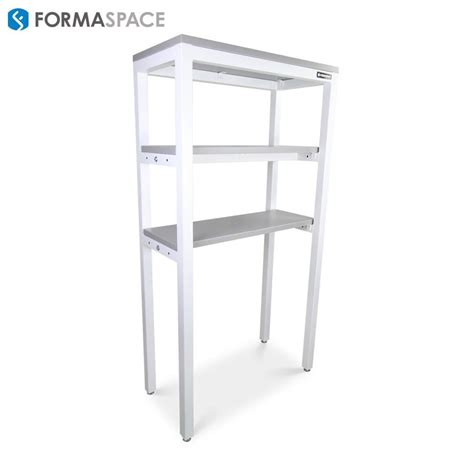
Freestanding Units with Strong Framing
For pantries without adequate wall studs or for a more flexible setup, a freestanding unit is ideal. Build a sturdy frame using 2x4s or 2x3s for the uprights and cross supports. Dado joints (grooves cut into the uprights for the shelves to slide into) or robust metal shelf pins and brackets are excellent for supporting adjustable shelves. Ensure the unit has a wide, stable base and consider anchoring it to a wall if it’s particularly tall or will hold an immense amount of weight.
Reinforcing for Extreme Loads
Even with good materials, long spans of shelving can sag under extreme weight. To prevent this:
- Shorten Spans: Keep the distance between vertical supports or wall studs to no more than 30-36 inches.
- Add a Front Lip: Attach a 1×2 or 1×3 board to the front edge of your shelf. This simple addition acts as a stiffener, dramatically increasing the shelf’s load-bearing capacity.
- Cross-Bracing: For freestanding units, add diagonal cross-bracing on the back or sides to prevent racking (wobbling).
Tools, Safety, and Finishing Touches
You don’t need a professional workshop, but some basic tools will make the job easier and safer. A circular saw or miter saw for cutting lumber, a drill/driver, a level, a tape measure, and safety glasses are essential. Always wear appropriate personal protective equipment. Once your shelves are built, consider sealing or painting them. This not only improves aesthetics but also protects the wood from moisture and makes cleanup easier – a big plus in a food storage area. Use food-safe paints or sealants if direct contact with food is possible, though typically canning jars provide that barrier.

Conclusion
Building your own heavy-duty pantry shelves for canning jars is a rewarding DIY project that offers both functionality and peace of mind. By choosing the right materials, employing robust construction techniques, and ensuring proper reinforcement, you can create a storage solution that will safely house your homemade preserves for years to come. Dive into your next DIY challenge and build the pantry of your dreams!


