


Best homemade compost recipes for nutrient-rich raised garden beds?

Why Homemade Compost is Essential for Raised Garden Beds
Raised garden beds offer numerous advantages, from better drainage to easier access, but their success hinges on one critical element: the soil. Unlike in-ground gardens where soil can draw nutrients from deeper earth, raised beds are self-contained. This makes replenishing nutrients through homemade compost not just beneficial, but essential for sustained plant health and abundant yields. Creating your own compost is an eco-friendly way to recycle organic waste, save money on commercial soil amendments, and tailor a nutrient profile specifically for your garden’s needs.
The Fundamental Ingredients: Browns, Greens, and Water
Successful composting relies on a balanced mix of “brown” and “green” materials, along with adequate moisture and aeration. Browns provide carbon, which is the energy source for microbes, while greens supply nitrogen, crucial for microbial reproduction and decomposition. A good rule of thumb is to aim for a 2:1 or 3:1 ratio of browns to greens by volume.
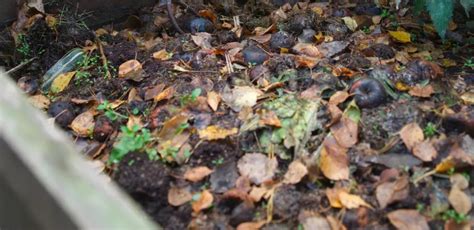
- Brown Materials (Carbon-rich): Dried leaves, straw, wood chips, shredded newspaper, cardboard (unwaxed, uncolored), sawdust, dry plant stalks.
- Green Materials (Nitrogen-rich): Fruit and vegetable scraps, coffee grounds, tea bags, grass clippings (in moderation), fresh plant trimmings, manure (herbivore only).
- What to Avoid: Meat, dairy, oily foods, pet waste (from carnivorous animals), diseased plants, chemically treated wood, inorganic materials.
Recipe 1: The Classic Balanced Blend (Slow & Steady)
This recipe is perfect for beginners and those who prefer a less hands-on approach. It produces a rich, dark compost over several months, ideal for a steady supply of nutrients for your raised beds.
Ingredients:
- Equal parts (by volume) of shredded brown materials (leaves, straw, newspaper).
- Equal parts (by volume) of green materials (kitchen scraps, grass clippings).
- A shovel full of garden soil or finished compost (to introduce microbes).
- Water.
Instructions:
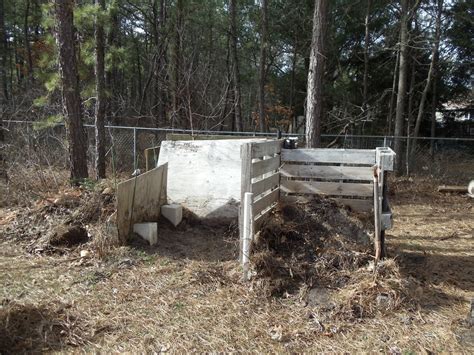
- Choose a suitable spot for your compost pile or bin.
- Start with a 4-6 inch layer of coarse brown material at the bottom for aeration.
- Add a 4-6 inch layer of green material.
- Sprinkle with a thin layer of garden soil or finished compost.
- Moisten thoroughly until damp like a wrung-out sponge.
- Continue layering browns, greens, and a bit of soil, wetting each layer, until your pile is at least 3x3x3 feet (or your bin is full).
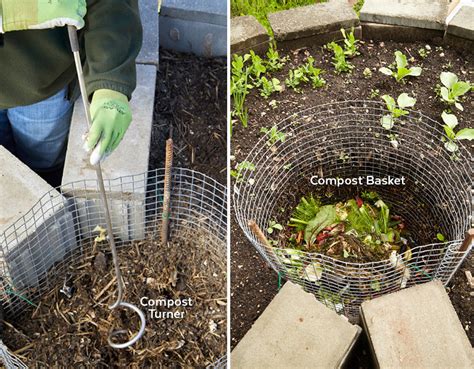
- Turn the pile every 2-4 weeks to aerate and mix the contents. Keep it consistently moist.
After 3-6 months, you should have dark, crumbly, earthy-smelling compost ready to be incorporated into your raised beds.
Recipe 2: The Hot Compost Method (Fast & Furious)
If you’re eager for compost in a shorter timeframe (4-8 weeks), the hot compost method is for you. This requires more attention, including frequent turning, to maintain high temperatures that accelerate decomposition and kill weed seeds and pathogens.
Ingredients:
- A higher ratio of greens to browns (e.g., 1 part green to 2 parts brown by volume) as hot composting requires more nitrogen to fuel microbial activity.
- All materials should be chopped into smaller pieces (1-2 inches) to increase surface area.
- Water.
Instructions:
- Build your pile quickly to at least 3x3x3 feet, layering finely chopped browns and greens, moistening as you go.
- Ensure the pile is consistently moist, but not soggy.
- Monitor the temperature with a compost thermometer. The ideal range is 130-160°F (55-70°C).
- When the temperature starts to drop (usually after a few days), it’s time to turn the pile. Mix the outer cooler material into the center.
- Continue turning every 2-3 days, or whenever the temperature drops below 130°F, until the pile no longer heats up. This indicates decomposition is complete.

Recipe 3: Vermicompost (Worm Composting) for Concentrated Nutrients
While not a traditional “pile” recipe, vermicomposting uses red wiggler worms to break down organic matter into highly potent worm castings. This is an excellent option for apartment dwellers or those with limited outdoor space, and it produces an incredibly nutrient-dense amendment.
Ingredients:
- A worm bin (can be homemade or purchased).
- Red wiggler worms (Eisenia fetida).
- Bedding materials: Shredded newspaper, cardboard, coco coir, or aged leaves.
- Food scraps: Fruit and vegetable peels, coffee grounds, tea bags, crushed eggshells.
Instructions:
- Set up your worm bin with moist bedding.
- Introduce your red wiggler worms.
- Feed them small amounts of food scraps, burying them in different spots each time.
- Avoid overfeeding and introducing items worms don’t like (citrus in large quantities, meat, dairy, oily foods).
- Harvest the worm castings when the bin is full and the material looks like rich, dark soil.
Tips for Composting Success in Raised Beds
- Chop Small: Smaller pieces break down faster.
- Maintain Moisture: Compost should feel like a damp sponge. Too dry, and decomposition slows; too wet, and it becomes anaerobic and smelly.
- Aeration is Key: Regular turning prevents compaction and provides oxygen to the microbes.
- Balance Browns & Greens: Adjust ratios based on what materials you have available. If it’s too wet and smelly, add more browns. If it’s dry and slow, add more greens and moisture.
- Incorporate Directly: You can also practice trench composting directly in your raised beds by burying kitchen scraps in a trench, covering them with soil, and letting them decompose in situ.
Conclusion
Mastering homemade compost is a game-changer for any raised garden bed enthusiast. By understanding the simple principles of browns, greens, moisture, and aeration, you can transform everyday organic waste into a rich, living amendment that will supercharge your soil, nurture your plants, and yield a bountiful harvest. Experiment with these recipes, observe your pile, and enjoy the sustainable satisfaction of creating your own garden gold.


