


Best low-cost DIY method for preserving garden herbs for winter use?

As summer fades and the chill of autumn approaches, many gardeners lament the inevitable loss of their vibrant herb patches. However, preserving your bountiful harvest doesn’t require expensive equipment or complex techniques. With just a little effort and some common household items, you can enjoy the fresh flavors of your garden herbs throughout the cold winter months. This guide explores the best low-cost DIY methods to ensure your culinary creations remain flavorful.

Why Preserve Your Herbs?
Beyond the obvious benefit of having fresh flavors on hand, preserving your own herbs allows you to control the quality, avoid unwanted chemicals, and significantly cut down on grocery bills. It’s a sustainable practice that connects you more deeply with your garden’s bounty, transforming a seasonal pleasure into a year-round delight.
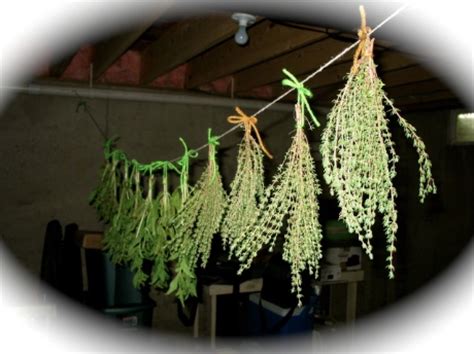
Method 1: Air Drying Herbs (The Ultimate Low-Cost Classic)
Air drying is arguably the most economical and traditional method for preserving herbs. It’s ideal for hardy herbs with lower moisture content, such as rosemary, thyme, oregano, marjoram, sage, and bay leaves. Delicate herbs like basil, mint, parsley, and cilantro tend to lose flavor and color when air-dried, making freezing a better option for them.
Steps for Air Drying:
- Harvesting: Choose healthy, blemish-free branches in the morning after the dew has dried, but before the sun is too strong. Avoid harvesting after rain.
- Preparation: Gently shake off any insects and remove any dead or yellowing leaves. Do not wash the herbs, as this adds moisture and can encourage mold. If absolutely necessary, rinse quickly and pat thoroughly dry.
- Bundling: Gather small bunches (about 4-6 stems) and tie them together securely at the base with natural twine or a rubber band. Don’t make the bundles too large, as this inhibits air circulation.
- Hanging: Hang the bundles upside down in a warm, dry, well-ventilated area away from direct sunlight. A pantry, attic, or even a corner of your kitchen can work. Ensure good airflow to prevent mold.
- Drying Time: Depending on humidity and herb type, drying can take one to three weeks. Herbs are fully dry when their leaves are brittle and crumble easily.
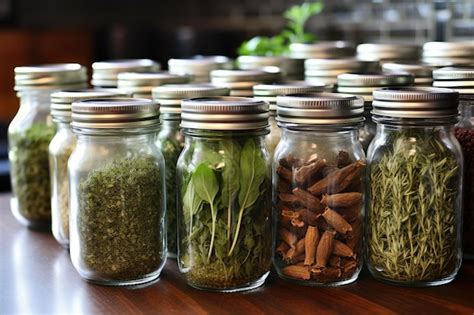
- Storage: Once completely dry, strip the leaves from the stems. Store them whole or lightly crushed in airtight containers (glass jars with tight-fitting lids are excellent) in a cool, dark place. Label with the herb name and date.
Method 2: Freezing Herbs (Freshness for Delicate Varieties)
Freezing is perfect for softer, more delicate herbs that tend to lose their vibrant flavor and color when dried. Basil, parsley, cilantro, chives, dill, mint, and tarragon all freeze exceptionally well. This method preserves their fresh taste, making them ideal for adding to dishes during cooking.
Steps for Freezing in Ice Cube Trays:
- Harvesting & Cleaning: Harvest healthy herbs. Gently rinse them under cool water and pat them very dry with a clean cloth or paper towels. Excess water can lead to freezer burn.
- Chopping: Finely chop the herbs, or leave them slightly coarser, depending on your preferred future use.
- Filling Trays: Pack about one tablespoon of chopped herbs into each compartment of an ice cube tray.
- Adding Liquid: Pour a small amount of olive oil, melted butter, or even just water over the herbs until they are just covered. Olive oil works particularly well for herbs destined for sautéing or sauces, while water is a good neutral option.
- Freezing: Place the ice cube trays in the freezer and allow them to freeze solid, which usually takes a few hours.
- Storage: Once frozen, pop the herb cubes out of the trays and transfer them to freezer bags or airtight containers. Label with the herb name and date. They can last for several months.

Other Low-Cost Considerations & Tips
- Harvesting Time: For optimal flavor, harvest most herbs just before they flower.
- Cleanliness: Always ensure your hands, tools, and containers are clean to prevent contamination.
- Labeling: This step is crucial! Always label your preserved herbs with the type and date of preservation. You’ll thank yourself later.
- Reusing Containers: Save glass jars, plastic containers, and freezer bags to minimize cost. Just ensure they are thoroughly cleaned.
Conclusion
Preserving your garden herbs for winter use doesn’t have to be an expensive or daunting task. By utilizing simple, low-cost DIY methods like air drying and freezing in ice cube trays, you can extend the joy and flavor of your harvest for months to come. These techniques are not only budget-friendly but also incredibly satisfying, allowing you to bring a touch of your summer garden to your winter kitchen with every dish.


