


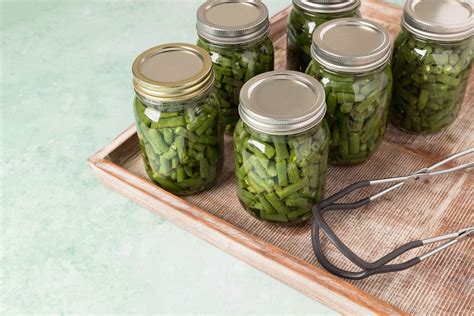
Best method to water bath can garden green beans safely for winter meals?

Understanding Safe Green Bean Preservation
As your garden bounty flourishes with crisp, vibrant green beans, the thought of preserving that freshness for hearty winter meals is incredibly appealing. Many home canners wonder if water bath canning is the right approach. It’s crucial to understand that while water bath canning is excellent for high-acid foods like fruits and pickles, it is not safe for low-acid vegetables such as green beans.
Green beans are a low-acid food, meaning they have a pH level that can allow for the growth of Clostridium botulinum, the bacterium responsible for botulism, a serious and potentially fatal foodborne illness. Water bath canning simply does not reach temperatures high enough to destroy these spores. Therefore, the only safe method for canning green beans is pressure canning.
The Safe Method: Pressure Canning Green Beans
Pressure canning uses steam under pressure to reach temperatures far exceeding the boiling point of water, effectively destroying botulism spores in low-acid foods. If you’re new to pressure canning, it might seem daunting, but with proper instructions and a reliable pressure canner, it’s a straightforward and rewarding process.
1. Essential Equipment and Preparation
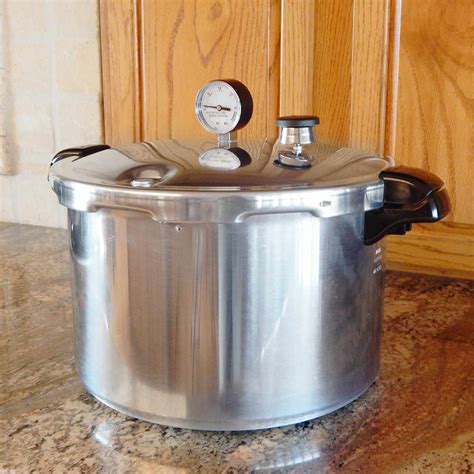
- Pressure Canner: Ensure it’s in good working condition with a properly functioning gauge (dial or weighted).
- Glass Canning Jars: Use clean, hot jars (pint or quart size) with no nicks or cracks.
- Lids and Rings: New lids are essential for a proper seal; rings can be reused if rust-free.
- Fresh Green Beans: Select tender, blemish-free beans.
- Basic Canning Tools: Jar lifter, funnel, headspace tool, bubble remover.
Begin by washing your green beans thoroughly. You can snap off the ends and leave them whole, or cut them into 1-inch pieces, depending on your preference. Prepare your jars by washing them in hot, soapy water and keeping them hot until ready to fill. Lids should be prepared according to the manufacturer’s instructions (often simmering in hot water, but check current guidelines as some no longer require pre-heating).

2. Packing the Jars: Raw Pack vs. Hot Pack
There are two primary methods for packing green beans:
- Raw Pack: Tightly pack raw, trimmed beans into hot jars. Add boiling water, leaving 1-inch headspace. You can add 1/2 teaspoon of canning salt to pints or 1 teaspoon to quarts, though it’s optional and for flavor only.
- Hot Pack: Boil beans in water for 5 minutes, then pack hot beans loosely into hot jars. Cover with the boiling cooking liquid, leaving 1-inch headspace. Again, optional salt can be added.
Hot packing is often preferred as it results in a fuller jar and better quality product after processing, minimizing shrinkage and floating.
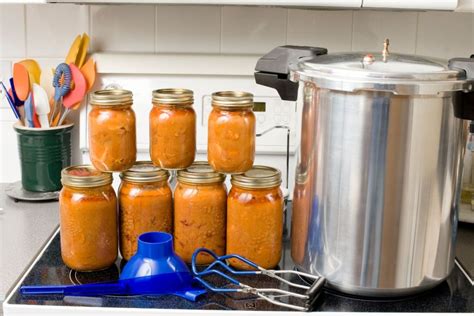
3. The Pressure Canning Process
- Prepare Canner: Add 2-3 inches of water to the bottom of your pressure canner and place the rack inside.
- Load Jars: Place filled jars into the canner using a jar lifter, ensuring they don’t touch.
- Vent Steam: Secure the canner lid. Turn heat to high. Allow a steady stream of steam to escape from the vent pipe for 10 minutes. This purges air from the canner, which is vital for reaching accurate pressure and temperature.
- Process: Place the weighted gauge or close the petcock (for dial gauge). Allow pressure to build to the recommended level for your altitude (usually 10 pounds for weighted gauge, or adjust for dial gauge). Maintain this pressure steadily for the required time: 20 minutes for pint jars and 25 minutes for quart jars. Adjust pressure if using a dial gauge according to your altitude.
- Cool Down: Once processing time is complete, turn off the heat. Let the canner cool down naturally until the pressure returns to zero. Do NOT rush this process by opening the vent or cooling with water, as it can cause liquid loss from jars and unsafe seals.
4. Post-Canning and Storage
Once the pressure has fully dropped, carefully remove the lid, tilting it away from your face to avoid steam. Use a jar lifter to remove the hot jars and place them on a towel-lined surface, ensuring they are not in a draft. Let them cool undisturbed for 12-24 hours.
After cooling, check the seals. Lids should be concave (curved inwards) and not flex when pressed. Remove the rings, wipe down jars, label with contents and date, and store in a cool, dark, dry place. Any jars that did not seal must be reprocessed immediately (within 24 hours with new lids) or refrigerated and consumed within a few days.
Final Safety Reminders
Always follow tested and approved canning recipes and guidelines from reputable sources like the National Center for Home Food Preservation (NCHFP) or USDA. Never taste food from a jar that shows signs of spoilage (e.g., bulging lid, off-odor, mold). When in doubt, throw it out! Properly pressure canning green beans ensures you can enjoy the taste of your garden throughout the winter months, safely and deliciously.