


Best tips for canning garden tomatoes for winter meals?

There’s nothing quite like the taste of a fresh, ripe tomato straight from the garden. But why let that joy be limited to summer? Canning your garden tomatoes is a rewarding way to preserve their vibrant flavor and nutritional goodness, providing a taste of summer sunshine throughout the cold winter months. Imagine rich marinara, hearty chili, or comforting tomato soup made from your very own preserved harvest!
Why Can Your Own Tomatoes?
Beyond the satisfaction of self-sufficiency, canning offers numerous benefits. You have complete control over ingredients, avoiding unwanted additives and excessive sodium found in store-bought options. It’s also incredibly cost-effective, especially if you have an abundant garden harvest. Most importantly, the flavor of home-canned tomatoes is simply unparalleled – a true taste of peak ripeness captured in a jar.
Essential Equipment for Safe Canning
Before you begin, gathering the right tools is crucial for both safety and success. You’ll need:
- Water Bath Canner: A large pot with a lid and a rack to keep jars off the bottom.
- Canning Jars: Mason-style jars with new lids and clean screw bands. Always use new lids for each canning session.
- Jar Lifter: For safely moving hot jars in and out of the canner.
- Canning Funnel: Helps prevent spills and keeps jar rims clean.
- Headspace Tool/Ruler: To measure the correct amount of space between the food and the lid.
- Large Stockpot: For blanching tomatoes and cooking down sauces.
- Basic Kitchen Utensils: Knives, cutting boards, ladles, and clean kitchen towels.

Choosing the Best Tomatoes for Canning
The quality of your canned tomatoes starts with the produce itself. Select ripe, firm tomatoes free from blemishes, cracks, or soft spots. Paste tomatoes like Roma or San Marzano are ideal due to their meaty flesh, fewer seeds, and lower water content, which results in thicker sauces and less processing time. However, any garden tomato can be canned, just be aware that juicier varieties will yield a thinner product.
Step-by-Step Guide to Canning Whole or Crushed Tomatoes
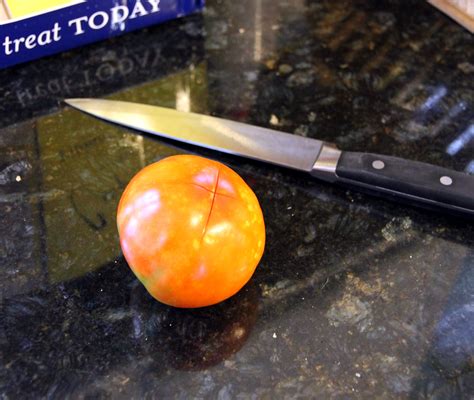
1. Prepare Your Tomatoes
Wash tomatoes thoroughly under cool running water. Remove stems and core any blemishes. For whole or crushed tomatoes, you’ll need to peel them. Bring a large pot of water to a rolling boil. Carefully lower a few tomatoes into the boiling water for 30-60 seconds, or until the skin begins to split. Immediately transfer them to an ice bath to stop the cooking process. The skins should then slip off easily. Dice or crush tomatoes as desired for your recipe.
2. Prepare Jars and Canner
Wash jars, lids, and bands in hot, soapy water and rinse well. Keep jars hot until filling to prevent thermal shock. You can do this by running them through a dishwasher cycle or placing them in your canner filled with hot water. Fill your water bath canner with water and heat it to a simmer (180°F / 82°C) while you prepare your tomatoes.
3. Acidification is Key for Safety
Tomatoes are a borderline acidic food, and for safe water bath canning, they must be acidified. Add 1 tablespoon of bottled lemon juice or 1/4 teaspoon of citric acid per pint jar, or 2 tablespoons of bottled lemon juice or 1/2 teaspoon of citric acid per quart jar, directly to the empty jar before adding tomatoes. Do not use fresh lemon juice, as its acidity can vary.
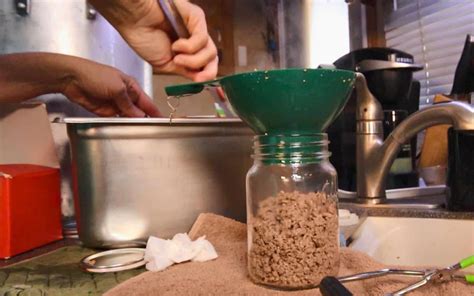
4. Fill and Vent Jars
Carefully pack prepared tomatoes into hot, sterilized jars, leaving 1/2 inch of headspace (the space between the food and the rim of the jar). For whole tomatoes, you can add hot tomato juice or water to cover them. Remove air bubbles by gently running a non-metallic utensil around the inside of the jar. Wipe jar rims clean with a damp cloth – any residue can prevent a proper seal. Center a hot, new lid on the jar and screw on the band fingertip-tight (just until you feel resistance, then a slight turn more).
5. Process in a Water Bath Canner
Carefully place filled jars onto the rack in your simmering water bath canner, ensuring jars do not touch. Add more hot water if needed, so the water level covers the tops of the jars by at least 1-2 inches. Bring the water to a rolling boil. Once boiling, begin timing according to your recipe and altitude. For pints of whole or crushed tomatoes, typically process for 35 minutes; for quarts, 45 minutes (adjust for altitude as per USDA guidelines).
6. Cool and Check Seals
Once processing is complete, turn off the heat and remove the canner lid. Let jars sit in the hot water for 5 minutes before carefully lifting them out with a jar lifter and placing them on a clean towel on your countertop, away from drafts. Do not disturb them for 12-24 hours. You’ll hear characteristic “pings” as lids seal. After cooling, check seals by pressing the center of the lid; it should not flex. If a lid doesn’t seal, refrigerate and use within a few days or reprocess with a new lid.
Safety Tips for Home Canning
Always follow tested, reputable canning recipes (like those from the USDA or university extension offices). Do not deviate from processing times or ingredient amounts, especially for acidification. Inspect jars for cracks before use, and never reuse old lids. Proper hygiene is paramount to prevent spoilage and ensure food safety.
Creative Ways to Use Your Canned Tomatoes
Your jars of preserved sunshine are incredibly versatile! Use whole peeled tomatoes as a base for classic marinara or pizza sauce. Crushed tomatoes are perfect for hearty chilis, stews, and minestrone soup. Blend them into a creamy tomato soup, or use them to make a vibrant salsa base. The possibilities are endless, bringing the taste of your garden to your table all year long.

Canning garden tomatoes is a labor of love that pays dividends in delicious, healthy meals. With a little preparation and adherence to safety guidelines, you can enjoy the fresh, authentic flavor of your summer harvest even on the chilliest winter day. Happy canning!


