


Best way to dry and store garden herbs for year-round culinary use?

Transforming Your Garden Harvest into Year-Round Flavor
There’s nothing quite like the vibrant aroma and fresh taste of herbs straight from your garden. However, as seasons change, preserving that goodness becomes essential for year-round culinary enjoyment. Drying and properly storing your garden herbs not only extends their shelf life but also allows you to infuse your dishes with homegrown flavor long after the growing season has ended. This guide will walk you through the best techniques to ensure your pantry is always stocked with fragrant, potent dried herbs.
When and How to Harvest Your Herbs
The key to potent dried herbs begins with proper harvesting. For most herbs, the ideal time to harvest is in the morning after the dew has dried but before the midday sun has intensified. This is when their essential oils are most concentrated. Snip stems just above a leaf node or pair of leaves, ensuring the plant can continue to grow. Avoid harvesting more than one-third of the plant at a time to prevent stress. Gently shake off any insects and rinse the herbs only if necessary, patting them thoroughly dry before proceeding to drying methods.

Popular Drying Methods for Garden Herbs
Several methods can be employed to dry your herbs, each with its own advantages. The choice often depends on the type of herb, your available equipment, and the desired speed.
Air Drying: The Traditional Method
Air drying is arguably the most common and often best method for herbs with lower moisture content, such as oregano, thyme, rosemary, bay leaves, and sage. Bundle small bunches (4-6 stems) with twine or a rubber band and hang them upside down in a warm, dry, well-ventilated area away from direct sunlight. A brown paper bag with holes poked in it can be placed over the bundles to protect them from dust and catch any falling leaves. Drying can take anywhere from one to four weeks, depending on humidity and herb type. Herbs are fully dry when their leaves are brittle and crumble easily.

Using a Food Dehydrator for Efficiency
For a faster and more consistent drying process, especially for herbs with higher moisture content like mint, basil, or parsley, a food dehydrator is an excellent investment. Arrange herbs in a single layer on the dehydrator trays, ensuring good air circulation. Set the temperature to a low setting (around 95-115°F or 35-46°C) to preserve essential oils and color. Drying time varies from a few hours to a full day. Check herbs periodically until they are crumbly and crisp.
Oven and Microwave Drying (Use with Caution)
While possible, oven and microwave drying require careful attention to prevent scorching or loss of flavor. For oven drying, spread herbs on a baking sheet and set your oven to its lowest temperature (below 180°F or 82°C), leaving the door slightly ajar to allow moisture to escape. Check frequently, flipping the herbs, and remove when brittle. Microwave drying is best for small batches; place herbs between paper towels and microwave on low power in short bursts (30 seconds) until dry.

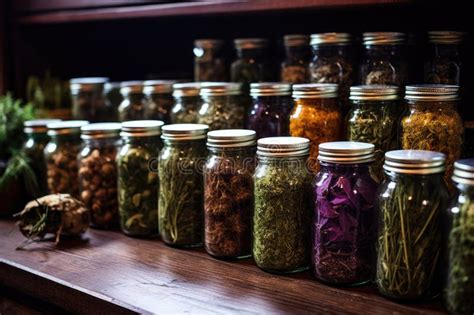
Storing Your Dried Herb Harvest
Once your herbs are thoroughly dry, proper storage is crucial to maintain their flavor and potency. Remove the leaves from the stems – for most herbs, the stems are woody and don’t offer much flavor. You can store the leaves whole or gently crumble them. Storing them whole and crushing them just before use will retain more flavor over time.
Ideal Storage Containers and Conditions
Store dried herbs in airtight containers, such as glass jars with tight-fitting lids. Plastic bags or containers can sometimes impart a taste or allow essential oils to evaporate. Keep the containers in a cool, dark, and dry place, away from direct sunlight, heat, and humidity. A pantry or cupboard is ideal. Label your containers with the herb name and date of drying.
Freezing Herbs: An Alternative Preservation Method
For some herbs, freezing can be an excellent alternative, preserving a fresher flavor and brighter color, especially for delicate herbs like basil, parsley, and cilantro. You can chop herbs and freeze them in ice cube trays with a little water or olive oil, or simply blanch and freeze them in freezer bags. Frozen herbs are perfect for adding directly to soups, stews, or sauces.
Enjoying Your Year-Round Herb Supply
With these drying and storage techniques, you can enjoy the bounty of your herb garden throughout the entire year. From savory roasts to aromatic teas, your homemade dried herbs will elevate your culinary creations with unparalleled freshness and flavor. Experiment with different herbs and methods to discover what works best for your garden and kitchen.


