


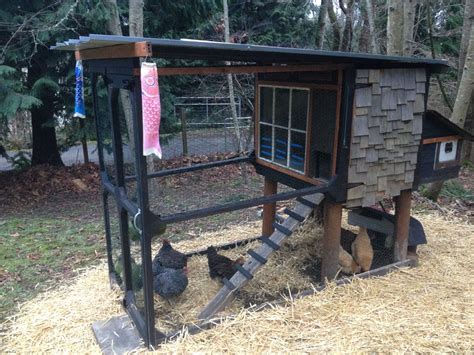
Budget DIY predator-proof chicken coop plans?

Building an Affordable, Secure Home for Your Flock
Raising chickens can be a rewarding experience, but ensuring their safety from predators is paramount. A well-built, predator-proof coop doesn’t have to break the bank. With some planning, resourcefulness, and DIY spirit, you can construct a secure haven for your feathered friends using budget-friendly materials and smart design.
Why Predator-Proofing is Crucial for Backyard Chickens
From raccoons and foxes to hawks and even domestic dogs, a variety of predators pose a constant threat to your flock. Losing chickens to an attack is not only heartbreaking but also a setback for your backyard farming efforts. Prevention is always better than cure, and a sturdy, well-secured coop is your first line of defense. Investing time in robust predator-proofing will save you significant grief and potential costs in the long run.
Core Principles of a Predator-Proof Coop Design
Before you even pick up a hammer, understand the key design elements that deter predators. A secure coop isn’t just about walls and a roof; it’s about eliminating entry points, reinforcing weak spots, and understanding predator behavior. Focus on strength, enclosure, and elevation.

1. Strong and Solid Foundation
Many predators, especially diggers, will try to tunnel under your coop. Elevating your coop off the ground on sturdy posts or concrete blocks is a good start. For the run, burying hardware cloth or a wire apron at least 12-18 inches deep and extending outward 12 inches can prevent digging.
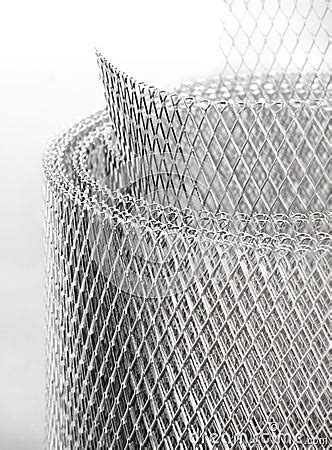
2. Hardware Cloth, Not Chicken Wire
Chicken wire is designed to keep chickens in, not predators out. It’s easily torn or chewed through by determined animals. Opt for 1/2-inch or 1/4-inch hardware cloth, which is significantly stronger, made of thicker gauge wire, and often galvanized to resist rust. Use it for all openings, windows, and the run enclosure.
3. Secure Latches and Doors
Predators like raccoons are surprisingly dexterous. Simple hook-and-eye latches are not enough. Use heavy-duty, spring-loaded barrel bolts or carabiner clips that require opposable thumbs to open. Ensure all doors and windows fit snugly and have no gaps.
Budget-Friendly Materials and Where to Find Them
Building on a budget requires creativity and resourcefulness. You don’t need to buy everything new from a big box store.
- Repurposed Wood: Check local construction sites for scrap wood, ask neighbors for old fencing or decking, or look for free pallets (ensure they are ‘HT’ heat-treated, not chemically treated).
- Reclaimed Roofing: Old metal roofing sheets, corrugated plastic panels, or even sturdy tarps can serve as waterproof roofing.
- Hardware Cloth: This is one area where you shouldn’t skimp. While it might be a larger upfront cost, it’s essential for security. Look for bulk discounts or sales.
- Sturdy Latches: Browse discount hardware stores or salvage yards for robust locking mechanisms.
- Concrete Blocks/Pavers: Often available cheaply or for free from demolition sites or landscaping discards.
Step-by-Step Budget Coop Construction Guide
1. Planning and Design
Sketch your coop and run layout. Consider the number of chickens you’ll have (allow 3-4 sq ft per bird inside, 8-10 sq ft in the run). Plan for roosting bars, nesting boxes, and adequate ventilation. Keep the design simple to save on materials and construction time.

2. Building the Foundation and Frame
Elevate the coop structure using concrete blocks or treated lumber posts. This deters digging predators and prolongs the life of your coop by preventing wood-to-ground contact. Construct a sturdy frame using your repurposed lumber, ensuring it’s square and level.
3. Walls and Roofing
For walls, use solid wood panels, plywood, or tightly secured reclaimed siding. For the roof, ensure it’s sloped to shed water and extends slightly beyond the walls to protect them. Secure your chosen roofing material firmly to withstand wind and snow.
4. Secure Run and Apron
Enclose the entire run with 1/2-inch or 1/4-inch hardware cloth, stapling it securely to the frame every few inches. Critically, create a wire apron around the perimeter of the run. Dig a trench 12-18 inches deep and 12 inches wide, lay hardware cloth flat at the bottom, and then bend it up the side of the trench and attach it to the run frame. Backfill with dirt. This creates a barrier that digging predators hit from the side.
5. Doors, Windows, and Ventilation
Install doors that open outwards to prevent them from being pushed in. Fit them with the heavy-duty latches mentioned earlier. Cover all windows and ventilation openings with hardware cloth, secured from the outside to prevent predators from prying it off. Ensure good cross-ventilation, especially in warmer climates.
Maintenance and Ongoing Security Checks
Even the best-built coop requires regular inspection. Walk around your coop and run periodically, looking for:
- Loose hardware cloth or gaps
- Signs of digging around the perimeter
- Damaged wood or weak spots
- Broken latches or hinges
- Overgrown bushes or debris that could provide cover for predators

Building a budget-friendly, predator-proof chicken coop is an achievable goal for any DIY enthusiast. By prioritizing security in your design, sourcing materials creatively, and performing regular maintenance, you can provide a safe and comfortable home for your flock for years to come without breaking the bank. Happy building!


