


Build a sturdy, low-cost garden fence using reclaimed wood?
Embrace Sustainability: Building Your Own Reclaimed Wood Garden Fence
Creating a beautiful and functional garden fence doesn’t have to break the bank or harm the environment. By harnessing the charm and character of reclaimed wood, you can construct a sturdy, low-cost barrier that adds unique aesthetic appeal to your outdoor sanctuary. This guide will walk you through the process, from planning to the final touches, ensuring your DIY project is both successful and satisfying.
Why Choose Reclaimed Wood for Your Fence?
Opting for reclaimed wood offers a multitude of benefits. Environmentally, it reduces demand for new timber, minimizes waste, and lowers your carbon footprint. Financially, it’s often significantly cheaper, or even free, compared to purchasing new lumber. Aesthetically, reclaimed wood brings a unique history and rustic charm that new materials simply cannot replicate, giving your garden a distinctive, lived-in feel. The weathered textures and varied tones can transform a simple fence into a work of art.
Planning Your Project: Design and Measurement
Before you start gathering materials, it’s crucial to plan your fence’s design and layout. Measure the perimeter of the area you wish to enclose. Consider the desired height of your fence – a decorative boundary might be lower than one intended for privacy or animal deterrence. Sketch out a simple design, noting where posts will go and how the panels or pickets will be attached. Check local regulations regarding fence height and placement, especially if your property borders a neighbor.
Gathering Your Materials and Tools
The beauty of a reclaimed wood project is in the variety of materials you can use. Look for pallets, old decking boards, fence pickets, barn wood, or even discarded lumber from construction sites (always ask permission!). Ensure any wood you use is free from excessive rot, pests, or dangerous chemicals. You’ll also need:
- **Posts:** Sturdy wood (4×4 or 4×6) or metal posts.
- **Fasteners:** Weather-resistant screws or nails.
- **Concrete mix:** For setting posts (optional, but highly recommended for stability).
- **Tools:** Post-hole digger, level, measuring tape, saw (circular or hand), drill, hammer, safety glasses, gloves.

Step-by-Step Construction Guide
1. Mark and Dig Post Holes
Using your measurements, mark the locations for your fence posts. Spacing typically ranges from 6 to 8 feet apart. Dig post holes that are roughly one-third the height of your desired fence post in depth, and three times the width of the post. For example, an 8-foot post for a 6-foot fence would need a 2-foot deep hole.
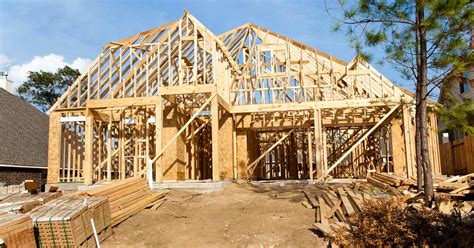
2. Set the Posts
Place a post in each hole. Use a level to ensure each post is perfectly plumb (straight up and down) from all angles. Brace the posts temporarily with scrap wood or stakes. Mix your concrete according to package directions and pour it into the holes, ensuring no air pockets. Slope the top of the concrete away from the post to shed water. Allow the concrete to cure fully, typically 24-48 hours, before proceeding.

3. Attach the Rails
Once your posts are secure, attach horizontal rails between them. These will provide the framework for your reclaimed wood infill. Depending on your fence height, you’ll likely need two or three rails per section (top, middle, bottom). Use sturdy, weather-resistant screws to attach the rails to the posts, ensuring they are level.
4. Install the Infill
Now comes the creative part! Take your reclaimed wood pieces and attach them to the rails. You can create a solid panel, a picket fence style, or even a staggered, artistic design. Ensure consistent spacing if desired, or embrace the unique sizes and shapes of your reclaimed materials for a more eclectic look. Use appropriate fasteners, pre-drilling holes if necessary to prevent splitting, especially with older, drier wood.
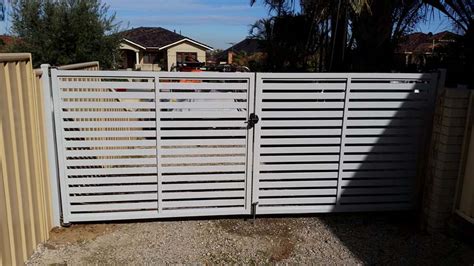
5. Add a Gate (Optional)
If your fence design includes a gate, construct a simple frame from sturdy reclaimed wood that fits snugly within the opening. Attach your reclaimed wood infill to the gate frame. Use heavy-duty, weather-resistant hinges and a latch to hang the gate securely to a post.

Finishing Touches and Maintenance
After construction, you might choose to sand any rough edges or splinters. To protect your fence and prolong its life, apply a weather-resistant stain, sealant, or paint. This will help prevent rot, insect damage, and UV degradation. Regularly inspect your fence for loose boards, rust on fasteners, or signs of wear, and address them promptly. With proper care, your reclaimed wood fence will provide years of sturdy service and rustic beauty.

Conclusion
Building a garden fence with reclaimed wood is a rewarding DIY project that combines sustainability, cost-effectiveness, and unique aesthetic appeal. It offers a chance to get creative, work with your hands, and transform discarded materials into a functional and charming addition to your outdoor space. Enjoy the satisfaction of a job well done and the distinctive character your new fence brings to your garden.


