


DIY a sturdy, budget-friendly root cellar for winter food storage?
Why Build a Root Cellar?
As winter approaches, gardeners and homesteaders often face the challenge of preserving their bountiful harvests. While canning and freezing are popular methods, a traditional root cellar offers a unique, energy-efficient, and budget-friendly solution for storing root vegetables, fruits, and even some canned goods. A well-designed root cellar maintains a consistently cool temperature and high humidity, creating ideal conditions that extend the shelf life of your produce for months without electricity. It’s an investment in self-sufficiency and a fantastic way to enjoy your garden’s bounty all year long.

Planning Your Root Cellar: Location and Design
The success of your root cellar hinges on careful planning. First, consider the location. An ideal spot is naturally cool, well-drained, and easily accessible from your home. This might be underground (a true cellar), semi-underground, or even a section of an existing basement or shed adapted for the purpose. Look for areas away from direct sunlight and where the ground temperature remains stable.
For design, crucial elements include insulation, ventilation, and drainage. Good insulation (think earth, straw bales, or rigid foam) helps maintain a consistent temperature. Proper ventilation is vital to prevent mold and rot; this typically involves an intake vent near the floor and an exhaust vent near the ceiling to promote air circulation. Drainage is equally important to prevent water accumulation, especially for underground builds. Sketching out your design, considering dimensions and materials, will be an invaluable first step.
Budget-Friendly Material Selection
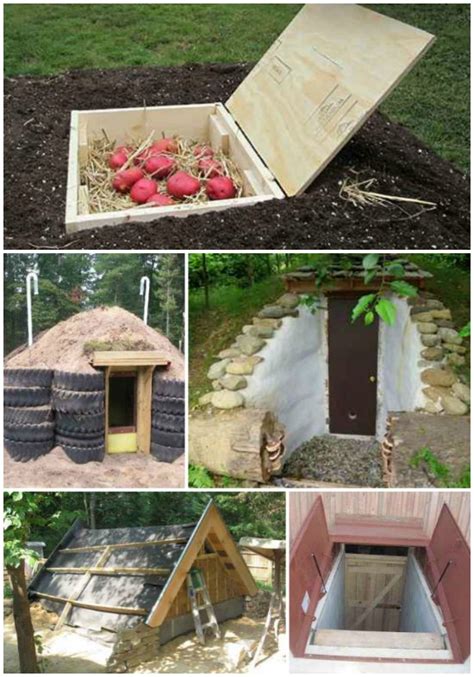
Building a sturdy root cellar doesn’t have to break the bank. Many materials can be repurposed or sourced affordably. For walls, consider concrete blocks, reclaimed timber, or even sturdy pallets lined with insulation. Earth itself is a fantastic insulator, so integrating berming or burying your structure can save on materials. The roof can be made from corrugated metal, thick plywood, or even a living roof for added insulation and aesthetics. For flooring, a simple dirt floor is often best as it helps maintain humidity, but gravel or concrete can also work if proper humidity is ensured otherwise. Prioritize durability and insulation qualities when making your choices.

Step-by-Step Construction Guide
1. Site Preparation and Excavation
Begin by clearing your chosen site. For an underground or semi-underground cellar, excavate to your desired depth and width. Ensure the base is level and consider adding a layer of gravel for drainage. For above-ground options, prepare a sturdy foundation.
2. Building the Walls and Floor
Construct your walls using your chosen materials. If using concrete blocks, ensure they are properly mortared. For wooden structures, treat wood that will be in contact with the ground to prevent rot. If opting for an earthen floor, ensure it’s compacted. For concrete, pour and level it.
3. Installing Ventilation and Drainage
Incorporate your intake and exhaust vents during wall construction. These can be simple PVC pipes or screened openings. For drainage, install perimeter drains if needed, connecting to a French drain or a sloped area away from the cellar. A small sumps pump might be necessary in areas with high water tables.

4. Roof Construction and Insulation
Build your roof structure, ensuring it’s strong enough to support insulation and any potential earth cover. Add your chosen insulation material (e.g., rigid foam, straw bales, or a thick layer of earth). A vapor barrier on the warm side (outside, for an underground cellar) is crucial to prevent condensation.
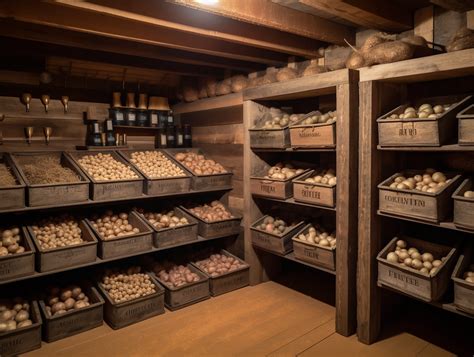
5. Adding Shelving and Finishing Touches
Install sturdy shelving units, ideally made from rot-resistant wood or metal, allowing for good air circulation around your stored produce. Consider adding a thermometer and hygrometer to monitor conditions. A heavy, insulated door will complete your cellar, sealing it effectively from outside elements.
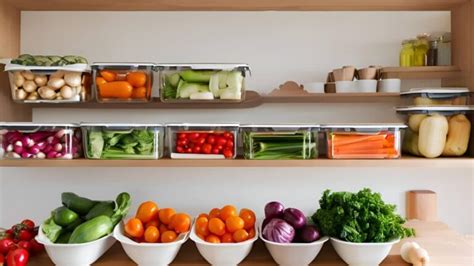
Optimizing and Using Your Root Cellar
Once built, the key to success is maintaining optimal conditions: temperatures between 32-50°F (0-10°C) and 85-95% humidity. Monitor these levels regularly and adjust ventilation as needed. Different produce items have different storage needs; for example, apples release ethylene gas, which can spoil potatoes, so store them separately. Cure root vegetables like potatoes and sweet potatoes for a few weeks before storage to enhance their keeping qualities. Keep the cellar clean and check produce periodically, removing any items showing signs of spoilage to prevent contamination.
Conclusion
Building a DIY root cellar is a rewarding project that empowers you to extend the freshness of your harvest, reduce food waste, and gain greater food security. With thoughtful planning, selection of budget-friendly materials, and careful construction, you can create a sturdy and efficient storage solution that serves your household for many winters to come. Embrace this timeless method and enjoy the taste of your garden’s bounty long after the growing season ends.
