


DIY compost bin: Easiest, pest-proof designs for backyard food scraps?
Why DIY Your Compost Bin?
Composting at home is an incredibly rewarding way to reduce household waste, enrich your garden soil, and contribute to a healthier planet. However, one common concern for many aspiring composters is attracting unwanted guests like rodents, raccoons, or insects. The good news is that with the right design and a few simple strategies, you can build a DIY compost bin that’s both easy to construct and virtually pest-proof.
This guide will walk you through designs that are simple for any DIY enthusiast, focus on keeping critters out, and effectively turn your kitchen and yard waste into valuable organic matter.
Understanding Pest-Proofing Principles
Before diving into specific designs, it’s crucial to understand what makes a compost bin unattractive to pests. Pests are typically drawn to easily accessible food sources and sheltered environments. A pest-proof bin addresses these two points:
- Enclosure: A solid, continuous barrier that prevents critters from burrowing in or climbing through.
- Lid/Cover: A secure top that prevents access from above and helps contain odors.
- Elevation (Optional but Recommended): Raising the bin off the ground can deter burrowing pests.
- Material Management: Proper layering and avoiding certain materials minimize attractants.

Easiest DIY Pest-Proof Compost Bin Designs
1. The Wire Mesh & Hardware Cloth Bin
This design is celebrated for its simplicity, excellent aeration, and adaptability. By choosing the right materials, it can be highly effective against pests.
Materials:
- Hardware cloth (1/4-inch or 1/2-inch mesh) – crucial for pest-proofing.
- Heavy-gauge wire mesh (e.g., galvanized welded wire, 1-inch or 2-inch openings) for structural support.
- Wire snips.
- Heavy-duty gloves.
- Zip ties or hog rings.
- Optional: Plywood or metal sheet for a lid.
Construction:
- Cut a length of wire mesh (around 10-12 feet long for a good size) and form it into a cylinder, securing the ends with zip ties or hog rings. This forms the main structure.
- Cut a slightly longer and wider piece of hardware cloth. Line the inside of your wire mesh cylinder with the hardware cloth, overlapping slightly, and secure it firmly to the outer mesh with zip ties. This fine mesh is your primary pest deterrent.
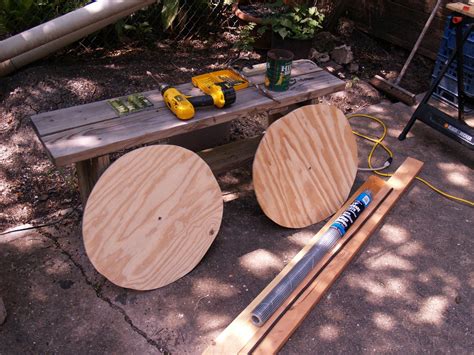
- For the lid, cut a circular piece of plywood or metal slightly larger than the bin’s diameter. Alternatively, you can form a lid from hardware cloth and wire mesh, ensuring it fits snugly.
- Place the bin in a sunny spot, ideally on a layer of cardboard or another barrier to deter burrowing.
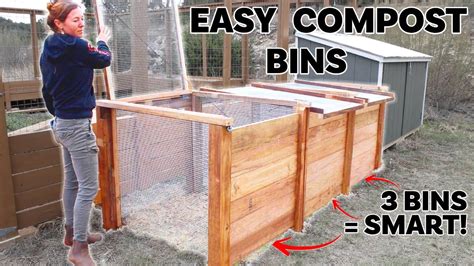
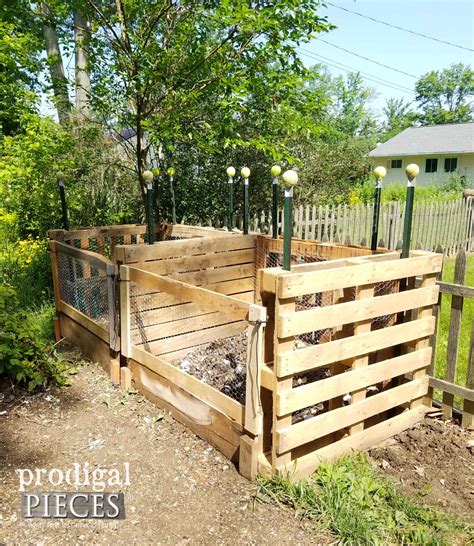
2. The Upcycled Pallet Bin (with Modifications)
Pallet bins are incredibly popular for their cost-effectiveness and ease of assembly. To make them pest-proof, you’ll need to add a few crucial elements.
Materials:
- 4-5 wooden pallets (heat-treated, not chemically treated).
- Hardware cloth (1/4-inch or 1/2-inch mesh).
- Wood screws or heavy-duty zip ties.
- Drill.
- Sturdy lid material (e.g., another pallet, plywood, or sheet metal).
- Optional: Bricks or concrete blocks for elevation.
Construction:
- Arrange four pallets to form a square or rectangle and secure them together using screws or heavy-duty zip ties.
- Line the inside walls and the bottom of the bin with hardware cloth, stapling or screwing it securely to the pallet wood. Ensure there are no gaps for pests to enter.
- Create a secure lid. A fifth pallet can work if hinged, but a piece of plywood or sheet metal cut to size and weighted down offers better pest protection. Hinges can be added for easier access.
- Elevate the bin on bricks or concrete blocks to deter burrowing rodents.
3. The Repurposed Plastic Tote/Drum Composter
For a highly contained and almost entirely pest-proof option, a large plastic tote or drum is excellent. These are easy to seal and manage.
Materials:
- Large plastic tote with a secure lid (e.g., 55-gallon drum, heavy-duty storage tote).
- Drill with a large drill bit (1/2-inch to 1-inch).
- Hardware cloth (optional, for covering larger holes).
Construction:
- Thoroughly clean the tote or drum.
- Drill numerous drainage and aeration holes all over the sides and bottom of the tote. Space them about 4-6 inches apart. If using a drum, larger holes can be covered with hardware cloth from the inside to prevent pests while allowing airflow.
- Ensure the lid fits snugly. You can add latches or bungees for extra security, especially if raccoons are an issue in your area.
- Place the tote in a convenient location. Turning the compost inside will require rolling the drum or using a pitchfork for a tote.
Key Pest-Proofing Features for Any Design
- Secure, Weighted Lid: This is arguably the most critical feature. A heavy, tightly fitting lid prevents most climbing pests (raccoons, squirrels) and helps contain odors that attract others.
- Fine Mesh Barriers: For any open-slatted or wire design, an inner lining of 1/4-inch or 1/2-inch hardware cloth is essential to block rodents and larger insects.
- Elevated Base: Raising your bin off the ground with bricks, cinder blocks, or a sturdy frame makes it harder for rodents to burrow underneath.
- Strategically Placed Holes: While aeration is important, ensure any larger holes are covered with hardware cloth to prevent entry.
- Location Matters: Place your bin away from your house, sheds, and fences where pests might find easy access or shelter.

Maintaining a Pest-Free Compost System
Even the best-designed bin needs proper management to remain pest-free:
- Balance ‘Greens’ and ‘Browns’: A healthy compost pile maintains a good carbon-to-nitrogen ratio, which helps it decompose quickly and reduces odors.
- Bury Food Scraps: Always bury fresh kitchen scraps deep within the existing compost pile, covering them with a layer of ‘brown’ materials (leaves, shredded paper). This hides them from view and smell.
- Avoid Problematic Materials: Do not compost meat, bones, dairy products, oils, or greasy foods. These are strong attractants for rodents and other scavengers.
- Turn Regularly: Aerating your pile by turning it regularly speeds up decomposition and keeps the pile active, making it less appealing to pests seeking a stagnant home.
- Maintain Moisture: Keep the compost moist like a wrung-out sponge. Too dry, and decomposition slows; too wet, and it can become anaerobic and smelly.
Conclusion
Building a DIY compost bin doesn’t have to be complicated, and making it pest-proof is entirely achievable with a bit of planning and the right materials. Whether you opt for a lined wire mesh bin, a modified pallet structure, or a repurposed plastic tote, the key lies in creating secure enclosures, effective lids, and diligent management of your compostable materials. Embrace these designs and tips, and you’ll be well on your way to creating nutrient-rich compost without attracting unwelcome visitors to your backyard.
