


DIY compost tea recipe for nourishing a kitchen herb garden?

Nourishing your kitchen herb garden with a homemade compost tea is one of the most effective and organic ways to ensure your plants thrive. This living liquid fertilizer is packed with beneficial microorganisms and essential nutrients that boost plant vigor, enhance soil health, and even improve resistance to pests and diseases. Forget expensive chemical concoctions; your herbs deserve the natural goodness of a DIY brew!

Why Your Herbs Will Love Compost Tea
Compost tea acts as a powerful stimulant for plant growth by introducing a diverse microbial ecosystem directly to the soil and foliage. These microbes help break down nutrients into forms that are readily available for your herbs to absorb. The result? Stronger roots, lusher leaves, more aromatic flavors, and an overall healthier garden. It’s especially beneficial for potted herbs, which can quickly deplete soil nutrients.
Gather Your Ingredients and Tools
Making compost tea is surprisingly simple and requires only a few basic items. The key ingredient is good quality, mature compost.
What You’ll Need:
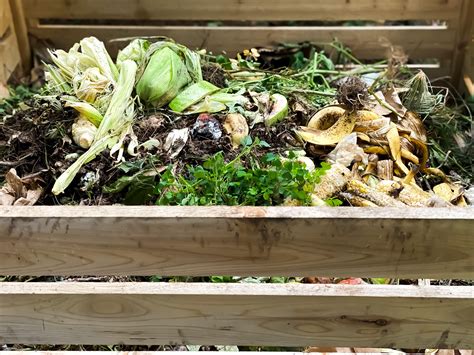
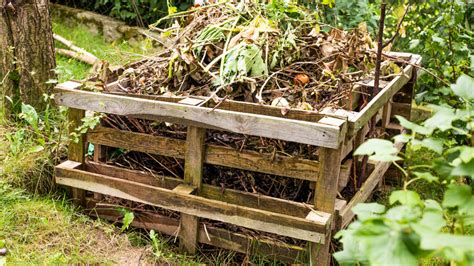
- Mature Compost: About 1-2 cups of well-rotted, finished compost (from kitchen scraps, yard waste, or worm castings). This is the source of your beneficial microbes and nutrients.
- Non-Chlorinated Water: 5 gallons of water. Tap water can be used if left out for 24 hours to allow chlorine to dissipate, or use rainwater/filtered water.
- 5-Gallon Bucket: A clean, sturdy bucket for brewing.
- Burlap Sack, Old Pillowcase, or Paint Strainer Bag: To hold the compost while steeping.
- Stirring Stick or Air Pump (Optional): For aeration.
Step-by-Step Brewing Guide
Follow these easy steps to brew your very own batch of nutrient-rich compost tea:
1. Prepare Your Compost Bag
Place 1-2 cups of your mature compost into your burlap sack, old pillowcase, or paint strainer bag. Tie the top securely to prevent compost from floating loose.
2. Fill the Bucket with Water
Fill your 5-gallon bucket with non-chlorinated water, leaving a few inches from the rim. If using tap water, let it sit uncovered for at least 24 hours to de-chlorinate.
3. Steep the Compost
Submerge the compost-filled bag into the water. Ensure it’s fully immersed. This is much like brewing a giant teabag!
4. Aerate and Stir (Optional but Recommended)
For an ‘aerated’ compost tea, you can use an aquarium air pump with an air stone to bubble oxygen into the water. Aeration encourages the growth of beneficial aerobic microbes and prevents anaerobic (potentially harmful) bacteria from dominating. If you don’t have an air pump, stir the mixture vigorously with a stick several times a day to oxygenate it manually.
5. Brew for 24-48 Hours
Allow the compost to steep for 24 to 48 hours in a shaded area. The water will turn a light to dark brown color, resembling iced tea. The brewing time is crucial; don’t let it go much longer than 48 hours, especially if not aerating, as the beneficial microbes can start to die off.
6. Remove and Dilute
Once brewed, remove the compost bag from the bucket. Squeeze out any remaining liquid into the tea. The spent compost can be returned to your compost pile or mixed directly into garden soil. The resulting liquid is your concentrated compost tea. For most kitchen herbs, it’s best to dilute the tea with water at a 1:1 or 1:2 ratio (one part tea to one or two parts water) before applying. This prevents over-fertilization and ensures gentle nourishment.
Applying Your Nourishing Brew
Compost tea can be applied in two primary ways to your kitchen herb garden:
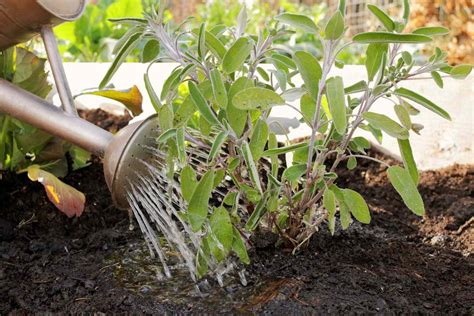
1. Soil Drench
The most common method is to water your herbs at the base, just as you would with regular water. The diluted tea delivers microbes and nutrients directly to the root zone, improving soil structure and nutrient uptake. Apply once every 2-4 weeks during the growing season.
2. Foliar Spray
For an added boost and to potentially deter pests, you can use diluted compost tea as a foliar spray. Fill a clean spray bottle with the diluted tea and lightly mist the leaves of your herbs. Do this in the early morning or late evening to prevent leaf burn from the sun and allow the microbes to colonize the leaf surfaces effectively.
Tips for Best Results
- Use It Fresh: Compost tea is a living product. For maximum benefit, use it within a few hours of brewing. The microbial activity diminishes rapidly after 48 hours, especially if not aerated.
- Observe Your Plants: Pay attention to how your herbs respond. If they seem to be thriving, stick to your schedule. If you notice any issues, adjust frequency or dilution.
- Consistency is Key: Regular, albeit dilute, applications are more beneficial than infrequent, strong doses.
- Cleanliness Matters: Always use clean buckets and tools to avoid introducing undesirable bacteria.

Conclusion
Brewing your own compost tea is a rewarding and eco-friendly practice that will significantly enhance the health and productivity of your kitchen herb garden. It’s a testament to the power of natural processes, turning humble compost into a potent elixir for your green companions. Give this DIY recipe a try, and watch your basil, mint, rosemary, and thyme flourish like never before!


