


DIY plans for a simple, raised garden bed for beginners?
Embarking on your gardening journey can be incredibly rewarding, and a raised garden bed is the perfect starting point for beginners. They offer numerous advantages, from better soil control and drainage to fewer weeds and easier access. This guide provides simple, step-by-step DIY plans to build your own functional and attractive raised garden bed without needing advanced carpentry skills.
Why a Raised Garden Bed is Perfect for Beginners
Raised garden beds lift your growing area off the ground, immediately addressing common gardening challenges. You get to choose your soil mix, ensuring optimal nutrients and drainage for your plants right from the start. This also means fewer soil-borne pests and diseases. Furthermore, the elevated height reduces bending and kneeling, making gardening more comfortable and accessible for everyone.

Gathering Your Materials
For a simple 4×8 foot raised bed (a popular and manageable size), you’ll need the following:
- Lumber: Four 2x6x8 foot boards (untreated pine, cedar, or redwood are good choices). Untreated wood is essential for food safety.
- Fasteners: 3-inch exterior wood screws (at least 16).
- Tools: Power drill, measuring tape, pencil, saw (miter saw or circular saw recommended, but a hand saw works), carpenter’s square.
- Optional: Landscape fabric or hardware cloth for the bottom, staples or heavy-duty stapler.
Step-by-Step Construction Guide
1. Plan Your Bed and Location
Decide where your raised bed will go. Choose a spot that receives at least 6-8 hours of direct sunlight per day. Clear the area of any grass or debris. This design is for a single tier 4×8 foot bed, which is a great size for variety without being overwhelming.
2. Cut Your Lumber
You’ll need two 8-foot boards and two 4-foot boards for the frame. If you purchased four 8-foot boards, you’ll need to cut two of them in half to create your 4-foot sections.
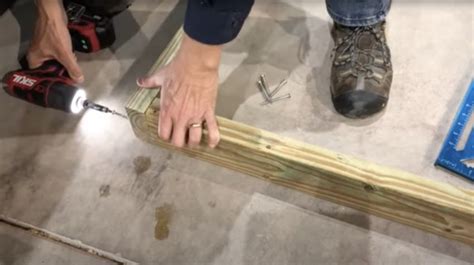
3. Assemble the Frame
Lay out your cut lumber on a flat surface. You’ll form a rectangle with the two 8-foot boards as the long sides and the two 4-foot boards as the ends. The 4-foot boards will fit between the 8-foot boards. Ensure your corners are square using a carpenter’s square.
Using your power drill, pre-drill two pilot holes through the ends of the 8-foot boards into the ends of the 4-foot boards at each corner. This prevents the wood from splitting. Then, secure each corner with two 3-inch exterior wood screws.
4. Add a Liner (Optional but Recommended)
If you’re concerned about weeds growing up from below or want to deter burrowing pests, line the bottom of your assembled bed with landscape fabric or hardware cloth. Simply lay it inside the frame and staple it to the inner edges of the lumber. Make sure it extends up the sides a few inches. This step also helps retain soil.
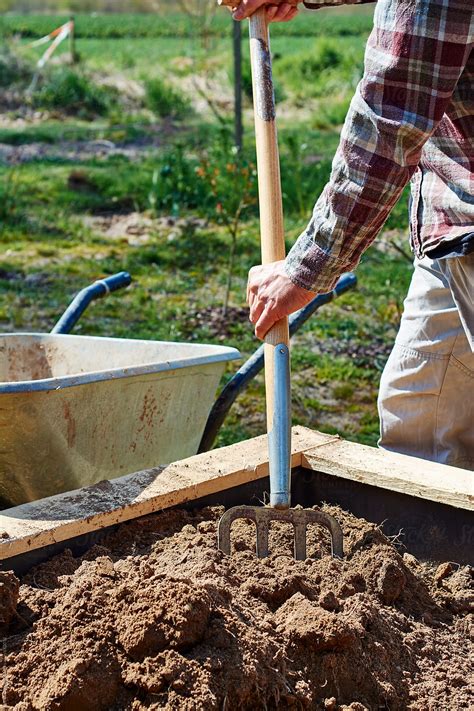
5. Fill with Soil
This is where you bring your raised bed to life! Do not use regular garden soil, which can be too heavy and compact. Instead, fill your raised bed with a high-quality raised bed mix or a blend of compost, topsoil, and peat moss/coconut coir. A good mix promotes drainage, aeration, and provides essential nutrients for healthy plant growth.
Tips for Beginner Gardeners
- Soil Quality: Invest in good soil. It’s the foundation of your garden’s success.
- Watering: Raised beds tend to dry out faster than in-ground gardens. Check the soil moisture daily and water deeply when the top inch or two feels dry.
- Plant Selection: Start with easy-to-grow vegetables like lettuce, radishes, bush beans, or herbs. Don’t overcrowd your plants; follow spacing recommendations on seed packets or plant tags.
- Sunlight: Most vegetables need full sun, so ensure your bed gets plenty.

Conclusion
Building a simple raised garden bed is a rewarding DIY project that empowers you to grow your own food with ease. With these straightforward plans, even absolute beginners can construct a sturdy and productive growing space. Get ready to enjoy fresh produce, beautiful blooms, and the satisfaction of harvesting from your very own backyard oasis!


