


DIY root cellar: effective natural cooling & moisture control tips?
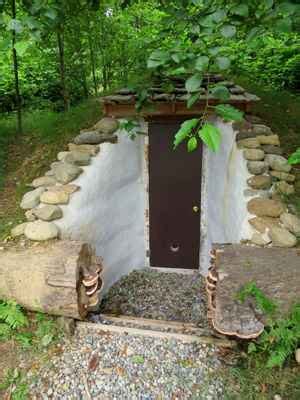
Building a DIY root cellar is a time-honored tradition making a strong comeback, offering an energy-efficient and natural way to store produce, extending its shelf life without refrigeration. The success of a root cellar hinges on two critical factors: maintaining a cool, stable temperature and controlling humidity. This guide delves into effective natural cooling and moisture control tips to help you design and build a functional root cellar that keeps your harvest fresh for months.
Embracing Nature’s Thermostat: Natural Cooling Principles
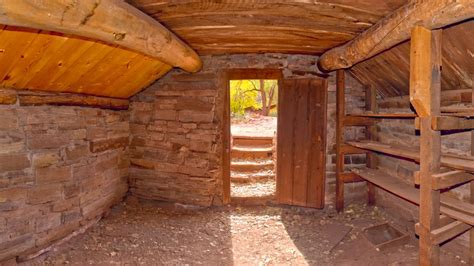
The core of a root cellar’s effectiveness lies in its ability to harness the earth’s natural thermal properties. Underground or partially underground structures benefit from the stable temperature of the surrounding soil, which acts as a massive insulator. This moderates temperature fluctuations, keeping the interior cool even when surface temperatures soar.
Thermal Mass: Materials like concrete, stone, and even packed earth within your cellar absorb and slowly release temperature, further stabilizing the internal climate. Think of a thick stone wall slowly warming up during the day and radiating that warmth back at night – a root cellar works similarly, but in reverse, keeping cool.
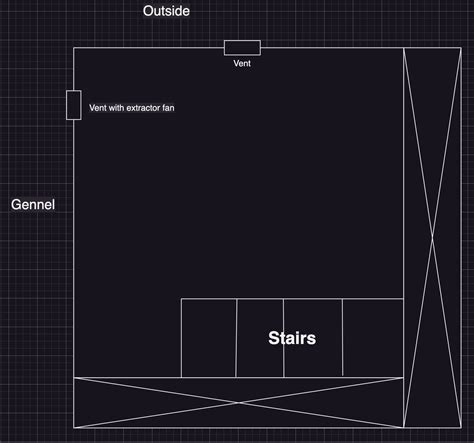
Ventilation is Key: Beyond the earth’s insulation, proper airflow is crucial for natural cooling and expelling unwanted heat or stale air. A well-designed passive ventilation system typically involves two vents: an intake vent placed low to draw in cooler, denser air, and an exhaust vent placed high to allow warmer, lighter air to escape. This creates a natural convection current, continuously cycling the air.
Mastering Moisture: Humidity and Condensation Control
While some humidity is desirable for root vegetables to prevent shriveling, too much can lead to mold, rot, and spoilage. Striking the right balance is essential.
Drainage Systems: For underground or partially underground cellars, managing groundwater is paramount. Implementing exterior French drains around the foundation can divert water away, preventing it from seeping into your cellar. Inside, a slightly sloped floor leading to a small drain can handle any condensation or spills, directing it away from stored produce.
Vapor Barriers: Preventing moisture from entering through walls and floors is vital. Applying a waterproof membrane or vapor barrier to the exterior of underground walls and beneath the floor slab can significantly reduce moisture penetration. Interior walls can also benefit from moisture-resistant finishes.

Achieving Optimal Humidity Levels
- Gravel or Earth Floors: Leaving a portion of the floor as bare earth or covered with gravel allows natural evaporation, contributing to humidity.
- Water Buckets or Trays: If your cellar is too dry, a simple bucket of water or a tray of wet sand can help increase humidity.
- Air Circulation: Adequate ventilation, as mentioned, also helps to prevent stagnant, overly humid pockets of air and discourages mold growth.
Strategic Location and Construction Materials
The site you choose and the materials you use profoundly impact your root cellar’s performance.
Location:
- Shade: Choose a northern exposure or a spot heavily shaded by trees or buildings to minimize direct sun exposure and heat gain.
- Drainage: Avoid low-lying areas prone to water accumulation. A site with good natural drainage is ideal.
- Accessibility: Consider ease of access for bringing in and taking out produce.
Materials:
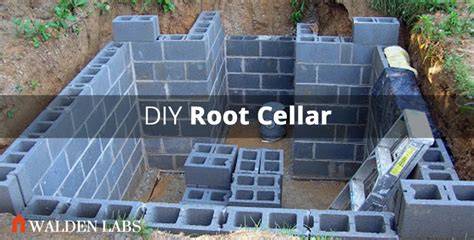
- Walls and Floor: Concrete, stone, or insulated concrete forms (ICFs) provide excellent thermal mass and durability. Earthbag construction is another sustainable option.
- Roof: A thick layer of earth (green roof), insulated wood, or concrete can provide insulation and thermal mass. Ensure it’s waterproofed.
- Shelving: Use sturdy, rot-resistant materials like cedar, treated lumber, or metal shelving. Ensure adequate space between shelves for air circulation.
Putting It All Together: A Functional Design
When designing your root cellar, integrate these principles from the outset. Plan for appropriate size based on your storage needs, ensure robust structural integrity, and critically, design for effective air flow and moisture management. Consider the entry point – an insulated door is vital to prevent heat transfer. For smaller, simpler setups, an old chest freezer buried underground (without power) can even serve as a mini root cellar, though ventilation and drainage would still need creative solutions.
Conclusion: The Reward of Sustainable Storage
Building a DIY root cellar is a rewarding project that offers immense benefits, from reducing food waste and lowering energy bills to fostering a deeper connection with your food supply. By diligently applying natural cooling techniques like proper ventilation and thermal mass, and mastering moisture control through effective drainage and humidity management, you can create an efficient, sustainable storage solution that serves you for years to come. Embrace the age-old wisdom of root cellaring and enjoy your bounty long after the harvest season ends.
