


DIY root cellar tips for naturally storing garden harvest without electricity?
Embracing the Ancient Art of Root Cellaring for Modern Harvests
In an age dominated by refrigeration and energy consumption, the humble root cellar offers a timeless, sustainable solution for preserving your garden’s bounty. Far from being an antiquated concept, a well-designed DIY root cellar leverages the earth’s natural cooling and insulating properties to create ideal storage conditions for many fruits and vegetables, all without a single watt of electricity. This guide will walk you through the essential tips and considerations for building your own natural storage haven, ensuring your harvest lasts well into the colder months.
Understanding the Core Principles of Root Cellar Storage
The success of a root cellar hinges on maintaining three critical environmental factors: temperature, humidity, and ventilation. Ideal temperatures typically range from 35-50°F (1-10°C), preventing spoilage while keeping produce from freezing. High humidity, usually between 85-95%, is crucial to prevent dehydration and shriveling, especially for root crops. Adequate ventilation ensures fresh air circulation, preventing the buildup of ethylene gas (which can accelerate ripening) and inhibiting mold growth. Achieving this delicate balance is the art of root cellaring.
Choosing the Right Location for Your Root Cellar
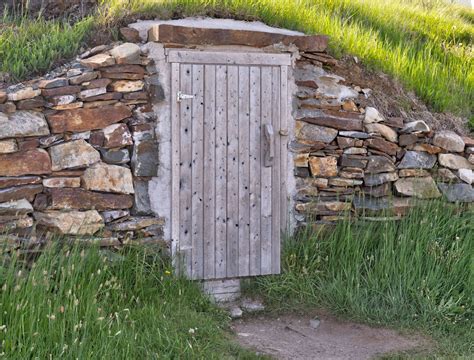
The first step in any DIY root cellar project is selecting the optimal location. Options generally fall into three categories: in-ground, above-ground, or within an existing basement structure. In-ground cellars (like excavated pits or buried containers) offer the most stable temperatures due to the earth’s insulation. Above-ground cellars, often built into a north-facing slope or heavily insulated, require more design effort to regulate temperature. Basement cellars are convenient but demand careful consideration of humidity and ventilation to prevent issues in the main living space.

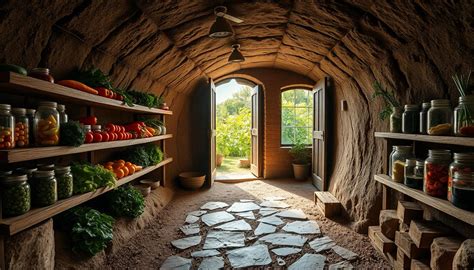
Essential Design Elements for Effective Storage
Regardless of your chosen location, several design elements are non-negotiable for an effective root cellar. Proper insulation (whether from earth, straw bales, or foam boards) is paramount for temperature stability. Drainage is critical, especially for in-ground structures, to prevent water intrusion and maintain dryness. Robust shelving and bins, made from rot-resistant materials like cedar or plastic, help organize produce and allow for air circulation. A sturdy, insulated door and an adjustable ventilation system (inlet and outlet pipes) complete the basic setup, allowing you to fine-tune the environment.
Key Steps in Building Your DIY Root Cellar
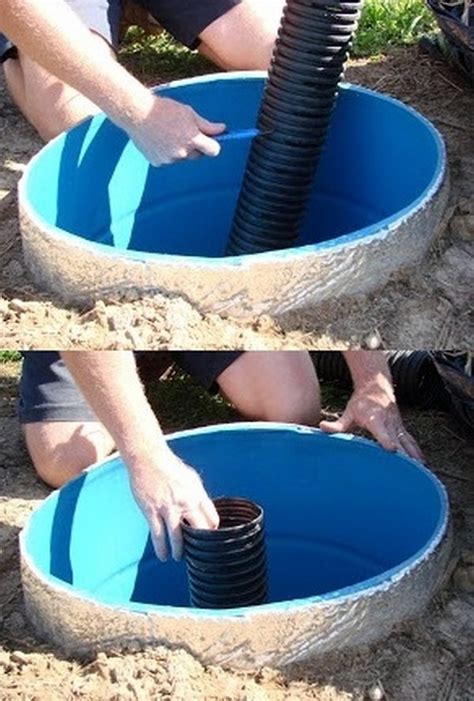
Constructing your root cellar will involve several stages. For in-ground designs, excavation is the first step, followed by ensuring proper drainage and a solid foundation. Walls can be built from concrete blocks, stone, or even repurposed materials like old tires, always with an eye towards insulation and moisture control. A strong, insulated roof or ceiling is vital, especially if exposed to the elements. Finally, installing an insulated door and configuring your ventilation system (typically two pipes at different heights for passive airflow) will bring your project to completion.
Preparing and Storing Your Garden Harvest
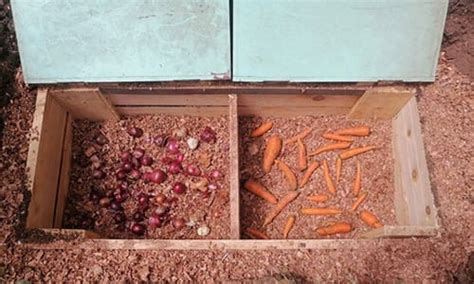
The way you prepare your harvest directly impacts its storage life. Most root crops (carrots, potatoes, beets) benefit from being cured for a few days to harden their skins, then stored in moist sand, sawdust, or peat moss. Cabbage, celery, and leafy greens often do best wrapped in damp newspaper or stored in open crates. Apples and pears should be stored separately from other produce, as they emit ethylene gas. Always inspect produce for damage or disease before storing, as one bad apple can indeed spoil the whole barrel.
Maintenance and Monitoring for Optimal Conditions
Once built, a root cellar isn’t entirely hands-off. Regular monitoring of temperature and humidity is crucial. Simple thermometers and hygrometers can help you keep track. Adjust ventilation as needed – open vents wider on cooler days to bring in fresh air, or close them partially on warmer days to maintain cool temperatures. Regularly inspect your stored produce, removing any items that show signs of spoilage to prevent contamination. With a little attention, your root cellar will become a reliable extension of your garden.

Conclusion: A Sustainable Path to Food Self-Sufficiency
Building a DIY root cellar is more than just a home improvement project; it’s an investment in sustainable living and food self-sufficiency. By harnessing nature’s power, you can significantly extend the life of your garden harvest, reduce food waste, and enjoy fresh, homegrown produce long after the growing season ends. It’s a rewarding endeavor that connects you to time-honored traditions and empowers you to take control of your food supply, naturally and without relying on electricity.
