DIY root cellar tips for year-round food storage without electricity?
Embracing Traditional Food Storage: The DIY Root Cellar
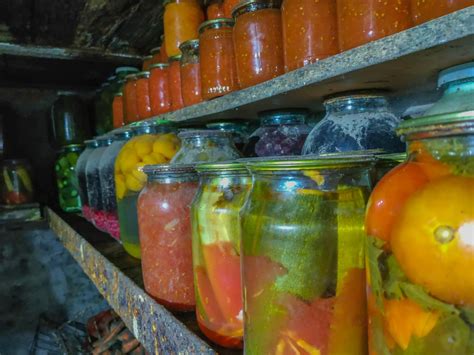
In an age increasingly dependent on electricity, the humble root cellar offers a timeless, reliable, and energy-free solution for preserving your harvest. Whether you’re a seasoned homesteader, a prepper, or simply someone looking to reduce your carbon footprint and ensure food security, building your own root cellar is a rewarding DIY project. It leverages natural conditions to keep fruits, vegetables, and even some canned goods fresh for months, providing a sustainable way to enjoy your produce long after the growing season ends.
The core principle behind a successful root cellar is creating a stable environment that mimics natural dormancy. This means maintaining a consistently cool temperature (just above freezing, typically 35-50°F or 2-10°C), high humidity (85-95%), and proper ventilation, all while keeping the area dark. Achieving this balance without power might seem daunting, but with careful planning and execution, it’s entirely achievable.

Key Principles for an Effective Root Cellar
Temperature Control
The ideal temperature range is crucial. Too warm, and produce will spoil or sprout; too cold, and it will freeze. The earth itself acts as a natural insulator, moderating temperatures year-round. Deeper cellars tend to be more stable.
Humidity Management
High humidity prevents produce from drying out and shriveling. Earthen floors, damp sand, or even buckets of water can help maintain the necessary moisture levels. Air circulation is vital to prevent condensation from leading to rot.
Ventilation System
Good airflow removes ethylene gas (produced by ripening fruits) and helps prevent the buildup of mold and mildew. A simple passive ventilation system, consisting of an intake pipe low to the ground and an exhaust pipe higher up, will create a natural convection current to exchange air.
Darkness
Light encourages sprouting and can degrade nutrient content. Ensure your root cellar is as dark as possible to extend the storage life of your foods.
Choosing Your Location and Type of Root Cellar
The best location will have good drainage to prevent water accumulation and be easily accessible. Consider the natural slope of your land, proximity to your home, and soil type.
Common DIY Root Cellar Types:
- Buried/Underground Cellar: This is the classic approach, often dug into a hillside or beneath a shed. It offers excellent insulation from the surrounding earth.
- Basement/Crawl Space Conversion: If you have an unheated section of your basement or a spacious crawl space, you can wall off a section and insulate it to create an indoor root cellar.
- Earth Mound/Pit Cellar: A simpler option where a pit is dug, produce is stored in containers, and then covered with layers of straw, soil, and possibly a tarp. Great for temporary or smaller harvests.
- Barrel/Container Cellar: Burying a food-grade barrel or large tote, often with a ventilation pipe, is a straightforward way to create a mini root cellar.

Construction Basics: From Digging to Shelving
No matter which type you choose, some fundamental construction elements apply:
Excavation and Foundation
Dig your chosen area to the required depth and width. Ensure the foundation is solid and provides good drainage. Gravel can be laid at the bottom.
Walls and Ceiling
For more permanent structures, walls can be built from concrete blocks, stone, treated wood, or even stacked tires. The ceiling should be sturdy enough to support the earth above it (if underground) and well-insulated. Consider using a vapor barrier to manage humidity.
Entry and Door
A well-insulated door is critical to prevent temperature fluctuations. Double doors can provide an extra layer of protection.
Ventilation Pipes
Install two pipes: one for intake, placed low and extending outside, and one for exhaust, placed high and also extending outside. Cover the external openings with mesh to deter pests.
Shelving and Storage
Build sturdy, slatted shelves to allow air circulation around your produce. Bins, crates, and even layers of sand can be used for different types of vegetables. Avoid direct contact with cold concrete or metal surfaces.

Maintaining Your Off-Grid Pantry
Once built, your root cellar requires a little ongoing attention to ensure optimal storage:
- Monitor Temperature and Humidity: Use a simple thermometer and hygrometer to keep an eye on conditions. Adjust ventilation or add/remove water as needed.
- Proper Storage Techniques: Different foods have different ideal conditions. Potatoes and carrots prefer cool, humid environments; onions and garlic like it cool and dry; apples prefer cool and humid but can release ethylene, so store them separately.
- Regular Inspection: Periodically check your stored produce for any signs of spoilage. Remove any rotten items immediately to prevent them from affecting others.
- Pest Control: Ensure your cellar is sealed against rodents and insects. Wire mesh on vents and tight-fitting doors are essential.
A Sustainable Path to Food Security
Building a DIY root cellar is a tangible step towards greater self-sufficiency and a deeper connection to your food source. It’s a testament to the wisdom of traditional methods, proving that with a little ingenuity and elbow grease, you can achieve year-round food storage without the need for a single watt of electricity. Enjoy the satisfaction of reaching into your own cool, dark cellar to retrieve a perfectly preserved carrot or a crisp apple, knowing you’ve harnessed nature’s power to feed your family sustainably.