


DIY root cellar tips for year-round fresh harvest storage?
Unlock Year-Round Freshness with a DIY Root Cellar
For centuries, root cellars have been a cornerstone of food preservation, offering a simple yet incredibly effective way to store fresh produce without electricity. In today’s world of rising food costs and a desire for greater self-sufficiency, building your own DIY root cellar is a rewarding project that can extend your harvest, reduce waste, and provide access to fresh, healthy food all year long.
Whether you have a sprawling garden or just a few raised beds, a root cellar can transform your harvest strategy. It’s an investment in sustainable living that pays dividends in flavor and savings.
Understanding the Basics: What Makes a Root Cellar Work?
The magic of a root cellar lies in its ability to replicate the cool, humid, and dark conditions found naturally underground. These conditions are ideal for many fruits and vegetables, slowing down their respiration and preventing spoilage. Key factors include:
- Consistent Cool Temperature: Ideally between 35-50°F (2-10°C) to inhibit bacterial growth and ripening.
- High Humidity: Around 85-95% to prevent produce from drying out and shriveling.
- Adequate Ventilation: To prevent the buildup of ethylene gas (a ripening agent) and stale air, which can encourage mold.
- Darkness: To prevent greening of potatoes and sprouting, and to slow photosynthesis.
Essential Design Principles for Your DIY Root Cellar
Before you dig, consider these fundamental design elements that will dictate your root cellar’s success:
-
Temperature Control: Insulation and Earth Contact
The earth itself is a fantastic insulator. Digging your root cellar partially or entirely underground leverages the consistent temperatures of the soil. If building above ground, thick walls, double doors, and natural insulation materials like straw bales, sawdust, or rigid foam are crucial.
-
Humidity Management: Natural Moisture and Floor Materials
An earthen floor is often the best for maintaining humidity, as it allows ground moisture to evaporate naturally. If a concrete floor is necessary, consider adding a layer of sand or gravel that can be periodically moistened. Avoid direct contact of produce with concrete, as it can draw out moisture.
-
Ventilation Systems: Air In and Air Out
Proper ventilation usually involves two pipes: an intake pipe drawing cool, fresh air from near the ground level outside, and an exhaust pipe positioned higher up inside the cellar to allow warmer, stale air to escape. Screens on both ends are vital to keep pests out.
-
Darkness: Location and Door Seals
Choose a location that minimizes direct sunlight. Ensure your door (or doors, for an airlock effect) is solid, well-insulated, and seals tightly to block light effectively.
Choosing and Preparing Your Site
The ideal location for your root cellar depends on your property and resources. Options range from repurposing an existing space to building new:
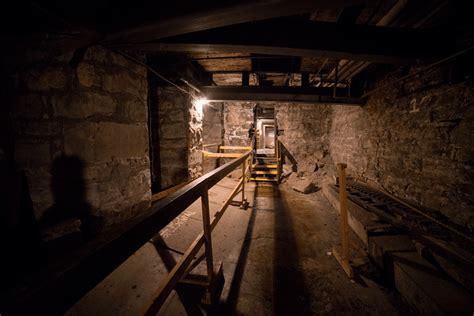
- Existing Basement Corner: If you have an unheated basement, a corner can be walled off, insulated, and ventilated to create a mini-root cellar.
- Under a Porch or Deck: An existing structure can provide a ready-made roof and walls, reducing construction effort.
- Earth-Sheltered or Dug-In Cellar: This is the most traditional method, involving digging a pit or hillside into which the cellar is built. This offers the best natural temperature regulation.
When selecting a site, consider drainage. You don’t want your root cellar to become a pond. Choose a spot with good natural drainage or implement a French drain system around the foundation.
Construction Tips: From Foundation to Shelving
Building your root cellar involves several stages, each critical to its functionality:
-
Foundation and Walls: Durability is Key
For an underground cellar, concrete block, poured concrete, or even stone can be used for walls. Ensure proper waterproofing on the exterior. For above-ground or semi-underground structures, consider treated lumber, insulated panels, or even repurposed materials for the walls.
-
Roofing and Insulation: Keeping the Elements Out
A sturdy, waterproof roof is essential. If above ground, ensure it’s well-insulated. For underground cellars, a thick layer of earth on top provides excellent insulation. Consider a living roof for added insulation and aesthetic appeal.
-
Shelving and Storage: Optimize Your Space
Design your interior with sturdy shelving. Wood is often preferred over metal as it doesn’t conduct cold as much. Ensure shelves allow for good air circulation around your produce. Bins, crates, and even hanging racks can be used for different types of harvest. Label everything clearly!

Maintaining Your Root Cellar for Optimal Storage
Once built, a root cellar isn’t entirely hands-off. Regular monitoring and proper storage techniques are vital:
- Monitor Temperature and Humidity: Use a simple thermometer and hygrometer to keep track of conditions. Adjust ventilation as needed.
- Prepare Produce Correctly: Cure onions and garlic, don’t wash root vegetables (just brush off excess dirt), and inspect all produce for blemishes before storing.
- Separate Incompatible Produce: Some fruits (like apples) release ethylene gas, which can cause other vegetables (like potatoes) to sprout prematurely. Store them in separate sections or containers.
- Regular Inspection: Periodically check your stored goods and remove any spoiled items immediately to prevent contamination.
- Cleanliness: At the end of the storage season, thoroughly clean and sanitize your root cellar to prepare for the next harvest.

Embrace the Root Cellar Lifestyle
Building a DIY root cellar is a commitment, but the rewards are immense. Imagine reaching for crisp carrots in February, firm potatoes in March, or fresh apples in April, all from your own harvest. It connects you more deeply to your food source, reduces your carbon footprint, and offers a tangible step towards a more self-sufficient and sustainable lifestyle. Start planning your root cellar today and enjoy the fruits (and vegetables!) of your labor all year long.


