


DIY root cellar tips for year-round vegetable storage without electricity?
Are you looking for sustainable ways to store your harvest without relying on modern refrigeration? A DIY root cellar offers an ancient, yet highly effective, solution for keeping vegetables fresh for months on end, all while being completely independent of electricity. This guide will walk you through the essential principles, design options, and construction tips to build your own natural food preservation system.
Why Build a Root Cellar?
In an age of increasing concern for food security and energy independence, root cellars are experiencing a resurgence. These passive storage solutions leverage the earth’s natural cooling and insulating properties to create ideal conditions for many fruits and vegetables. Beyond saving on electricity bills, a root cellar significantly extends the shelf life of your harvest, reduces food waste, and provides a resilient storage option during power outages or emergencies. It’s a testament to self-sufficiency and a return to simpler, more sustainable living.
Essential Principles of Root Cellaring
Successful root cellaring hinges on understanding and maintaining four key environmental factors:
- Temperature: Most root crops prefer cool temperatures, ideally between 32°F and 50°F (0°C to 10°C). Consistency is crucial; fluctuations can trigger sprouting or spoilage.
- Humidity: High humidity (around 85-95%) is vital for preventing produce from shriveling and drying out. This is often achieved naturally underground or with a damp floor.
- Ventilation: Adequate airflow is necessary to prevent the buildup of ethylene gas (released by ripening produce), which can accelerate spoilage. A simple intake and exhaust system works wonders.
- Darkness: Light encourages sprouting in potatoes and can diminish the quality of other root vegetables. A completely dark environment is best.
Choosing the Right Location
The success of your root cellar begins with its placement. Look for a spot that offers natural advantages:
- Good Drainage: Avoid low-lying areas prone to water accumulation. A high water table can lead to dampness and structural issues.
- Shade: If building above ground or partially buried, shade from trees or a north-facing slope can help keep temperatures stable.
- Accessibility: Consider how easily you can access your cellar throughout the year, especially in winter.
- Existing Structures: Basements, crawl spaces, or even sturdy sheds can often be converted or augmented to serve as root cellars, reducing excavation work.
Popular DIY Root Cellar Designs
There are numerous ways to construct a root cellar, ranging from simple to more elaborate. Your choice will depend on your budget, available space, and desired capacity.
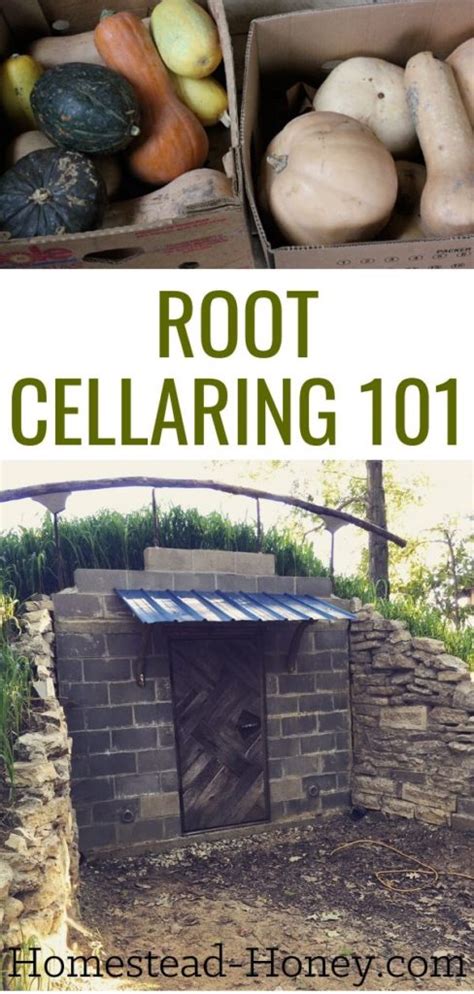
Buried Barrel or Container
One of the simplest methods involves burying a sturdy, food-grade plastic barrel, galvanized trash can, or even an old chest freezer. Dig a hole, bury the container, and add a lid for access. Ensure proper ventilation with PVC pipes extending above ground.
Earth Mound or Pit Cellar
For a slightly larger scale, an earth mound involves digging a pit, lining it with straw, wood chips, or sand, placing your produce, and then covering it with more insulating material and a thick layer of soil. This is great for temporary or seasonal storage.
Basement Corner Conversion
If you have an unheated basement, you can easily partition off a corner. Use insulated walls (e.g., rigid foam, straw bales) to create a separate, cooler space. Ensure an exterior vent for fresh air and a small interior vent for circulation.
Straw Bale or Pallet Insulated Structure
For an above-ground option, construct a small shed-like structure and heavily insulate its walls, floor, and roof with straw bales, sawdust, or even stacked wooden pallets filled with insulation. This design requires careful attention to ventilation and waterproofing.

Step-by-Step Construction Tips (General)
While designs vary, common construction principles apply:
- Excavation & Foundation: Dig to the desired depth. Ensure good drainage with gravel or a sloped floor.
- Structure & Insulation: Build walls from concrete block, treated lumber, or natural earth. Insulate heavily. Earth itself is a fantastic insulator, so burying your cellar is often the most effective.
- Ventilation System: Install two pipes – an intake pipe near the floor (bringing in cool, fresh air) and an exhaust pipe near the ceiling (releasing warmer, stale air). Ensure they are screened to keep pests out.
- Waterproofing: Prevent moisture intrusion from the outside. Use a vapor barrier, waterproof membrane, or a French drain system around the perimeter.
- Shelving & Organization: Build sturdy shelves from untreated wood. Keep produce off the floor. Consider separate bins for different types of vegetables.
- Door & Sealing: Install a heavy, insulated door that seals tightly to maintain temperature and humidity.

Best Vegetables for Root Cellaring
Not all produce is suitable for root cellaring. The best candidates thrive in cool, dark, and humid conditions:
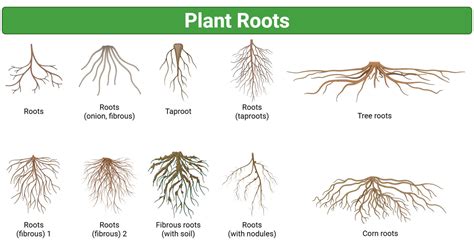
- Root Vegetables: Carrots, beets, parsnips, turnips, rutabagas (store in damp sand or sawdust).
- Potatoes: Cure first, then store in bins, avoiding light.
- Apples & Pears: Store separately from other produce (especially potatoes) as they release ethylene gas.
- Cabbage & Celery: Can be stored whole or with roots intact, sometimes in damp soil.
- Onions & Garlic: Prefer slightly cooler and drier conditions than most root crops; hang in braids or mesh bags.
- Winter Squash & Pumpkins: Prefer slightly warmer (50-55°F / 10-13°C) and drier conditions, often stored on shelves.
Maintenance and Troubleshooting
A root cellar isn’t a “set it and forget it” system. Regular checks are vital:
- Monitor Conditions: Use a thermometer/hygrometer to ensure ideal temperature and humidity. Adjust ventilation as needed.
- Inspect Produce: Regularly check for signs of spoilage, mold, or pests. Remove any compromised items immediately to prevent contamination.
- Pest Control: Ensure screens on vents are intact and the door seals properly to deter rodents and insects.
- Cleanliness: Clean the cellar thoroughly at the end of each storage season.
Building a DIY root cellar is a rewarding project that reconnects you with time-honored traditions of food preservation. By understanding the core principles and selecting a design that fits your needs, you can enjoy your homegrown bounty long after the harvest season, embracing a more sustainable and self-sufficient lifestyle.


