


DIY Sturdy Pantry Shelves for Canning Jars and Homemade Preserves
Why Sturdy Shelves Matter for Canning
Canning jars, especially when full of delicious homemade preserves, can become surprisingly heavy. Standard flimsy pantry shelves simply won’t cut it, risking collapse, damage to your jars, and a potential safety hazard. Building your own sturdy shelves ensures peace of mind, allowing you to store your canned goods securely and efficiently for years to come.
This DIY project is not only practical but also deeply satisfying, providing a custom solution tailored to your specific pantry dimensions and storage needs. Forget wobbly particle board; we’re talking about robust, reliable shelving designed to bear significant weight.
Planning Your Heavy-Duty Shelving Project
Before you lift a single tool, thorough planning is crucial. Start by assessing your pantry space. Measure the width, depth, and height carefully. Consider the size of your canning jars (pint, quart, half-gallon) to determine optimal shelf spacing, ensuring enough vertical clearance for easy access. Think about the total weight your shelves will need to support; a single quart jar weighs about 2 lbs, so a shelf holding 20-30 jars can easily exceed 50 lbs.
Material Selection for Durability
For sturdy shelving, materials are key. Plywood (minimum 3/4-inch thick, preferably good-grade hardwood plywood like birch or oak) or solid dimensional lumber (e.g., 2x4s or 2x6s for supports, 1×10 or 1×12 for shelves) are excellent choices. Avoid MDF or particle board, as they lack the strength and moisture resistance needed for heavy loads and potential spills. Fasteners should be high-quality wood screws (2.5-3 inches long) rather than nails, ensuring maximum holding power.
Essential Tools and Materials
Gathering your tools and materials beforehand will make the project smoother. Here’s what you’ll likely need:
- Measuring Tape and Pencil: For precise measurements and markings.
- Circular Saw or Miter Saw: For cutting lumber accurately.
- Drill/Driver: For pre-drilling holes and driving screws.
- Level: To ensure shelves are perfectly horizontal.
- Stud Finder: To locate wall studs for secure mounting.
- Safety Glasses and Gloves: Always prioritize safety.
- Wood Screws (2.5″ – 3″): Self-tapping recommended.
- Lumber: For vertical supports (e.g., 2x4s) and horizontal shelves (e.g., 3/4″ plywood or 1×10/1×12 boards).
- Wood Glue: For added joint strength (optional but recommended).
- Sanding Paper (various grits) and Finish (e.g., polyurethane): For a smooth, durable surface.
Step-by-Step Construction Guide
Step 1: Measure and Mark
Using your initial measurements, mark the locations of your vertical supports and horizontal shelf lines on the pantry walls. Use a level to ensure all lines are perfectly straight. Locate wall studs with a stud finder and mark them, as you’ll want to attach your supports directly into these for maximum strength.
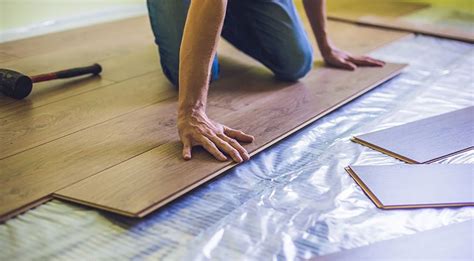
Step 2: Cut Your Lumber
Cut your vertical supports to the desired height of your shelving unit. Then, cut your horizontal shelf boards to the correct length (width of your pantry minus any space for end supports). If using plywood, cut it into the desired shelf depths and widths. Label your pieces to avoid confusion.

Step 3: Assemble the Shelf Frames (Optional for Standalone) or Attach Supports
If building a freestanding unit, assemble the side frames first, then attach the horizontal supports for the shelves. For wall-mounted shelves, begin by attaching your vertical support cleats to the wall, screwing them directly into the studs. Use at least two screws per stud. Ensure these are perfectly plumb.

Step 4: Secure the Shelves
Rest your cut shelf boards on the horizontal cleats or supports. For wall-mounted designs, you might use additional cleats running the depth of the shelf from the back wall, or simply screw the shelf boards directly into the vertical supports and wall cleats from above. Pre-drill pilot holes to prevent wood splitting. Use several screws along each support point for maximum stability.
Step 5: Reinforce and Finish
For extremely heavy loads or long spans, consider adding additional reinforcement. This could include diagonal braces underneath shelves, or a front lip on shelves made from 1×2 lumber to prevent sagging. Once all shelves are securely in place, sand any rough edges to prevent splinters. Apply a durable finish, such as polyurethane, to protect the wood from moisture and make cleaning easier.
Maximizing Your New Pantry Space
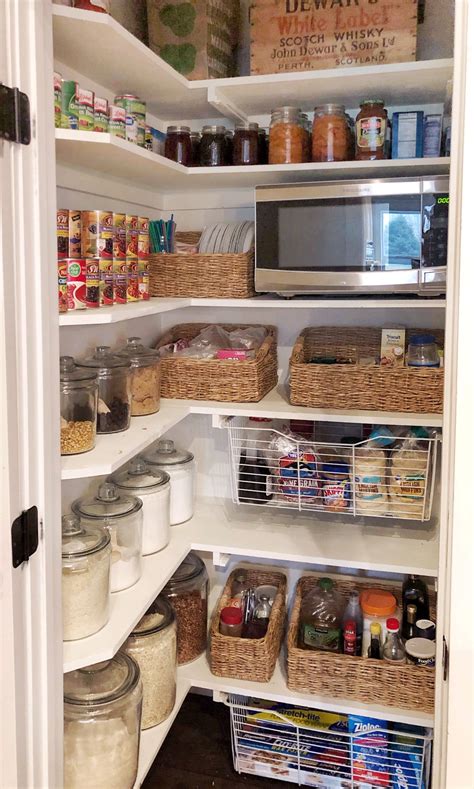
With your new sturdy shelves in place, it’s time to organize! Arrange your canning jars by type, date, or ingredient for easy access. Consider adding labels to the front of each shelf or the jars themselves. Deeper shelves are excellent for multiple rows of jars, while shallower shelves can be used for smaller items or frequently accessed preserves.
Safety First
Always ensure your shelving unit is anchored to the wall, especially if it’s tall or heavy. This prevents tipping, a serious safety concern. When loading shelves, distribute weight evenly. Regularly check screws and joints for any signs of loosening, and tighten as needed.

Building your own sturdy pantry shelves for canning jars and homemade preserves is a rewarding project that pays dividends in organization, safety, and functionality. Enjoy your beautifully organized pantry and the bounty of your hard work!


