


Durable DIY garden fence to keep farm critters out of your vegetables?

Protect Your Harvest: Building a Durable DIY Garden Fence
There’s nothing more frustrating for a home gardener than seeing their hard work devoured by hungry farm critters. Whether it’s deer nibbling on your lettuce, rabbits munching on carrots, or chickens scratching up your newly planted seedlings, an effective barrier is crucial. Building a durable DIY garden fence not only provides robust protection but also offers the satisfaction of a job well done, tailored specifically to your garden’s needs and aesthetic preferences.
Before you dig your first post hole, a well-thought-out plan is essential. Start by identifying the main culprits. Are you battling small burrowing animals like rabbits and groundhogs, or larger jumpers like deer? This will dictate the height of your fence, whether you need an underground barrier, and the type of materials required. Consider the size and layout of your garden as well, ensuring easy access for you while creating an impenetrable fortress for pests.
Choosing the Right Materials for Longevity
Durability is key when constructing a critter-proof fence. For posts, pressure-treated lumber (rated for ground contact), metal T-posts, or even sturdy cedar posts are excellent choices. T-posts are cost-effective and easy to install, while wooden posts offer a more traditional, aesthetic appeal. For the fencing material itself, options range from welded wire mesh, chicken wire, hardware cloth, or even electric netting for persistent pests.
- Welded Wire Mesh: Strong and long-lasting, ideal for various animals.
- Hardware Cloth: Tightly woven, perfect for small animals like voles and mice, often used for underground barriers.
- Chicken Wire: Economical for smaller animals, but less durable and prone to rust.
- Deer Netting: Tall and lightweight, effective for deer but needs sturdy posts.
Select materials that can withstand your local climate and potential critter pressure. Galvanized or vinyl-coated options offer superior rust resistance and longevity.

Step-by-Step Construction Guide
1. Layout and Site Preparation
Mark out the perimeter of your garden using stakes and string. Clear any vegetation or debris from the fence line. Ensure the ground is relatively level, making installation much easier. Dig post holes according to your chosen post type and recommended depth (typically 1/3 of the post’s height should be underground, plus extra for concrete if using).
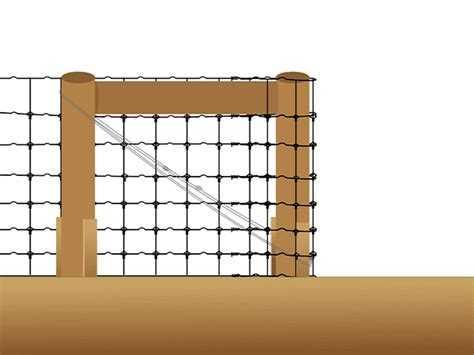
2. Setting the Posts
Install your corner posts first, ensuring they are plumb and well-anchored. For wooden posts, setting them in concrete will significantly increase stability and durability. For T-posts, a post driver makes quick work of installation. Space intermediate posts evenly along the fence line, typically 6-10 feet apart, depending on the fence material’s rigidity and the terrain.

3. Attaching the Fencing Material
Start at a corner post and securely attach your chosen fencing material. For welded wire or hardware cloth, use heavy-duty staples for wooden posts or wire clips for T-posts. Pull the material taut as you go, ensuring there are no slack areas that critters could exploit. Overlap sections slightly when connecting new rolls to maintain a seamless barrier.
If you’re dealing with burrowing animals, extend the fencing material 6-12 inches underground, bending it outwards at a 90-degree angle to create an “L-footer.” This prevents animals from digging underneath the fence.
4. Installing a Gate
A sturdy, well-fitting gate is crucial for easy access and security. Construct a simple wooden gate frame that matches the height of your fence, then cover it with the same fencing material. Use durable hinges and a reliable latch that cannot be easily opened by clever animals. Ensure the gate swings freely without leaving gaps at the bottom or sides.
Critter-Proofing and Maintenance for Long-Term Success
Once your fence is up, walk around the perimeter to inspect for any potential weak points. Address any gaps, loose sections, or areas where animals might squeeze through. For persistent climbers, consider adding an outward-sloping top section or even a single strand of electric wire along the top. For deer, a double-fence system or angled fence can be highly effective.
Regular maintenance will ensure your fence remains effective for years. Check posts for stability, repair any damaged sections of mesh, and ensure your gate latch is still secure. Clear vegetation away from the fence line to prevent animals from using it as a climbing aid or hiding spot. A well-maintained fence is your best defense against garden invaders.

Enjoy Your Protected Harvest
Investing the time and effort into building a durable DIY garden fence will pay dividends in protected harvests and peace of mind. Not only will you keep hungry farm critters out, but you’ll also add a valuable, long-lasting structure to your garden landscape. With careful planning and solid construction, your vegetables can thrive, unmolested by the local wildlife.


