Easiest beginner canning method for excess garden produce, safely?

Preserving Your Harvest: The Beginner-Friendly Way
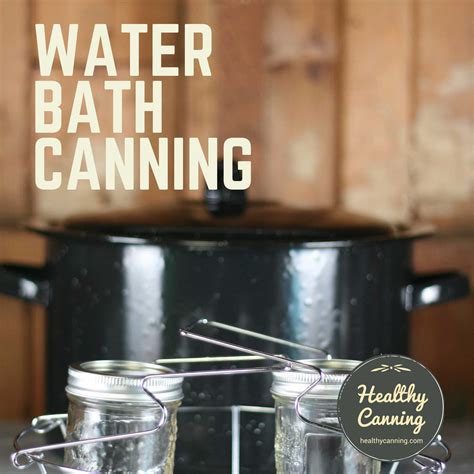
As summer ripens and garden beds overflow, many home growers find themselves with a delightful dilemma: what to do with all that produce? While fresh eating is a joy, canning offers a fantastic solution to extend the bounty well into the colder months. For those new to the art of food preservation, the prospect of canning can seem daunting, riddled with rules and safety concerns. Fear not! There’s a method that is not only incredibly accessible for beginners but also perfectly safe when done correctly: water bath canning.
Understanding Water Bath Canning: High-Acid Heroes
Water bath canning is the go-to method for preserving high-acid foods. This includes most fruits (berries, peaches, apples), jams, jellies, fruit butters, pickles, relishes, and tomatoes (especially when acidified with lemon juice or citric acid). The high acidity, combined with proper heat processing, creates an environment where harmful bacteria like Clostridium botulinum cannot thrive.
The process involves submerging sealed jars of food in boiling water for a specific period. This heat pasteurizes the food, creates a vacuum seal as the jars cool, and ensures the destruction of molds, yeasts, and other spoilage microorganisms that can survive in high-acid conditions.
Essential Equipment for Safe Water Bath Canning
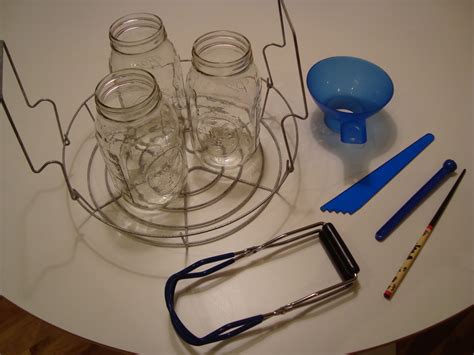
You don’t need a professional kitchen to start canning. A few key pieces of equipment will get you going:
- Large Pot with Rack: A pot deep enough to cover your jars by at least an inch of water, with a rack to keep jars off the bottom and prevent breakage.
- Canning Jars with Lids and Bands: Always use new lids, and ensure jars are free of cracks or chips. Bands can be reused.
- Jar Lifter: Essential for safely placing hot jars into and removing them from boiling water.
- Funnel: Helps keep jar rims clean when filling.
- Headspace Tool/Ruler: Crucial for measuring the empty space at the top of the jar.
- Bubble Remover/Non-metallic Spatula: To release trapped air bubbles from food in jars.
- Timer: Accuracy is key for processing times.
Step-by-Step Guide to Water Bath Canning
- Prepare Your Produce & Recipe: Wash and prepare your fruits or vegetables according to a tested, reliable recipe (e.g., from USDA, university extension offices, or reputable canning books).
- Sterilize Jars (if necessary): For processing times under 10 minutes, jars should be sterilized by boiling for 10 minutes. For longer processing, simply wash and keep jars hot.
- Fill Jars: Carefully fill hot jars with your prepared food, leaving the recommended headspace (usually 1/4 to 1/2 inch, specified by your recipe). Use the funnel to keep rims clean.
- Remove Air Bubbles: Insert a non-metallic spatula or bubble remover tool between the food and the jar, gently moving it around to release trapped air. Adjust headspace if needed.
- Clean Rims & Seal: Wipe jar rims thoroughly with a clean, damp cloth to remove any food residue. Place new, pre-warmed lids on the jars and screw on bands finger-tight (until resistance is met, then a slight turn more).
- Process: Place jars on the rack in your canning pot. Add hot water to cover jars by at least 1-2 inches. Bring water to a rolling boil and begin timing according to your recipe and altitude adjustments.
- Cool & Check Seals: Once processing is complete, turn off the heat and let jars sit in the hot water for 5 minutes (optional, but recommended by some). Remove jars with the jar lifter and place them on a towel-lined counter, spaced apart, to cool undisturbed for 12-24 hours. Do not retighten bands. After cooling, check seals: the lid should be concave and not flex when pressed.
Crucial Safety Tips for Beginners
- Always Use Tested Recipes: Never guess processing times or ingredients. Stick to recipes from trusted sources like the USDA National Center for Home Food Preservation, university extension offices, or current Ball/Kerr canning guides.
- Mind Headspace: Incorrect headspace can lead to seal failures or spoilage.
- Process Correctly: Ensure water is at a full rolling boil for the entire processing time. Adjust processing times for higher altitudes.
- Check Seals Thoroughly: A good seal is crucial for safety and shelf-stability. If a jar doesn’t seal, refrigerate and consume within a few days or reprocess within 24 hours with a new lid.
- Store Properly: Store sealed jars in a cool, dark, dry place without the bands (to prevent false seals and allow you to easily spot spoilage).
What to Can First: Ideal Beginner Projects
Start with simple, forgiving recipes to build confidence. Great options include:
- Jams and Jellies: Berry jams (strawberry, raspberry) are often simple and delicious.
- Pickles: Dill pickles or bread-and-butter pickles from cucumbers are very popular.
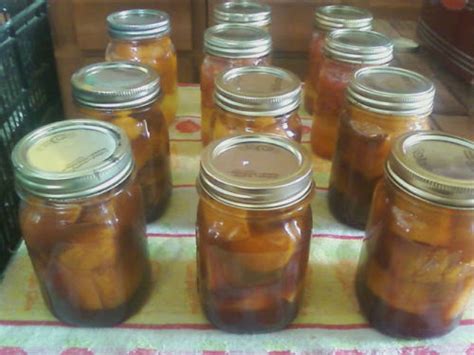
- Canned Peaches or Pears: These fruits are excellent for beginners, often canned in a light syrup or juice.
- Salsa with Added Acid: Many beginner-friendly salsa recipes are designed for water bath canning.
With a little preparation and adherence to safety guidelines, water bath canning is an incredibly rewarding skill that allows you to enjoy your garden’s bounty all year long. Embrace the journey, experiment with flavors, and soon your pantry shelves will be gleaming with delicious, homemade preserves.