


Easiest way to safely can summer garden tomatoes for winter use?

Unlock Summer Flavor: Your Simple Guide to Canning Tomatoes
As summer gardens burst with ripe, juicy tomatoes, many home cooks dream of preserving that peak flavor for colder months. Canning tomatoes can seem daunting, but with the right approach, it’s one of the most rewarding ways to enjoy your harvest all year long. The ‘easiest’ safe method for most tomato products is water bath canning, provided you follow crucial acidification steps.
Why Water Bath Canning is Your Best Bet for Tomatoes
Water bath canning is simpler than pressure canning and is perfectly safe for high-acid foods. While tomatoes were once considered high-acid enough on their own, modern varieties can vary in acidity, making acidification a mandatory step for safety. This prevents the growth of harmful bacteria like Clostridium botulinum.

Essential Equipment You’ll Need
- Canning Pot with Rack: A large pot with a lid and a rack to keep jars off the bottom.
- Canning Jars: Mason jars with new lids and bands (lids are single-use).
- Jar Lifter: Essential for safely placing and removing hot jars.
- Funnel: Helps prevent spills when filling jars.
- Bubble Remover/Headspace Tool: A non-metallic utensil to remove air bubbles and measure headspace.
- Acid Source: Bottled lemon juice or citric acid.
- Large Pot: For blanching tomatoes.
- Sharp Knife and Cutting Board: For preparation.
Step-by-Step: Safely Canning Whole or Diced Tomatoes
Step 1: Prepare Your Tomatoes
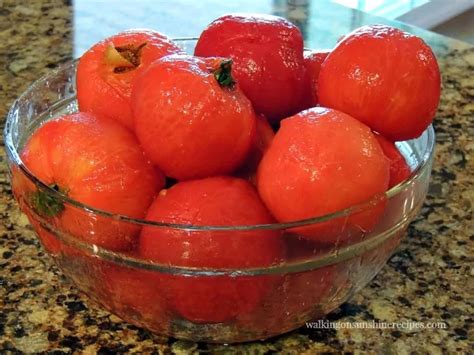
Choose ripe, blemish-free tomatoes. Wash them thoroughly. To easily peel tomatoes, score an ‘X’ on the bottom of each and blanch them in boiling water for 30-60 seconds, then immediately transfer to an ice bath. The skins should slip off easily. Core the tomatoes and remove any green spots. You can leave them whole, halve them, or dice them.
Step 2: Prepare Your Jars and Canner
Wash jars, lids, and bands in hot, soapy water. While sterilization isn’t strictly necessary if processing for 10 minutes or more (as the canning process itself sterilizes), it’s good practice to keep jars hot to prevent thermal shock when filling. Keep lids hot in a small saucepan of simmering water (do not boil). Fill your canning pot with water and bring it to a simmer.
Step 3: Acidify and Fill Jars
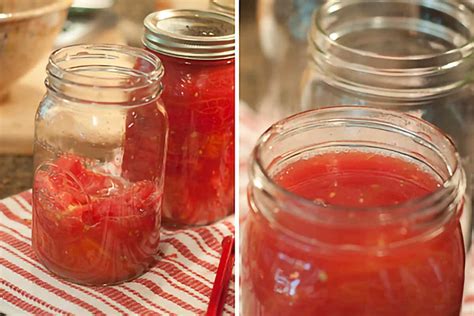
This is the most critical safety step. For pint jars, add 1 tablespoon of bottled lemon juice or 1/4 teaspoon of citric acid directly to each jar. For quart jars, add 2 tablespoons of bottled lemon juice or 1/2 teaspoon of citric acid. You can add 1/2 teaspoon of salt per pint or 1 teaspoon per quart for flavor, but it is optional and not for preservation.
Pack your prepared tomatoes tightly into the jars, leaving 1/2 inch of headspace (the space between the food and the rim of the jar). If hot-packing, you can add hot water to cover, leaving 1/2 inch headspace. Use your bubble remover tool to dislodge any air bubbles, then adjust headspace if necessary. Wipe jar rims clean with a damp cloth, center a hot lid on each jar, and screw on the band fingertip-tight.
Step 4: Process in the Water Bath Canner
Carefully lower the filled jars onto the rack in the simmering canning pot. Ensure the water level covers the tops of the jars by at least 1-2 inches. Cover the canner and bring the water to a rolling boil. Once boiling, start your timer.
- Pints: Process for 35 minutes
- Quarts: Process for 45 minutes
Adjust processing time for your altitude if necessary (refer to a reliable canning guide).
Step 5: Cool and Store
Once the processing time is complete, turn off the heat and remove the canner lid. Let the jars sit in the hot water for 5 minutes before carefully removing them with the jar lifter. Place jars on a towel-lined counter or cooling rack, ensuring they are not touching each other, and allow them to cool undisturbed for 12-24 hours. Do not tighten bands.
As they cool, you’ll hear reassuring ‘ping’ sounds as the lids seal. After 24 hours, check for seals by pressing the center of each lid. If it doesn’t flex, it’s sealed. Remove the bands, wipe down the jars, label them with the contents and date, and store in a cool, dark place. Unsealed jars must be refrigerated and consumed within a few days.

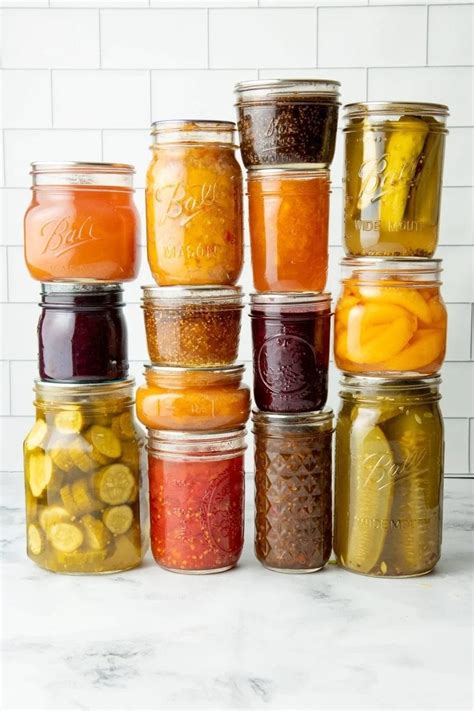
By following these steps, you can safely and easily preserve the vibrant taste of summer tomatoes, ensuring a delicious supply for your winter soups, sauces, and stews!


