


Easy DIY beeswax wrap recipe for food storage?

Crafting Your Own Eco-Friendly Food Wraps
In a world increasingly conscious of its environmental footprint, finding sustainable alternatives to everyday items has become a priority for many. One popular and incredibly effective swap is the beeswax food wrap. These reusable wraps offer a fantastic, natural alternative to plastic cling film and aluminum foil, helping to reduce waste and keep your food fresh. While readily available for purchase, making your own beeswax wraps is a rewarding DIY project that’s both simple and cost-effective. Plus, you get to customize them with your favorite fabric patterns!

Why Go DIY with Beeswax Wraps?
Beyond the satisfaction of creating something with your own hands, crafting your beeswax wraps allows for complete control over the materials used. You can choose organic cotton, specific beeswax types, and even adjust the oil content for different levels of flexibility. It’s a fun weekend project that quickly pays dividends in your kitchen’s sustainability efforts.
Essential Materials and Tools
Gathering your supplies is the first step to creating these wonderful food savers. You’ll likely find most of these items at a local craft store or online.
- Cotton Fabric: Choose 100% cotton fabric in various sizes, pre-washed and dried. Old cotton shirts, pillowcases, or sheets work great!
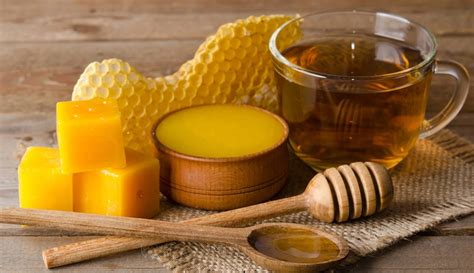
- Beeswax Pellets or Block: Food-grade beeswax is ideal. Pellets are easier to work with.
- Jojoba Oil (Optional): A small amount adds flexibility and helps prevent cracking.
- Pine Rosin (Optional): Also known as colophony, a tiny amount makes the wraps tackier, helping them adhere better. Use sparingly.
- Baking Sheet: To protect your work surface and contain melted wax.
- Parchment Paper or Aluminum Foil: To line the baking sheet.
- Oven or Iron: For melting the wax.
- Brush (Natural Bristle): For spreading the wax mixture evenly (dedicated for this project).
- Clothesline or Drying Rack: For air-drying the wraps.
- Pinking Shears (Optional): To prevent fabric fraying.
Step-by-Step Guide to Making Your Wraps
1. Prepare Your Fabric
First, cut your cotton fabric into desired sizes. Common sizes include small (6×6 inches for snacks), medium (10×10 inches for bowls/sandwiches), and large (13×13 inches for larger dishes/bread). If you have pinking shears, use them to cut the edges to minimize fraying. Wash and thoroughly dry all fabric pieces before starting.

2. Grate Beeswax and Mix (if using additions)
If using a beeswax block, grate it into small pieces. If using pellets, you’re good to go. For a standard 10×10 inch wrap, you’ll need about 1-2 tablespoons of beeswax. If adding jojoba oil or pine rosin, mix them with the beeswax pellets/grated wax in a bowl (e.g., 1 teaspoon jojoba oil and a pinch of pine rosin per cup of beeswax pellets, adjust as needed).
3. Choose Your Melting Method: Oven or Iron
Oven Method:
- Preheat your oven to its lowest setting, typically around 150-200°F (65-95°C).
- Line a baking sheet with parchment paper.
- Place a single piece of fabric flat on the parchment paper.
- Evenly sprinkle your beeswax mixture over the fabric. Don’t overdo it; you can always add more.
- Place the baking sheet in the oven for 3-5 minutes, or until the wax is completely melted and glossy.
- Carefully remove the sheet. Using your dedicated brush, quickly spread any melted wax that hasn’t absorbed evenly to cover the entire fabric.
- If there are dry spots, sprinkle a bit more wax and pop it back in the oven for a minute. If there’s excess wax, gently blot it with another piece of fabric (you can reuse this fabric later for another wrap).
Iron Method:
- Cover your ironing board with old towels or a dedicated ironing cloth you don’t mind getting waxy.
- Place a piece of parchment paper on top of the protective layer.
- Lay your fabric flat on the parchment paper.
- Sprinkle beeswax mixture evenly over the fabric.
- Place another piece of parchment paper over the fabric and wax.
- Set your iron to a medium-low heat (no steam). Gently press and move the iron over the top parchment paper until the wax melts and spreads evenly. You’ll see the fabric darken as it absorbs the wax.
- Lift the top parchment paper carefully. If there are dry spots, add more wax and repeat. If there’s excess, blot with another piece of fabric.
4. Dry and Cure
Once your wrap is fully saturated and smooth, carefully peel it off the parchment paper. It will be pliable and sticky. Hang it to dry for a few minutes until it’s cool and firm to the touch. A clothesline with clothespins works perfectly. As it cools, it will harden and become less sticky.
Using and Caring for Your Beeswax Wraps
Your new beeswax wraps are ready for action! Use the warmth of your hands to mold the wrap around bowls, sandwiches, fruits, or vegetables. The wax will soften slightly from your body heat, allowing it to adhere to itself or the container, creating a breathable seal.
- To Clean: Wash gently with cool water and a mild dish soap. Avoid hot water, as it will melt the wax.
- To Dry: Air dry on a drying rack or clothesline.
- What to Avoid: Don’t use them with raw meat, extremely hot food, or in the microwave.
- Longevity: With proper care, your beeswax wraps can last for up to a year or even longer. When they start to lose their tackiness, you can “re-wax” them using the same method.
![How to Clean Beeswax Off Every Surface? [A Step-By-Step Guide]](/images/aHR0cHM6Ly90czMubW0uYmluZy5uZXQvdGg/aWQ9T0lQLjF4MDhNVS1UYUhKWXFEazBzUDc5OVFIYUU3JnBpZD0xNS4x.webp)
Embrace Sustainable Food Storage
Making your own beeswax wraps is a delightful and practical way to contribute to a greener planet. They are an attractive, breathable, and reusable alternative to plastic, keeping your food fresh naturally. Experiment with different fabrics and personalize your kitchen with these charming, eco-conscious wraps. You’ll not only save money but also reduce your reliance on single-use plastics, one wrap at a time.


