


Easy DIY compost recipes for nutrient-rich backyard garden soil?
Unlock Your Garden’s Potential with Homemade Compost
Transforming kitchen scraps and yard waste into nutrient-rich compost is one of the most rewarding and sustainable practices for any home gardener. Not only does it divert waste from landfills, but it also creates a powerful, organic soil amendment that can supercharge your garden’s health, improve soil structure, and reduce the need for chemical fertilizers. Making your own compost is surprisingly easy, and with a few simple recipes, you can start producing black gold for your backyard in no time.

The Essential Ingredients: Browns, Greens, Air, and Water
Successful composting hinges on a balanced mix of ‘brown’ (carbon-rich) and ‘green’ (nitrogen-rich) materials, along with adequate air circulation and moisture. Think of it as a recipe for a microbial feast: the microorganisms need both energy (carbon) and protein (nitrogen) to break down organic matter efficiently.
- Browns: These are dry, carbon-rich materials like dried leaves, straw, wood chips, shredded newspaper, cardboard, and sawdust. They provide bulk and aeration.
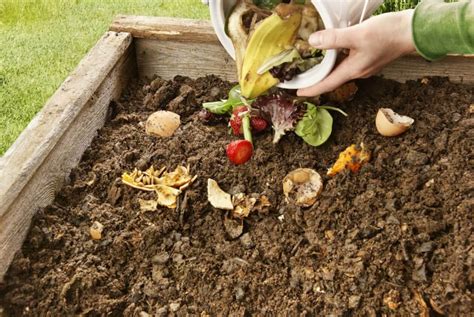
- Greens: These are moist, nitrogen-rich materials such as grass clippings, kitchen scraps (fruit and vegetable peels, coffee grounds, tea bags), fresh plant trimmings, and manure. They provide the necessary nitrogen to fuel decomposition.
- Air: Microbes need oxygen! Turning your compost pile regularly ensures good airflow, preventing odors and speeding up the process.
- Water: The pile should be consistently moist, like a wrung-out sponge, to support microbial activity.
Recipe 1: The Balanced Kitchen and Yard Waste Blend
This is the most common and versatile composting method, ideal for most home gardeners with a steady supply of kitchen and yard waste.
Ingredients:
- 2 parts brown materials (e.g., dry leaves, shredded cardboard)
- 1 part green materials (e.g., kitchen scraps, grass clippings)
Method:
- Start with a Base: Lay down a 4-6 inch layer of coarse brown material (like twigs or straw) at the bottom of your compost bin or pile to ensure good drainage and aeration.
- Layer It Up: Alternate layers of brown and green materials. A good ratio is roughly two parts browns to one part greens. For example, a layer of dried leaves, then a layer of kitchen scraps, followed by a thin layer of soil or finished compost (to introduce microbes).
- Moisten: Lightly water each layer as you add it, ensuring the pile remains damp but not soggy.
- Turn Regularly: Once a week, use a pitchfork to turn the entire pile, mixing the layers and aerating the material. This speeds up decomposition.
- Maintain: Continue adding materials as they become available. Your compost should be ready in 2-4 months, depending on conditions and consistency of turning.
Recipe 2: The Easy Lasagna Layering Method (No-Turn Compost)
Perfect for those who prefer a more hands-off approach, this method builds a compost bed directly on the ground, creating a rich soil layer over time without much turning.
Ingredients:
- Abundance of brown materials (cardboard, newspaper, leaves)
- Various green materials (grass clippings, kitchen scraps, fresh weeds)
- Optional: thin layers of soil or manure
Method:
- Prepare Your Spot: Choose a garden bed or an area where you want to build new soil. You can start directly on grass or bare soil.
- First Layer: Lay down a thick layer of wet cardboard or several layers of wet newspaper (remove tape and labels). This smothers weeds and creates a good base.
- Alternate Layers: Begin layering browns and greens, much like a lasagna. Aim for thicker layers (6-12 inches) compared to the standard method. For instance, a thick layer of dry leaves, followed by a layer of grass clippings, then a layer of kitchen scraps, possibly a sprinkle of soil or manure, then another brown layer.
- Keep it Moist: Water each layer thoroughly as you build, ensuring everything is damp.
- Let it Break Down: The beauty of this method is that it requires minimal to no turning. Over several months, the layers will slowly decompose, enriching the soil beneath. You can plant directly into the top layers once they start breaking down.

Recipe 3: Accelerating the Process with Hot Composting
If you’re looking for faster results, hot composting aims to create an environment where decomposition happens rapidly, often producing finished compost in a matter of weeks.
Ingredients:
- Equal parts (by volume) brown and green materials, shredded or chopped into small pieces.
- Sufficient volume to create a critical mass (at least 3x3x3 feet).
Method:
- Collect and Prep: Gather a large amount of materials all at once. Chop or shred everything into smaller pieces (1-2 inches) to increase surface area for microbes.
- Build the Pile: Construct a pile at least 3x3x3 feet. Layer browns and greens roughly equally, ensuring a good mix.
- Moisten Thoroughly: Water the pile as you build it until it is uniformly moist.
- Monitor Temperature: The pile should heat up to 130-160°F (55-70°C) within a few days. Use a compost thermometer to check.
- Turn Frequently: This is crucial for hot composting. Turn the pile every 1-3 days, ensuring the outer material moves to the center. Re-moisten if it feels dry. The temperature will spike again after each turn.
- Finished Compost: When the pile no longer heats up after turning, and the material is dark, crumbly, and smells earthy, your compost is ready. This can happen in 3-6 weeks.
Tips for a Thriving Compost Pile
- What NOT to Compost: Avoid meat, dairy, oily foods, diseased plants, pet waste, and synthetic materials, as these can attract pests, cause odors, or introduce pathogens.
- Chop it Up: Smaller pieces break down faster.
- Keep it Moist: A pile that’s too dry won’t decompose. Too wet, and it becomes anaerobic and smelly.
- Aeration is Key: Turn your pile regularly or ensure good airflow in your bin.
- Patience is a Virtue: Composting takes time. Enjoy the process and the benefits it brings to your garden.

Enjoy Your Nutrient-Rich Garden
Whichever method you choose, starting a compost pile is a simple step towards a more sustainable home and a more vibrant garden. By following these easy DIY compost recipes, you’ll soon be harvesting your own ‘black gold,’ providing your plants with the essential nutrients they need to thrive and flourish. Happy composting!


