


Easy DIY: How to build a robust compost bin from reclaimed pallet wood?

Embracing a more sustainable lifestyle often starts in our own backyards, and one of the most impactful steps you can take is to begin composting. Not only does it reduce household waste, but it also creates nutrient-rich soil for your garden. Building your own compost bin from reclaimed pallet wood is an economical, eco-friendly, and rewarding DIY project that even beginners can tackle. This guide will walk you through creating a robust and efficient compost bin, turning discarded pallets into a valuable asset for your garden.
Why Build a Compost Bin from Pallets?
Using reclaimed pallet wood is an excellent choice for a compost bin for several reasons. Firstly, it’s incredibly cost-effective – pallets are often available for free from local businesses. Secondly, it’s a fantastic way to upcycle material that might otherwise end up in a landfill, promoting sustainable practices. Pallets are also designed to be sturdy, making them ideal for a durable outdoor structure. Their inherent gaps also provide natural aeration, crucial for efficient composting.
Tools and Materials You’ll Need
Before you begin, gather the following:
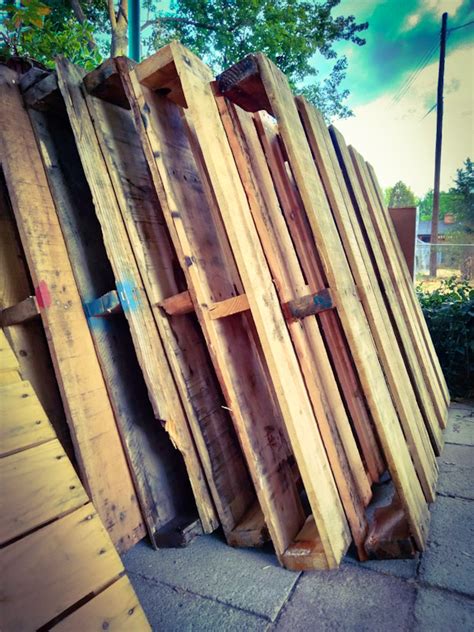
- 3-5 Heat-Treated (HT) Pallets: Look for the ‘HT’ stamp, indicating they are heat-treated, not chemically treated (MB – Methyl Bromide – should be avoided).
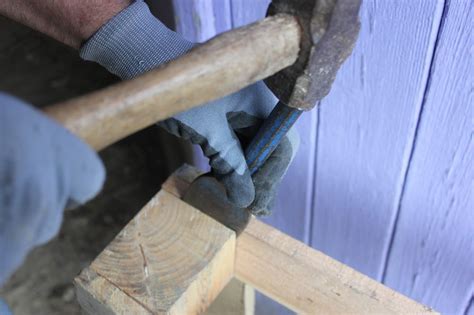
- Pry Bar or Pallet Buster: Essential for disassembling pallets.
- Hammer and Nails, or Drill and Screws: Exterior-grade screws (e.g., 2.5-3 inch deck screws) are recommended for durability.
- Saw: Hand saw, circular saw, or jigsaw for cutting wood.
- Measuring Tape and Pencil: For accurate measurements.
- Safety Gear: Gloves, safety glasses, and sturdy footwear.
- Optional: Sandpaper, wood preservative (non-toxic), hinges for a lid.
Step 1: Safely Deconstruct Your Pallets
This is often the most challenging part. Pallets are designed to be tough, so take your time and use appropriate tools. A pallet buster makes the job much easier, but a pry bar and hammer can also work. The goal is to separate the deck boards from the stringers (the thicker support beams) with as little damage as possible to the individual pieces of wood. Be mindful of nails and splinters.
Step 2: Design and Cut Your Components
Decide on the size of your compost bin. A common size is about 3 feet by 3 feet by 3 feet, which is manageable and efficient. You’ll need four corner posts (e.g., from the pallet stringers, about 3 feet long) and numerous slats (the deck boards) for the sides. Cut your chosen pieces to uniform lengths. You might also want to designate some thicker pieces for a base if you want to lift it off the ground slightly.
Step 3: Assemble the Frame
Begin by constructing the four corner posts. You can use two of the thicker stringer pieces for each corner, forming an ‘L’ shape for added stability. Alternatively, use a single sturdy post for each corner. Once your corner posts are ready, connect them with horizontal slats to form the top and bottom of your four walls. Ensure the frame is square and level before securing. This initial frame will provide the structure for your entire bin.

Step 4: Attach the Side Slats
Starting from the bottom, attach the pallet deck boards horizontally to your frame. Leave small gaps (around 1/2 to 1 inch) between the slats to allow for air circulation, which is vital for aerobic decomposition. You can build all four sides completely, or you might consider making one side (usually the front) partially removable for easier turning and emptying of compost. This can be achieved by using hooks and eyelets, or by simply slotting the front slats between two vertical posts.
Step 5: Create a Lid (Optional but Recommended)
A lid helps retain moisture, keeps out pests, and prevents the compost from getting waterlogged in heavy rain. A simple lid can be constructed by creating a square frame from pallet wood and attaching slats to it. You can either let it rest on top of the bin or attach it with hinges to one of the back walls for easier access. Ensure it’s slightly larger than the top opening to provide adequate cover.
Step 6: Finishing Touches and Placement
Once assembled, sand down any rough edges or splinters. While optional, you can treat the wood with a non-toxic, eco-friendly wood preservative to extend its lifespan, though untreated pallet wood will naturally break down over time. Choose a well-drained, shaded spot in your garden for your new compost bin, away from direct sunlight to prevent drying out. Ensure it’s easily accessible for adding materials and turning.
Tips for Effective Composting
- Balance Green and Brown: Aim for a good mix of ‘greens’ (nitrogen-rich, like food scraps, grass clippings) and ‘browns’ (carbon-rich, like dry leaves, wood chips, shredded paper).
- Keep it Moist: The compost pile should feel like a wrung-out sponge. Add water if it’s too dry, or ‘brown’ materials if it’s too wet.
- Turn Regularly: Aerate your pile every week or two to speed up decomposition and prevent odors.
- Avoid Certain Items: Do not compost meat, dairy, oily foods, or diseased plants, as these can attract pests and slow the process.

Conclusion
Building a robust compost bin from reclaimed pallet wood is a fulfilling project that contributes significantly to both your garden’s health and the planet’s well-being. With a little effort and basic tools, you can transform discarded materials into a functional and attractive addition to your outdoor space. Get ready to enjoy the benefits of homemade compost and the satisfaction of a successful DIY endeavor!
