Easy DIY plans for a rustic outdoor compost bin using repurposed materials?

Embrace Sustainable Gardening with a DIY Compost Bin
Composting is a cornerstone of sustainable gardening, transforming kitchen scraps and yard waste into valuable organic matter that enriches your soil. Building your own compost bin doesn’t have to be complicated or expensive. In fact, by using repurposed materials, you can create a charmingly rustic and highly functional bin that perfectly complements your outdoor space while keeping waste out of landfills. Let’s dive into some easy DIY plans for an eco-friendly composting solution.
Why Go Rustic & Repurposed for Composting?
Opting for repurposed materials not only saves money but also reduces your environmental footprint. Instead of buying new lumber or plastic bins, you’re giving a second life to items that might otherwise be discarded. A rustic design blends seamlessly with natural garden aesthetics, adding character rather than an industrial look. Plus, many repurposed materials, like old pallets or fencing, are surprisingly durable and well-suited for outdoor use.
Gathering Your Repurposed Treasures
The beauty of building with repurposed materials is the flexibility. Look around your home, ask friends, or check local online marketplaces for these common items:
- Wooden Pallets: Often available for free from businesses. They’re sturdy and already have gaps for aeration.
- Scrap Lumber: Leftover planks, fence panels, or old deck wood.
- Chicken Wire or Hardware Cloth: Great for creating breathable sides.
- Old Tires: Stackable and durable, though less common for traditional bins.
- Cinder Blocks or Bricks: Can form a sturdy, long-lasting base or sides.
- Fasteners: Nails, screws, zip ties, or heavy-duty wire – use what you have.
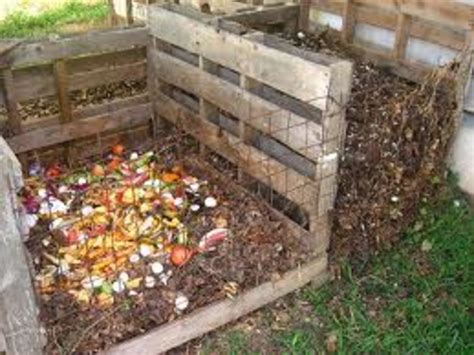
Simple DIY Plan: The Three-Sided Pallet Bin
A three-sided pallet bin is one of the easiest and most popular designs. It offers good airflow and allows for easy access to turn your compost. For this project, you’ll ideally need 3-4 standard wooden pallets of similar size, plus some additional wood or metal for reinforcement if desired.
Step 1: Planning and Preparation
Choose a level spot in your garden that is easily accessible but not directly in a high-traffic area. Ensure it gets some sun to help with decomposition but isn’t scorching hot all day, which can dry out the pile. Clear any debris and measure your pallets. You might need a saw to adjust their height or width if you want a specific size, but often they can be used as-is.
Step 2: Assembling the Structure
Stand two pallets upright to form a corner. Secure them together using sturdy screws, bolts, or heavy-duty zip ties. If using screws, pre-drill holes to prevent splitting. Repeat this with the third pallet to form the third side, creating a ‘U’ shape. The open front allows for easy loading and turning. For extra stability, you can add corner braces made from scrap wood or metal.

Step 3: Securing and Finishing Touches
Once your three sides are joined, give the structure a gentle shake to test its stability. If it feels wobbly, add more fasteners or bracing. You can choose to leave the front open or attach a fourth pallet with hinges to create a door, or simply use removable boards that slide into place. Consider lining the inside with chicken wire to keep smaller materials from falling out, especially if the pallet gaps are wide. For a truly rustic look, you can leave the wood unfinished or apply a non-toxic, eco-friendly sealant to prolong its life.

Alternative Repurposed Ideas
- Wire Mesh Cylinder: Simple and quick. Form a cylinder with chicken wire or hardware cloth, securing the ends. Very good airflow.
- Cinder Block Hexagon: Stack cinder blocks in a hexagonal or square shape. Offers excellent durability and heat retention.
- Stacked Tires: Drill holes in old tires for drainage and stack them up. Not ideal for a large volume but good for small spaces.
Compost Bin Care and Usage Tips
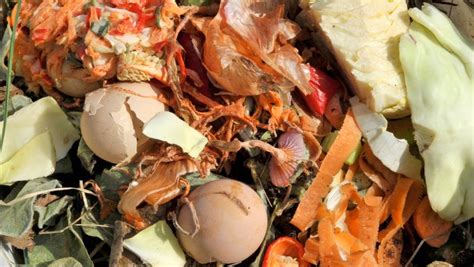
Now that your rustic compost bin is ready, it’s time to put it to use! Remember the ‘greens and browns’ rule: a good mix of nitrogen-rich ‘greens’ (fruit/veg scraps, grass clippings) and carbon-rich ‘browns’ (leaves, wood chips, shredded paper) is key. Keep the pile moist like a wrung-out sponge, and turn it regularly to aerate it and speed up decomposition. Avoid adding meat, dairy, or oily foods, as these can attract pests and slow down the process.
Conclusion
Building a rustic outdoor compost bin from repurposed materials is a rewarding project that benefits both your garden and the environment. It’s a tangible step towards reducing waste, enriching your soil naturally, and fostering a more sustainable lifestyle. With these easy plans, you’ll be well on your way to harvesting nutrient-dense compost and enjoying a healthier, more vibrant garden space in no time!