


Easy DIY project for converting old pallets into pantry shelving?
Revitalize Your Pantry: Upcycling Pallets for Storage
Is your pantry bursting at the seams, lacking proper organization, and feeling uninspired? Before you rush out to buy expensive shelving units, consider a sustainable and budget-friendly alternative: old wooden pallets! This easy DIY project not only helps you create custom storage solutions but also gives discarded materials a new lease on life. Get ready to add character and functionality to your kitchen with rustic, sturdy, and entirely unique pantry shelves.
Why Pallets are Perfect for Pantry Shelving
Pallets are an incredible resource for DIY enthusiasts. They’re often free or very inexpensive, readily available, and made from durable wood, making them ideal for load-bearing structures like shelving. Repurposing pallets reduces waste, promotes sustainability, and allows you to create custom pieces tailored to your exact pantry dimensions. Plus, the distressed look of reclaimed wood adds a charming, rustic aesthetic that’s hard to achieve with new materials.
Gather Your Materials and Tools
Before you begin, ensure you have all the necessary items. Safety first: always wear appropriate personal protective equipment (PPE) like gloves and eye protection.
Materials:
- 2-3 standard wooden pallets (check for HT stamp – heat treated, not chemically treated)
- Wood screws (various lengths)
- Wood glue
- Sandpaper (medium and fine grit)
- Optional: Wood stain, paint, or sealer
- Optional: Wall anchors/mounting hardware if attaching to a wall
Tools:
- Pry bar or pallet buster
- Hammer
- Saw (hand saw, circular saw, or jigsaw)
- Drill with various bits
- Measuring tape
- Pencil
- Spirit level
- Safety glasses and work gloves
Step-by-Step Guide to Building Your Pallet Shelves
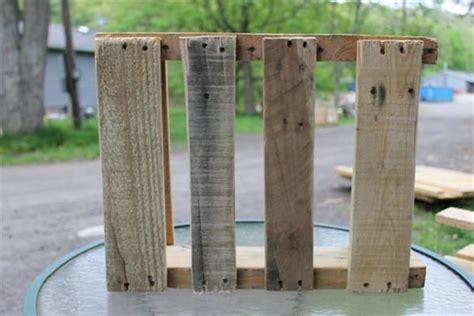
Step 1: Disassemble the Pallets
This is often the most challenging part. Use a pry bar or pallet buster to carefully separate the top and bottom deck boards from the stringers (the thicker support beams). Try to keep the boards intact as much as possible. Remove any nails and discard them safely. Inspect the wood for any damage or major splinters.
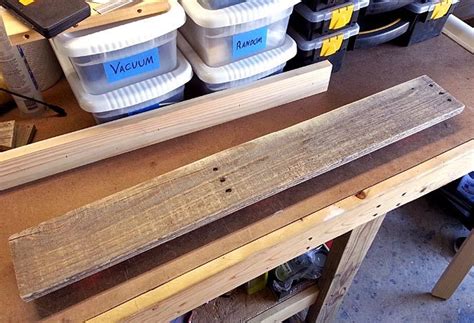
Step 2: Clean and Prepare the Wood
Once disassembled, clean your wood planks thoroughly. Use a stiff brush and soapy water to remove any dirt or grime. Let them dry completely. Once dry, sand all surfaces, especially edges and areas that will be handled frequently, starting with medium-grit sandpaper and finishing with fine-grit for a smooth finish. This step is crucial for safety and aesthetics.
Step 3: Measure and Cut Your Pieces
Determine the desired dimensions of your pantry shelves. Measure your pantry space carefully. You’ll need vertical support pieces (legs) and horizontal shelf boards. Cut your pallet planks to the appropriate lengths for your shelves and stringers for support. Remember to account for the thickness of the wood when planning your shelf heights.
Step 4: Assemble the Shelving Units
Start by creating the side frames. Take two vertical support pieces and attach horizontal shelf supports at your desired shelf heights using wood glue and screws. Pre-drilling pilot holes will prevent the wood from splitting. Once both side frames are built, attach your shelf boards to these frames. Ensure everything is square and level as you assemble each shelf.
Step 5: Finish and Install
Once assembled, you can choose to leave the wood natural for a rustic look, or apply a wood stain, paint, or clear sealer. A sealer will protect the wood from moisture and make it easier to clean, which is great for a pantry environment. Once the finish is dry, move your new shelving unit into your pantry. For added stability and safety, especially if your shelves will hold heavy items, consider securing them to the wall studs using appropriate mounting hardware.

Tips for Success
- Check Pallet Stamps: Always look for the “HT” (heat-treated) stamp on pallets. Avoid “MB” (methyl bromide) pallets, as they are chemically treated and not safe for indoor use.
- Safety First: Pallets can have hidden nails, splinters, and sharp edges. Wear heavy-duty gloves, eye protection, and closed-toe shoes.
- Measure Twice, Cut Once: Precision in measuring will save you time and material in the long run.
- Utilize Existing Space: Consider building shelves that fit perfectly into alcoves or against a specific wall in your pantry to maximize space.
Conclusion
Converting old pallets into pantry shelving is a rewarding DIY project that offers both practical benefits and a sense of accomplishment. Not only will you save money and contribute to a more sustainable lifestyle, but you’ll also end up with a beautifully organized pantry that reflects your unique style. So, roll up your sleeves, gather your tools, and embark on this eco-friendly adventure to transform your kitchen storage today!
