


Easy DIY project to build a simple composting system for kitchen scraps?

Transform Your Kitchen Scraps into Garden Gold with an Easy DIY Composter
Are you looking for a simple, eco-friendly way to reduce waste and enrich your garden soil? Building a basic composting system for your kitchen scraps is one of the easiest and most rewarding DIY projects you can undertake. Not only does it divert organic waste from landfills, but it also creates nutrient-rich compost that your plants will love. Forget complicated setups; we’ll guide you through constructing a straightforward system perfect for beginners.
Why Embrace Home Composting?
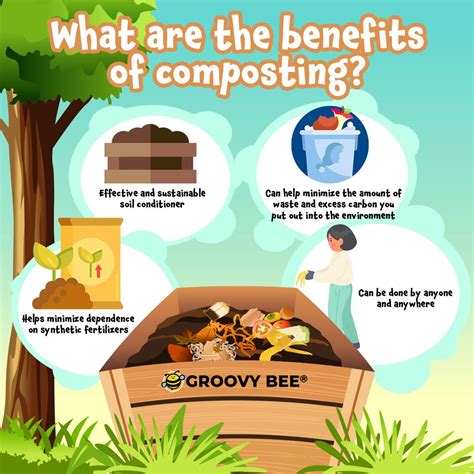
Composting isn’t just a trend; it’s a powerful practice with numerous benefits. For starters, it significantly reduces the amount of household waste sent to landfills, lowering your environmental footprint. Landfilled organic waste decomposes anaerobically, producing methane, a potent greenhouse gas. By composting, you help mitigate this issue.
Beyond waste reduction, composting provides your garden with invaluable “black gold.” This finished compost improves soil structure, enhances water retention, suppresses plant diseases, and delivers essential nutrients naturally, reducing the need for chemical fertilizers. It’s a win-win for both your home and the planet.
Choosing Your Simple Composting Method
While there are many types of composting systems, from tumblers to worm farms, a simple bin or pile is often the best starting point for kitchen scraps. For this DIY project, we’ll focus on creating an accessible, low-cost static bin that allows for easy turning and aeration, crucial for efficient decomposition.
What You’ll Need for Your DIY Composter
The beauty of a simple composting system is that it often requires minimal materials, many of which you might already have or can source cheaply. Here’s what you’ll typically need for a basic wooden pallet or wire mesh bin:
- Wooden Pallets (3-4) or Sturdy Wire Mesh: Pallets are often free from local businesses. If using mesh, choose one with openings small enough to contain scraps but large enough for air circulation (e.g., chicken wire or hardware cloth).
- Tools: Hammer, nails or screws (if using pallets), heavy-duty wire cutters and zip ties or hog rings (if using wire mesh), measuring tape.
- Gloves: To protect your hands during construction.
- Location: A level, well-drained spot in your yard, away from your house, preferably in a partially shaded area to prevent drying out.
Step-by-Step Guide to Building Your Composter
Let’s get started on building your very own kitchen scrap composter!
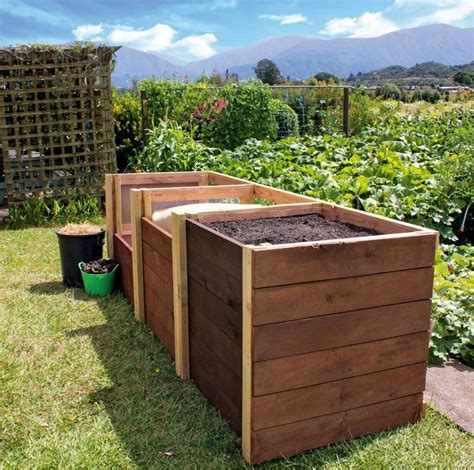
Option 1: Wooden Pallet Bin
- Arrange the Pallets: Stand three pallets upright to form three sides of a square or U-shape. The fourth side will be left open or have a removable pallet for easy access.
- Secure the Pallets: Using a hammer and nails or a drill and screws, securely attach the pallets at their corners. Ensure the structure is stable.
- Add a Fourth Side (Optional): If you want a fully enclosed bin, attach a fourth pallet. You can hinge it for easy opening or simply lean it against the structure and remove it when you need to turn the compost or harvest it.
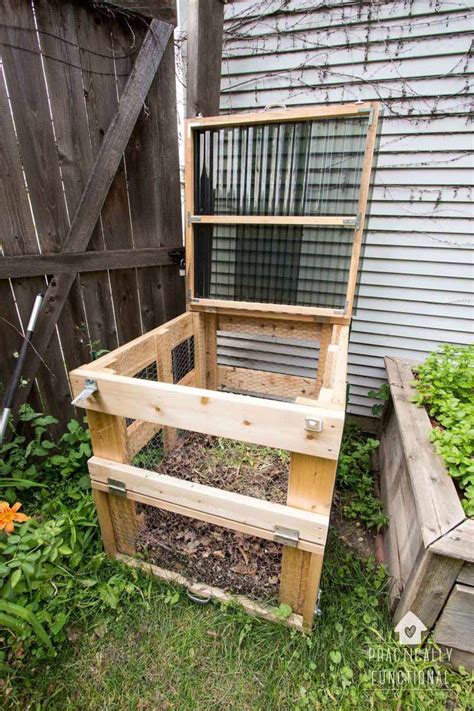
Option 2: Wire Mesh Bin
- Cut the Mesh: Measure and cut a length of wire mesh (e.g., 8-10 feet long and 3 feet high, depending on your desired bin size).
- Form a Cylinder: Bring the two ends of the mesh together to form a cylinder.
- Secure the Ends: Use strong zip ties, wire, or hog rings to securely fasten the ends of the mesh together, creating a stable circular bin.
How to Use Your New Composting System
Once your bin is built, it’s time to start adding your kitchen scraps and garden waste. Composting is about balancing “greens” (nitrogen-rich materials) and “browns” (carbon-rich materials).
- Greens: Kitchen fruit and vegetable scraps, coffee grounds, tea bags, grass clippings, fresh plant trimmings.
- Browns: Dried leaves, shredded paper/cardboard, wood chips, sawdust, straw.
Aim for a 2:1 or 3:1 ratio of browns to greens for optimal decomposition, layering them like a lasagna. Keep the pile consistently moist (like a wrung-out sponge) and turn it regularly (weekly or bi-weekly) to aerate it and speed up the composting process. Do NOT add meat, dairy products, oily foods, or diseased plants, as these can attract pests and introduce pathogens.

Troubleshooting & Tips for Success
- Smelly Pile? Too much green material, not enough air, or too wet. Add more browns, turn the pile, and ensure good drainage.
- Dry Pile? Not enough moisture. Add water, especially when adding dry browns.
- No Activity? Not enough greens (nitrogen) or too dry. Add more nitrogen-rich scraps and water.
- Pests? Likely due to adding inappropriate items (meat, dairy) or an uncovered pile. Ensure you’re only adding suitable materials and consider a lid if pests are an issue.
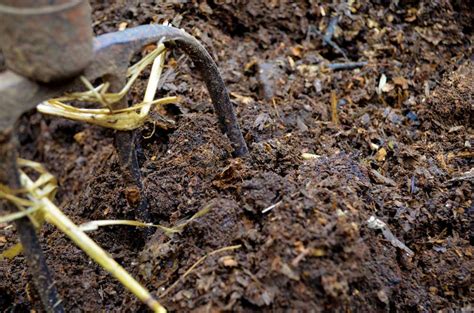
With a little patience and regular attention, your kitchen scraps will transform into beautiful, dark compost within a few months, ready to nourish your garden and houseplants.
Conclusion
Building a simple composting system for your kitchen scraps is a rewarding DIY project that benefits your garden, your wallet, and the environment. By following these easy steps, you can start your composting journey today, turning everyday waste into a valuable resource. Happy composting!
