


Easy DIY root cellar plans for long-term food storage?

Unlock Year-Round Freshness: Why a DIY Root Cellar?
Imagine harvesting your garden’s bounty and knowing you can enjoy fresh produce months later without refrigeration or canning. This dream becomes a reality with a root cellar – an age-old, passive food storage solution. Perfect for homesteaders, preppers, or anyone looking to reduce their grocery bill and ecological footprint, a DIY root cellar leverages natural coolness and humidity to extend the life of many fruits and vegetables. Forget complex setups; many effective root cellars can be built with minimal tools and on a shoestring budget.
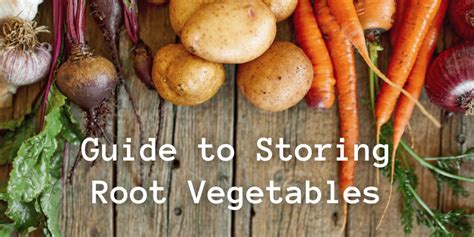
Root cellars are not just for potatoes and carrots; they are ideal for a wide range of produce, from apples and pears to cabbage and beets. By understanding a few basic principles, you can create a reliable, energy-free storage system that serves your family’s needs year-round. It’s a return to traditional methods that are both sustainable and incredibly satisfying.

Understanding the Core Principles of a Root Cellar
The effectiveness of a root cellar hinges on four key environmental factors: temperature, humidity, ventilation, and darkness. Mimicking the cool, stable conditions found naturally underground, these elements combine to slow down the spoilage process, keeping your produce dormant and fresh.
- Temperature: Ideally, a root cellar should maintain a cool temperature, typically between 35-50°F (2-10°C), consistently. Freezing is to be avoided, as it damages cell structure.
- Humidity: High humidity (85-95%) is crucial for most root crops to prevent them from drying out and shriveling.
- Ventilation: Good air circulation prevents the buildup of ethylene gas (which can ripen produce prematurely) and odors, and helps regulate temperature and humidity.
- Darkness: Light encourages sprouting and can degrade nutrient content, especially in potatoes. A dark environment keeps produce dormant.
Simple & Effective DIY Root Cellar Designs
You don’t need to dig a full underground bunker to create an effective root cellar. Many simple designs can be adapted to your space and budget. Here are a few popular and easy DIY options:
- The Buried Trash Can or Barrel: This is arguably the easiest and most common starter root cellar. Dig a hole, place a food-grade plastic trash can or barrel inside, add a layer of straw or sand, fill with produce, and cover. Ensure proper drainage and a simple vent system.
- Mound or Clamp Cellar: Ideal for storing larger quantities directly in the garden. Pile produce on the ground, cover with straw, then a layer of soil, creating a small mound. Add a simple ventilation pipe.
- Modified Basement Corner: If you have a cool, damp basement, you can partition off a corner using insulated walls. Install a simple vent to the outside and ensure it remains dark.
- In-Ground Pit/Straw Bale: Dig a shallow pit, line it with straw, place your produce, and cover with more straw and then a plywood or metal lid, weighted down.
![[VIDEO] How To Build A Trash Barrel Root Cellar - Die Hard Survivor](/images/aHR0cHM6Ly90czEubW0uYmluZy5uZXQvdGg/aWQ9T0lQLk5JRl9Bb0p2THE0WFRzaDJGU2UzR2dIYUVHJnBpZD0xNS4x.webp)
Step-by-Step: Constructing Your Basic Root Cellar (Buried Container Method)
Let’s outline the steps for building a simple buried container root cellar – perfect for beginners.
1. Choose Your Location
Select a shaded, well-drained spot in your yard. Avoid areas prone to flooding. Consider proximity to your home for easy access.
2. Gather Materials
You’ll need a large, food-grade plastic trash can with a tight-fitting lid (20-30 gallon is a good size), gravel for drainage, sand or straw for insulation, a PVC pipe for ventilation, and optionally, hardware cloth to keep pests out of the vent.
3. Dig the Hole
Excavate a hole slightly larger and deeper than your container. The top rim of the container should be about 6-12 inches below ground level when finished.
4. Prepare for Drainage and Insulation
Lay 6-12 inches of gravel at the bottom of the hole for drainage. Place your container inside. If the ground is very cold, you might wrap the container with insulation (e.g., rigid foam board) before backfilling.
5. Install Ventilation
For a simple vent, cut a small hole in the side of the container lid or near the top rim. Insert a PVC pipe, extending it above ground level and covering the top with hardware cloth to prevent pests. Burying the container lid slightly below ground with a layer of soil on top provides insulation and maintains darkness.

What to Store and How to Maintain It
A root cellar is not a universal storage solution. Certain produce thrives, while others do not. Ideal candidates include:
- Root Vegetables: Potatoes, carrots, beets, parsnips, turnips, rutabagas.
- Firm Fruits: Apples (store separately from veggies as they release ethylene gas), pears.
- Winter Squash & Pumpkins: These prefer slightly warmer (50-55°F) and drier conditions, so they might need a different section or a separate, slightly less humid cellar.
- Cabbage & Celery: Can be stored wrapped or rooted in damp sand.
Maintenance Tips:
- Regular Checks: Periodically check your stored produce and remove any items showing signs of spoilage to prevent mold from spreading.
- Monitor Conditions: Use a thermometer/hygrometer to ensure ideal temperature and humidity levels are maintained.
- Organization: Keep similar items together and label everything for easy access and rotation.
- Cleanliness: Before loading new produce each season, clean out your cellar thoroughly.
Embrace Self-Sufficiency with Your DIY Root Cellar
Building an easy DIY root cellar is a rewarding project that empowers you to take control of your food supply. It’s a step towards greater self-sufficiency, reduces food waste, and connects you with time-honored traditions of food preservation. With minimal effort and investment, you can enjoy fresh, homegrown (or locally sourced) produce long after the growing season ends. Start planning your simple root cellar today and taste the difference!
