


Garden tomatoes: Safest water bath canning tips for winter pantry staples?

Embrace the Harvest: Why Can Your Garden Tomatoes?
There’s nothing quite like the taste of a sun-ripened tomato straight from your garden. But when the harvest is abundant, how do you preserve that fresh flavor to enjoy long after the growing season ends? Water bath canning is a fantastic and relatively simple method for preserving high-acid foods like tomatoes, turning your summer bounty into versatile pantry staples that will brighten your winter meals.
While often seen as a traditional skill, modern canning techniques emphasize safety above all else. With the right approach, you can confidently preserve whole, crushed, or sauced tomatoes, ensuring they are not only delicious but also safe for your family to enjoy.

Understanding Acidity: The Foundation of Safe Tomato Canning
The key to safe water bath canning for tomatoes lies in their acidity. Tomatoes are borderline high-acid foods, meaning their pH can sometimes be above 4.6, which is the threshold for safe water bath processing. To ensure safety and inhibit the growth of harmful bacteria (like Clostridium botulinum), it is crucial to add an acidifying agent.
- Lemon Juice: Add 2 tablespoons of bottled lemon juice per quart jar, or 1 tablespoon per pint jar. Always use bottled lemon juice, as its acidity is standardized, unlike fresh lemons which can vary.
- Citric Acid: Use 1/2 teaspoon of citric acid per quart jar, or 1/4 teaspoon per pint jar.
- Vinegar: White vinegar (5% acidity) can be used, but it may alter the flavor more significantly. Use 4 tablespoons per quart or 2 tablespoons per pint.
Adding a small amount of sugar (1 teaspoon per jar) can help balance the flavor without compromising safety.
Essential Equipment Checklist for Successful Canning
Having the right tools makes the canning process smooth and efficient. Gather these items before you begin:
- Water Bath Canner: A large pot with a lid and a rack to keep jars off the bottom.
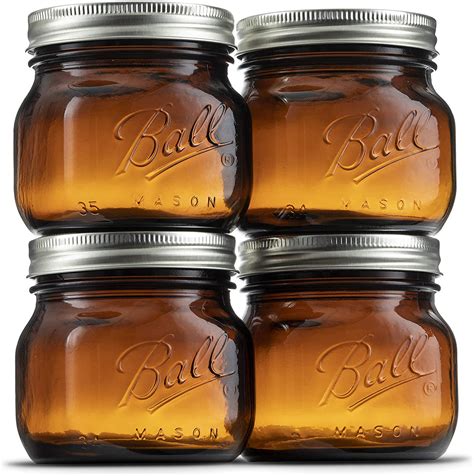
- Canning Jars: Mason-style jars specifically designed for canning. Use new lids and ensure bands are in good condition.
- Jar Lifter: Essential for safely placing and removing hot jars from the canner.
- Canning Funnel: Helps keep jar rims clean when filling.
- Headspace Tool/Bubble Remover: For measuring proper headspace and removing air bubbles.
- Large Stockpot: For blanching tomatoes and preparing the tomato product.
- Utensils: Ladle, sharp knife, cutting board.
- Clean Towels: For cooling jars and keeping surfaces tidy.

Step-by-Step: Preparing Your Tomatoes for Canning
1. Selecting and Preparing Tomatoes
Choose ripe, firm tomatoes free from blemishes, cracks, or soft spots. Wash them thoroughly under cool running water. For whole or diced tomatoes, you’ll need to peel them. Score an ‘X’ on the bottom of each tomato, then blanch them in boiling water for 30-60 seconds, immediately transferring them to an ice bath. The skins should slip off easily. Core and chop or leave whole as desired.
2. Jar Sterilization and Lid Preparation
Wash canning jars in hot, soapy water and rinse well. Keep them hot (either in the canner with water or a warm oven/dishwasher) until ready to fill to prevent thermal shock. Prepare new lids according to the manufacturer’s instructions; typically, they are simmered in warm water (not boiling) to soften the sealing compound.
Filling and Processing: The Canning Process
1. Packing the Jars
You can choose between raw pack (packing raw tomatoes into jars) or hot pack (heating tomatoes first, then packing them). Hot packing usually yields a better quality product with less floating. Add your chosen acidifying agent (lemon juice, citric acid, or vinegar) to each jar. Fill jars with tomatoes and their juice, leaving the correct headspace (usually 1/2 inch for whole/diced tomatoes). Use a bubble remover tool to dislodge any trapped air bubbles, then recheck headspace and add more liquid if necessary. Wipe jar rims clean with a damp cloth to ensure a good seal, then center a lid on each jar and secure with a band to fingertip tight.
2. The Water Bath Process
Place filled jars onto the rack in your water bath canner, ensuring jars don’t touch each other or the sides of the pot. Add hot water to the canner until the water level is at least 1-2 inches above the jar tops. Cover the canner and bring the water to a rolling boil. Once boiling vigorously, start your timer. Processing times vary by tomato product and altitude; always consult a reliable, tested recipe (e.g., from the USDA or university extension offices) and adjust for your specific elevation.
3. Cooling and Sealing
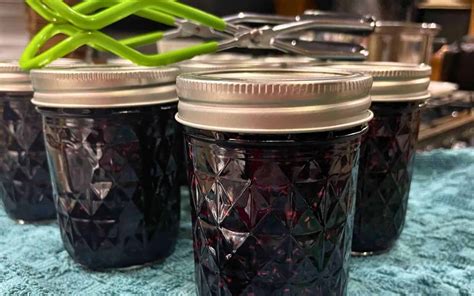
Once the processing time is complete, turn off the heat and let the jars sit in the canner for 5 minutes. This helps prevent siphoning (loss of liquid). Carefully remove the jars using a jar lifter and place them on a clean towel or cooling rack, ensuring they are not touching each other, in a draft-free area. Allow them to cool undisturbed for 12-24 hours. You’ll hear satisfying ‘ping’ sounds as the lids seal.

Storage and Shelf Life
After cooling, check the seals: the center of the lid should be concave and not flex when pressed. If any jar hasn’t sealed, refrigerate it and consume within a few days, or re-process immediately with a new lid. Remove bands (they can be reused), wipe jars clean, label with contents and date, and store in a cool, dark, dry place. Properly canned tomatoes can last for 12-18 months, though for best quality, aim to consume them within a year.
Common Mistakes to Avoid for Safe Canning
- Skipping the Acid: Never omit the acidifying agent when canning tomatoes in a water bath.
- Improper Headspace: Too much or too little can lead to seal failures or product spoilage.
- Reusing Lids: Always use new, unused lids for canning. Bands can be reused if in good condition.
- Inadequate Processing Time: Always follow tested recipes and adjust for altitude.
- Dirty Jar Rims: Food residue on the rim can prevent a proper seal.
- Forgetting to Debubble: Trapped air can lead to siphoning or food discoloration.
Enjoy Your Winter Pantry Staples!
Canning your garden tomatoes is a rewarding process that extends the joy of your harvest into the colder months. By following these safest water bath canning tips, you’ll stock your pantry with delicious, homemade goodness, ready to transform into hearty sauces, rich soups, and comforting stews whenever you desire. Happy canning!


