


How do I make a rich, flavorful bone broth from my chicken scraps?
Making your own bone broth is one of the most rewarding kitchen endeavors. Not only does it transform discarded chicken scraps into a liquid gold full of nutrients and incredible flavor, but it also elevates your cooking to a new level. Forget bland store-bought versions; homemade chicken bone broth is a game-changer for soups, stews, sauces, and even just sipping on its own.
Why Make Your Own Bone Broth?
Beyond the satisfaction of zero-waste cooking, homemade bone broth offers superior flavor and a nutritional punch that commercial broths often lack. It’s packed with collagen, gelatin, amino acids, and minerals extracted from the bones, contributing to gut health, joint support, and glowing skin. Best of all, it’s incredibly economical, turning what would otherwise be trash into a culinary treasure.
Gathering Your Scraps and Aromatics
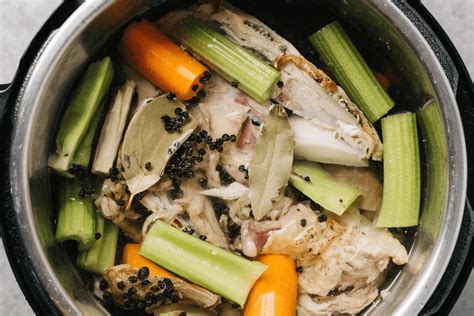
The foundation of a great broth starts with good scraps. Save all your chicken bones: carcasses, backs, wings, necks, feet, and even roasted chicken skin and cartilage. Keep a bag in your freezer and add to it until you have a substantial amount – at least 2-3 pounds is ideal for a rich broth. Don’t be afraid to mix and match different types of chicken bones.
Essential Aromatics for Depth of Flavor
- Onions: Quartered, skin on for extra color.
- Carrots: Roughly chopped.
- Celery: Roughly chopped.
- Garlic: Halved head, unpeeled.
- Bay Leaves: 2-3 dried leaves.
- Peppercorns: 1 teaspoon whole black peppercorns.
- Optional: A splash of apple cider vinegar (1-2 tablespoons) helps draw minerals from the bones. Fresh parsley stems can also add a nice herbaceous note.
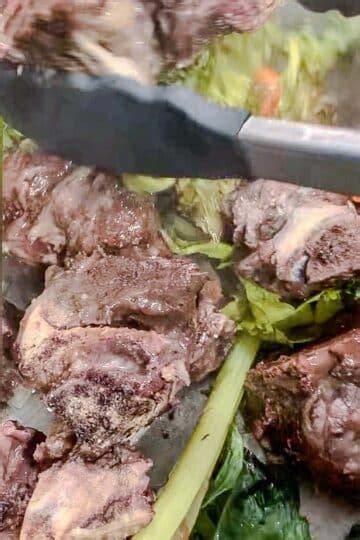
The Power of Roasting (Optional but Recommended)
While you can certainly make broth from raw scraps, roasting your chicken bones and scraps beforehand adds a profound depth of flavor and a beautiful golden color to your finished broth. Spread your bones on a baking sheet and roast at 400°F (200°C) for 20-30 minutes, or until deeply golden brown. This caramelization is key to a truly rich broth.
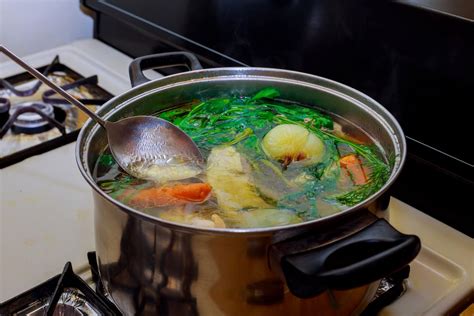
The Simmering Process: Time and Patience
Once your bones are roasted (or if you’re using raw scraps), place them in a large stockpot or Dutch oven. Add your chosen aromatics and cover everything with cold water, ensuring the bones are fully submerged by at least an inch or two. The cold water is crucial as it slowly extracts impurities and flavors more effectively.
Bring to a Gentle Simmer
Bring the pot to a boil over high heat, then immediately reduce the heat to a very low simmer. You want just a few gentle bubbles breaking the surface, not a rolling boil. A vigorous boil will emulsify impurities into the broth, making it cloudy and potentially imparting off-flavors.
Skimming for Clarity
In the first hour or two of simmering, foam and scum will rise to the surface. Use a large spoon or a fine-mesh skimmer to regularly remove these impurities. This step is essential for a clear, clean-tasting broth. Once most of the scum has been removed, you can largely leave the pot alone.

Simmering Duration
For chicken bone broth, a minimum of 4-6 hours is recommended for good flavor extraction, but for a truly rich and gelatinous broth, aim for 12-24 hours. The longer, gentler simmer allows for maximum extraction of collagen and minerals. Add more water if necessary to keep the bones submerged, especially during longer simmers.
Straining, Cooling, and Storage
Once your broth has simmered to perfection, carefully strain it. A fine-mesh sieve lined with cheesecloth (optional, but recommended for extra clarity) works best. Discard all the solids – the bones and vegetables have given up all their goodness. You can save any bits of meat for other uses, but the vegetables will likely be mushy and flavorless.
Cooling Quickly
Rapidly cool your broth to prevent bacterial growth. You can do this by placing the pot in an ice bath, stirring occasionally, or dividing it into smaller containers. Once it reaches room temperature, transfer it to the refrigerator.
Storage Options
- Refrigerator: Stored in airtight containers, homemade bone broth lasts for 5-7 days.
- Freezer: For longer storage, freeze your broth in airtight containers, freezer bags (laid flat), or ice cube trays for convenient portioning. It will keep for several months.
Tips for Maximum Flavor and Richness
- Don’t Overcrowd the Pot: Give your bones and aromatics space to release their flavors.
- Always Start with Cold Water: This helps in a gradual and thorough extraction process.
- Low and Slow is the Way: A gentle simmer is key to a clear and flavorful broth without bitterness.
- Utilize Apple Cider Vinegar: A small amount can aid in extracting minerals and collagen.
- Scrap the Fond: If you roasted your bones, deglaze the roasting pan with a bit of water or vinegar and add those flavorful bits to your stockpot.
- Don’t Add Salt: It’s best to season your broth when you use it in a recipe, as different applications will require different levels of salt.
Troubleshooting Common Broth Issues
- Cloudy Broth: Often a result of boiling too vigorously or not skimming impurities early on. It’s still perfectly fine to use, just not as visually appealing.
- Lack of Gelatin: This indicates insufficient collagen extraction. Ensure you’re using enough joint-rich bones (like feet or backs) and simmering for long enough at a gentle temperature.

Conclusion
Crafting a rich, flavorful bone broth from your chicken scraps is a rewarding journey that transforms kitchen waste into a culinary masterpiece. With a little patience and the right techniques, you’ll soon be enjoying the countless benefits and incredible depth of flavor that only homemade bone broth can provide. Happy simmering!


