How do I make my homemade sourdough bread consistently light and airy?
Unlock the Secret to a Perfect Sourdough Crumb
Many home bakers dream of a sourdough loaf with an open, airy crumb and a delightfully light texture. While sourdough can be notoriously finicky, consistency is absolutely achievable with attention to a few critical factors. Forget dense, gummy loaves; we’ll guide you through the steps to consistently produce the light and airy sourdough bread you crave.
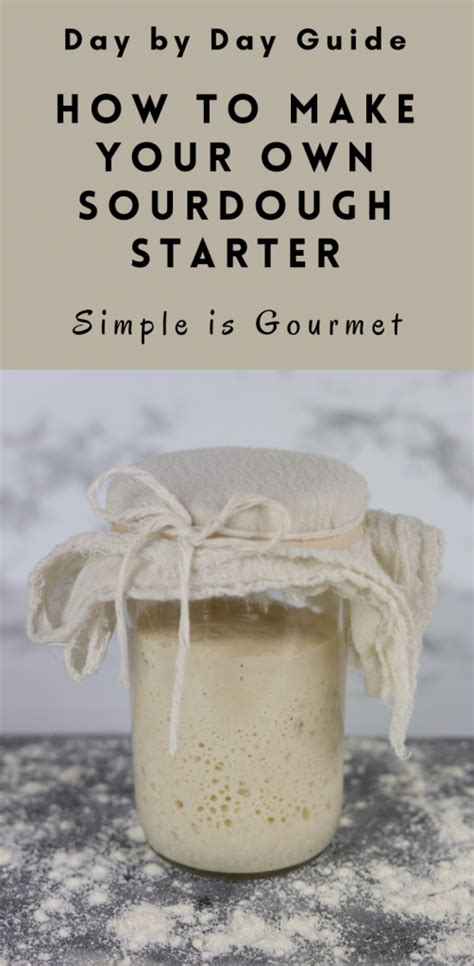
The Foundation: Your Sourdough Starter’s Health
A strong, active sourdough starter is the bedrock of a successful loaf. Its vigor directly translates to the leavening power needed for a light crumb. Ensure your starter is fed regularly and is consistently doubling or tripling in size within 4-6 hours after feeding, showing plenty of bubbles on the surface and sides, and smelling pleasantly yeasty and slightly acidic.
Using your starter at its peak activity – when it’s most potent and before it starts to recede – is crucial for optimal rise and an open structure. If your starter is sluggish, try a few days of consistent feeding (twice a day) to revive it before baking.

Mastering Hydration: A Delicate Balance
Hydration refers to the ratio of water to flour in your dough. Higher hydration doughs (typically 70% to 80% or even higher) generally lead to a more open, airy crumb. However, high hydration also makes the dough stickier and more challenging to handle. Don’t jump to extremely high hydration levels if you’re new; gradually increase it as you gain confidence.
It’s important to consider your flour type, too. Different flours absorb water differently. Whole wheat flour absorbs more water than all-purpose or bread flour. Experiment with your chosen flour to find its sweet spot, aiming for a dough that is hydrated enough to be extensible but not so wet that it’s unmanageable.
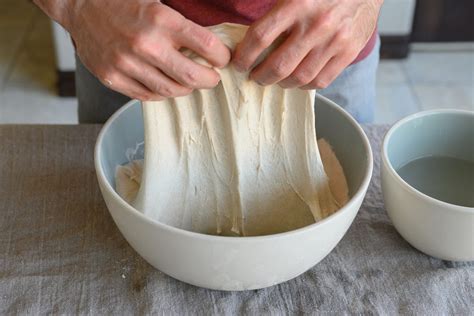
Gluten Development: The Key to Structure
Gluten is the protein network that traps gases produced by the yeast, creating those lovely air pockets. Proper gluten development is non-negotiable for a light and airy loaf. Instead of aggressive kneading, sourdough bakers often rely on gentle, repetitive folding techniques over several hours during bulk fermentation.
- Autolyse: Mixing flour and water first and letting it rest for 30-60 minutes before adding the starter and salt allows the flour to fully hydrate and gluten to begin forming naturally, making the dough easier to work with.
- Stretch and Folds: Performing 3-6 sets of stretch and folds (or coil folds) during the first 2-3 hours of bulk fermentation helps build strength and elasticity without overworking the dough.
Proofing Perfection: Timing is Everything
Proofing, both bulk fermentation (first rise) and cold proofing (second rise in the fridge), significantly impacts your crumb structure. Under-proofed dough will be dense and tight, while over-proofed dough will collapse and be hard to handle.
- Bulk Fermentation: This stage is crucial. Monitor your dough, not the clock. It should increase in volume by 30-50% (depending on hydration and temperature), feel airy and jiggly, and show some bubbles. The ambient temperature will greatly affect the timing.
- Cold Proofing: A long, cold proof in the refrigerator (8-16 hours) slows down fermentation, develops flavor, and makes the dough easier to score and handle. It also contributes to a better oven spring.
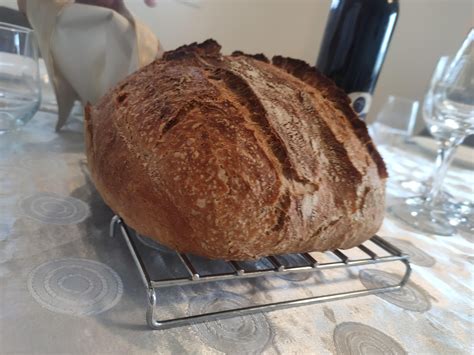
Baking for Maximum Oven Spring
Oven spring – the final burst of expansion in the oven – is what gives sourdough its dramatic rise and open crumb. Achieving this requires high heat and steam.
- Preheat Thoroughly: Always preheat your oven with a Dutch oven (or baking stone with a steam setup) for at least 45-60 minutes at a high temperature (typically 450-500°F / 230-260°C).
- Steam: Baking in a preheated Dutch oven traps steam, keeping the crust soft and flexible for the first 20-30 minutes, allowing the dough to expand maximally. After this initial period, remove the lid to crisp up the crust and allow further browning.
- Scoring: A proper score on your dough allows for controlled expansion during oven spring, preventing blowouts and guiding the dough to open up beautifully.

Troubleshooting Common Issues
If your bread is still not as airy as you’d like, consider these points:
- Starter Strength: Re-evaluate your starter’s activity. Is it truly at its peak?
- Gluten Development: Are you performing enough stretch and folds? Is your dough passing the windowpane test?
- Proofing Temperature: Is your bulk fermentation happening at a consistent, warm-enough temperature (around 75-80°F / 24-27°C is ideal)?
- Overhandling: Be gentle during shaping to avoid degassing the dough too much.

Conclusion
Making consistently light and airy sourdough bread is a journey of understanding and practice. By focusing on a robust starter, appropriate hydration, thorough gluten development, precise proofing, and effective baking techniques, you’ll soon be regularly pulling loaves from your oven that boast an enviable open crumb. Don’t be discouraged by imperfect loaves; each one is a learning experience on your path to sourdough mastery.