How do I properly season and maintain cast iron pans for generations? #countrykitchen
Cast iron cookware, with its rugged charm and exceptional heat retention, is a staple in many kitchens, especially those with a country flair. But its longevity and non-stick properties hinge entirely on proper seasoning and consistent maintenance. Master these techniques, and your cast iron pans won’t just cook your meals; they’ll tell a story for generations.
The Foundation: Understanding Seasoning
Seasoning isn’t just about adding flavor; it’s about creating a natural, non-stick surface through a process called polymerization. When oil is heated to its smoke point on the cast iron, it bonds to the metal, forming a durable, protective layer. A well-seasoned pan is naturally non-stick, resistant to rust, and imparts a unique flavor to your food.
Initial Seasoning for New or Stripped Pans
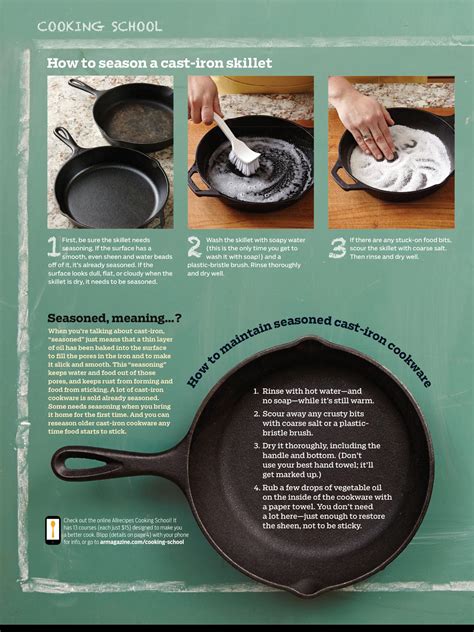
- Clean Thoroughly: Wash the pan with warm, soapy water and a stiff brush (yes, soap is okay for initial cleaning or stripping!). Rinse well and dry immediately and completely on the stovetop over low heat.
- Apply a Thin Layer of Oil: Once dry and slightly warm, apply an extremely thin, even layer of high smoke point oil (like flaxseed, grapeseed, canola, or vegetable oil) over the entire pan, inside and out. Use a paper towel to wipe off as much oil as possible – you want it to look dry.
- Bake in the Oven: Place the pan upside down on the middle rack of a preheated oven (375-450°F / 190-230°C) with foil or a baking sheet on the bottom rack to catch any drips. Bake for one hour.
- Cool Slowly: Turn off the oven and let the pan cool completely inside the oven. This slow cooling helps the seasoning bond effectively.
- Repeat: For best results, especially with new or stripped pans, repeat this oiling and baking process 3-5 times. Each layer builds upon the last, creating a stronger, more robust seasoning.

Daily Care: Keeping Your Seasoning Intact
The true beauty of cast iron lies in its ability to improve with every use. Daily cleaning and proper handling are crucial for maintaining and enhancing that prized seasoning.
Cleaning After Each Use
- Scrape Food Residue: While the pan is still warm, use a flat-edged spatula or a plastic pan scraper to remove any stuck-on food.
- Rinse with Warm Water: Avoid harsh soaps, as they can strip away the seasoning. For most uses, warm water and a non-abrasive brush or sponge are sufficient. If needed, a small amount of mild dish soap can be used sparingly, but always re-oil immediately.
- Stubborn Bits? Salt Scrub: For tough spots, sprinkle coarse salt (like kosher salt) into the pan and use a paper towel to scrub. The salt acts as a gentle abrasive. Rinse thoroughly.
- Dry Immediately and Completely: This is critical to prevent rust. Place the pan back on the stovetop over low heat for a few minutes until all moisture has evaporated.
- Apply a Thin Coat of Oil: Once dry and slightly warm, apply a very thin layer of cooking oil to the interior of the pan with a paper towel. Wipe off any excess; it should look dry, not greasy.

Deep Cleaning and Re-Seasoning
Sometimes, despite your best efforts, your cast iron might develop sticky spots, rust, or uneven seasoning. Don’t despair! It’s rarely beyond repair.
When to Deep Clean and Re-Season
- Rust Spots: If rust appears, it means the seasoning has failed in that area.
- Sticky or Gummy Surface: This often indicates too much oil was applied during a previous seasoning attempt, and it didn’t polymerize properly.
- Flaking Seasoning: Old, uneven seasoning may start to flake off.
Stripping and Re-Seasoning
For severe issues, a full strip and re-seasoning might be necessary. Methods include using a lye-based oven cleaner (with extreme caution and ventilation), an electrolysis tank, or a self-cleaning oven cycle (check manufacturer recommendations first, as some advise against this). Once stripped bare, follow the initial seasoning steps outlined above, repeating the oiling and baking process multiple times.

Storage and Common Pitfalls
Proper storage is just as important as proper seasoning to ensure your cast iron lasts for generations.
Storing Your Pans
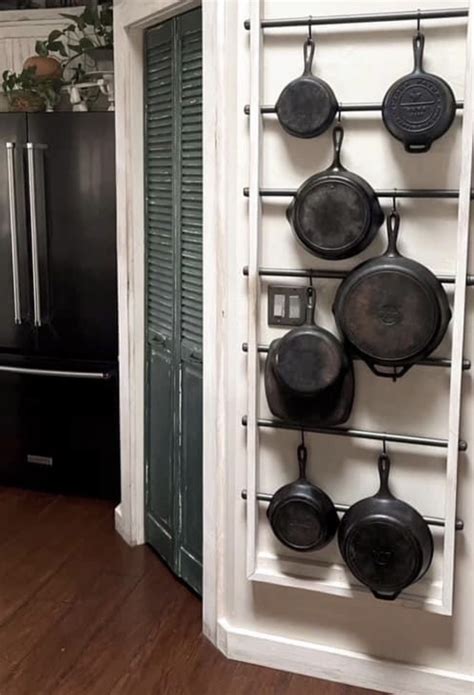
- Dry and Aerated: Always store your cast iron in a dry, cool place. Avoid humid environments.
- Prevent Stacking Damage: If stacking pans, place a paper towel or a thin cloth between them to prevent scratching the seasoning and allow for air circulation. This also absorbs any residual moisture.
- Never Store Food In It: Acidic foods can strip seasoning, and storing any food in cast iron for extended periods can lead to metallic tastes and damage to the pan.
Mistakes to Avoid
- Dishwasher: The harsh detergents and prolonged exposure to water will strip your seasoning and cause rust.
- Soaking: Leaving your cast iron to soak in water is a sure way to invite rust.
- High Heat Too Quickly: While cast iron loves heat, rapid temperature changes can warp the pan. Always preheat gradually.
The Legacy: Cooking with Cast Iron
A well-seasoned and maintained cast iron pan is a joy to cook with. It heats evenly, develops beautiful crusts, and naturally enriches flavors. Over time, your pan will develop a deep, dark patina and a silky-smooth, non-stick surface that rivals any modern non-stick coating.
By following these simple steps for seasoning and daily maintenance, you’re not just caring for a piece of cookware; you’re preserving an heirloom. Your cast iron pans will become more than just kitchen tools; they’ll be cherished artifacts, bearing the history of countless meals shared, ready to be passed down through your family for generations to come, embodying the true spirit of the country kitchen.