


How do I properly season cast iron for non-stick cooking?

Unlock the Secret to Non-Stick Cast Iron
Cast iron cookware is renowned for its durability, even heat distribution, and ability to last for generations. However, its true magic – the naturally non-stick surface – comes from a well-maintained seasoning. Seasoning isn’t just about applying oil; it’s a process of polymerizing fat onto the iron, creating a smooth, slick, and protective layer that makes cooking and cleaning a breeze. If your cast iron sticks, it’s likely a sign it needs a little love and a proper re-seasoning.

What Exactly Is Seasoning?
At its core, seasoning is a layer of polymerized oil that has been baked onto the surface of your cast iron. When oil is heated past its smoke point, it breaks down and bonds with the iron, forming a hard, protective, and slick coating. This isn’t just a simple coating; it’s chemically bonded to the metal. Over time and with proper care, this layer builds up, becoming increasingly robust and non-stick. The darker and more uniform the surface, the better the seasoning.
Before You Begin: The Clean Slate
Before you can build a new, effective seasoning, your cast iron needs to be impeccably clean. This is especially true if you’re starting with a rusty pan or one with uneven, flaking seasoning. Don’t be afraid to use soap and a scrub brush; modern dish soaps won’t strip away well-polymerized seasoning, though harsh abrasives should generally be avoided for regular cleaning.
- For a new or lightly used pan: Wash thoroughly with hot water and dish soap using a stiff brush or sponge. Rinse well and dry immediately and completely.
- For a rusty or sticky pan: You might need to strip it down to bare metal. This can be done by scrubbing vigorously with steel wool, using an oven’s self-cleaning cycle (be cautious, as this can sometimes warp pans if not done correctly), or even electrolysis. Once bare, proceed with seasoning immediately to prevent rust.

The Step-by-Step Seasoning Process for Non-Stick Perfection
This method focuses on building a durable, non-stick layer through multiple thin coats. Patience and thin layers are key.
1. Preheat Your Oven
Preheat your oven to a temperature between 450°F and 500°F (232°C – 260°C). Place an old baking sheet or aluminum foil on the bottom rack to catch any potential oil drips.
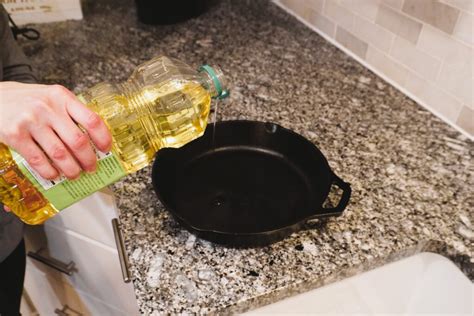
2. Apply a Thin Layer of Oil
Choose an oil with a high smoke point. Good options include flaxseed oil (often praised for its hard, durable finish, though it can be prone to flaking if applied too thickly), grapeseed oil, canola oil, or vegetable oil. Using a paper towel, apply a very thin, even layer of oil over the entire surface of the pan – inside, outside, handle, and even the bottom. Every single crevice should have a light coating.
3. Wipe Off Excess Oil – Seriously, Wipe It All Off
This is the most crucial step for a non-stick finish. Using a clean paper towel (or several), wipe the pan down as if you’re trying to remove all the oil you just applied. You want to leave behind an almost imperceptible layer of oil. If the pan looks oily, it’s too much. Excess oil will lead to a sticky, gummy, or uneven seasoning layer that is prone to flaking.
4. Bake Upside Down
Place the pan upside down on the middle rack of your preheated oven. Baking it upside down helps to prevent oil from pooling on the cooking surface. Bake for one hour at your chosen temperature. The high heat will polymerize the thin layer of oil onto the iron.
5. Cool and Repeat
After one hour, turn off the oven and let the pan cool completely inside the oven. This slow cooling helps the seasoning bond effectively. Once cool enough to handle, remove the pan. The pan should now have a slightly darker, satin finish.
For best results and a truly non-stick surface, repeat steps 2-5 at least 3-5 times. Each layer builds upon the last, creating a more robust and durable finish. Don’t rush the process; each layer needs to fully polymerize and cool.
Maintaining Your Seasoned Pan for Lasting Non-Stick Performance
Once you have a beautifully seasoned pan, proper maintenance is key to keeping it non-stick:
- Cook with oil or fat: Using a little cooking oil or butter when you cook will help reinforce the seasoning.
- Avoid harsh abrasives: While a little scrubbing is fine, avoid steel wool or metal spatulas that can scratch through the seasoning.
- Clean immediately: After cooking, clean your pan while it’s still warm. Use hot water and a stiff brush or chainmail scrubber to remove food residue. Avoid soaking the pan.
- Dry thoroughly: Immediately after washing, dry your pan completely. You can place it on a burner over low heat for a few minutes to ensure all moisture evaporates.
- Apply a maintenance coat: After drying, apply a very thin coat of cooking oil to the pan’s surface before storing it. Wipe off any excess. This protects the seasoning and prevents rust.
Troubleshooting Common Seasoning Issues
- Sticky or Gummy Pan: This is almost always due to too much oil during the seasoning process. You need to strip off the sticky areas and re-season with much thinner coats.
- Flaking Seasoning: This can happen if the oil layer was too thick, the pan wasn’t clean enough before seasoning, or if using flaxseed oil applied too thickly. Strip the flaking areas and re-season.
- Rust Spots: Rust occurs when moisture is left on bare iron. Scrub off the rust, dry thoroughly, and apply a thin layer of oil to prevent recurrence, then consider an additional seasoning layer.
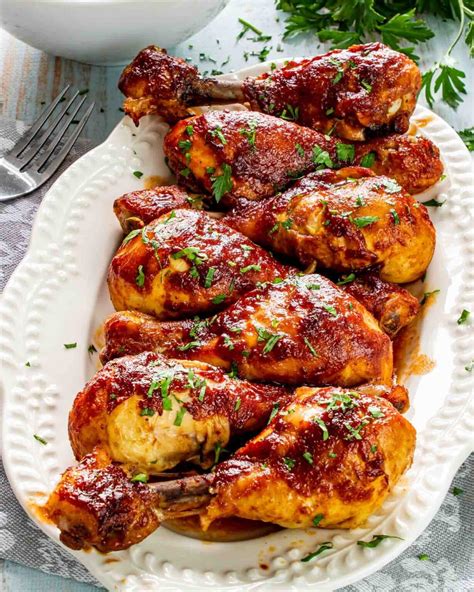
Properly seasoning and maintaining your cast iron is an art, but one that yields incredibly rewarding results. With a little practice and patience, you’ll soon be enjoying perfectly seared steaks, crispy fried eggs, and countless other dishes from your naturally non-stick, cherished cast iron cookware.


