


How do I safely scale down large canning recipes for smaller garden yields?
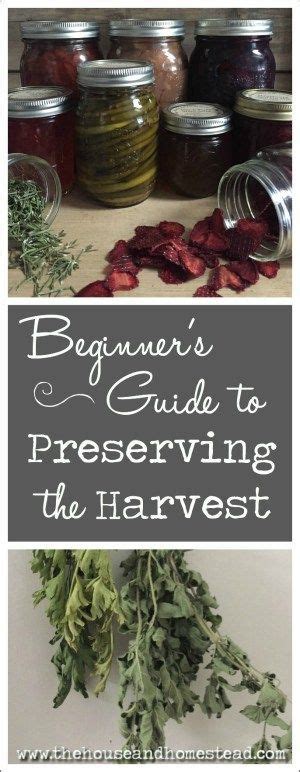
Embracing Small Batch Canning for Your Garden Harvest
As a passionate home gardener, you know the joy of a bountiful harvest. But what if your yield isn’t quite enough for a massive batch of canned salsa or pickles? Scaling down a large canning recipe safely and effectively is a common challenge. It’s not just about halving ingredients; canning relies on precise science to prevent spoilage and ensure food safety. This guide will walk you through the essential considerations and best practices for successfully adapting recipes to your smaller garden yields.

Understanding the Science of Safe Canning
Before you even think about adjusting quantities, it’s crucial to understand why canning recipes are so specific. Canning uses heat to destroy harmful microorganisms and enzymes, and then seals the food in an airtight environment. The processing time and temperature are calculated based on the acidity of the food and how quickly heat penetrates to the center of the jar. Altering key components like acid levels or ingredient ratios can compromise safety.
Acidity and pH Levels
- High-Acid Foods: Fruits, pickled vegetables, and foods with added acids (like vinegar or lemon juice) can be safely processed in a boiling water canner. Their acidity helps inhibit bacterial growth.
- Low-Acid Foods: Vegetables (most beans, corn, peas), meats, and mixed recipes (like stews) require a pressure canner to reach temperatures high enough to destroy Clostridium botulinum spores, which thrive in low-acid, oxygen-free environments.
When scaling a recipe, particularly for low-acid foods, it is paramount that you do not alter the proportions of low-acid ingredients in relation to high-acid ingredients or acidifying agents (vinegar, lemon juice). The target pH level for safe water bath canning (4.6 or below) must be maintained.

Key Considerations for Scaling Down
While some aspects of a recipe are flexible, others are non-negotiable. Here’s what to keep in mind:
1. Processing Times Are Sacrosanct
Regardless of how many jars you’re processing, or how small your batch, the processing time and pressure (for pressure canning) specified in a tested recipe are fixed. They are determined by the food’s density, acidity, and jar size, not by the batch quantity. Never reduce processing times.
2. Prioritize Tested Recipes
Always start with a trusted, tested canning recipe from reliable sources like the National Center for Home Food Preservation (NCHFP), university extension offices, or reputable canning book authors. These recipes have been scientifically developed and verified for safety.

3. Maintain Proportions for Safety-Critical Ingredients
For recipes involving a specific acid level (e.g., pickled items, salsa), maintain the exact ratio of high-acid ingredients (vinegar, lemon juice) to low-acid ingredients (vegetables, fruit). For instance, if a salsa recipe calls for 4 cups of tomatoes to 1 cup of vinegar, and you want to half the recipe, you must use 2 cups of tomatoes to 1/2 cup of vinegar. Do not reduce the vinegar more than the tomatoes.
4. Adjust Flavorings, Not Preservatives
Spices, herbs, and non-essential flavorings are generally safe to adjust to taste. If a recipe calls for 2 tablespoons of cumin, and you’re making half a batch, you can start with 1 tablespoon and adjust. However, ensure that such adjustments do not significantly alter the overall volume of the jar or displace critical ingredients.
Practical Steps for Scaling Down Recipes
Here’s a step-by-step approach to safely reduce your favorite canning recipes:
Step 1: Choose Your Recipe Wisely
Some recipes are easier to scale than others. Simple jams, jellies, plain fruits, or pickled vegetables are generally more forgiving than complex mixed vegetable recipes or stews where ingredient interaction is more critical for safety.

Step 2: Calculate New Quantities Accurately
Use a calculator to divide each ingredient quantity by the desired factor (e.g., if you want half a batch, divide by two). Be precise, especially with safety-critical ingredients. It can be helpful to convert measurements to weight (grams) for more accuracy, especially for spices or smaller amounts.
Step 3: Prepare Your Produce and Ingredients
Process your fresh produce just as the original recipe instructs (peeling, chopping, blanching). This ensures consistent texture and density, which affects heat penetration during processing. Have all your scaled ingredients measured out before you begin cooking.
Step 4: Cook and Fill Jars
Follow the cooking instructions precisely. When filling jars, ensure you maintain the specified headspace. Headspace is crucial for creating a proper vacuum seal and is not dependent on the batch size. Too little can result in siphoning; too much can lead to seal failure.
Step 5: Process as Usual
Process your jars in a boiling water bath or pressure canner according to the original recipe’s instructions, using the exact same processing time and pressure (if applicable) for your jar size. The number of jars you’re processing doesn’t change this critical step.
Conclusion
Scaling down large canning recipes for smaller garden yields is entirely possible with careful planning and adherence to food safety principles. By understanding the science behind canning and prioritizing tested recipes, precise measurements, and correct processing times, you can enjoy your homemade preserves, no matter the size of your harvest. Happy canning!