How to build a functional, rustic pantry shelf for canning jars?

Embrace Home Canning with Custom Storage
There’s immense satisfaction in preserving your own food, and equally so in having a dedicated, beautiful space to store your hard-won canning jars. A custom-built, rustic pantry shelf not only provides essential organization but also adds a touch of farmhouse charm to your kitchen or pantry. This project is perfect for DIY enthusiasts of all skill levels, offering a rewarding blend of functionality and aesthetic appeal.
Why a Rustic Pantry Shelf?
Beyond the practical need for storage, a rustic shelf offers several advantages. Its robust construction ensures it can safely bear the considerable weight of full canning jars, which can be surprisingly heavy when accumulated. Aesthetically, the rustic look, often achieved with natural wood finishes or slightly distressed techniques, complements a variety of home decors, from modern farmhouse to industrial chic. It transforms a utilitarian storage solution into a visual feature.
Planning Your Shelf: Key Considerations
Before you pick up a saw, meticulous planning is crucial. Consider the following:
- Location and Space: Measure the area where your shelf will go. Account for wall studs if mounting directly to the wall.
- Jar Dimensions: Standard quart jars are about 7 inches tall, and pint jars are around 5 inches. Plan for at least 8-9 inches of vertical clearance between shelves to allow for easy placement and removal.
- Weight Capacity: Full quart jars weigh over 2 lbs each. Design for sturdy construction.
- Materials: Reclaimed wood, pine, or common whitewood boards are excellent choices for a rustic look. Ensure wood is straight and free of major defects.
Gathering Your Materials and Tools
A successful project starts with having everything at hand. Here’s a typical list:
Materials:
- Wood boards (e.g., 1×10 or 1×12 for shelves, 1×2 or 1×3 for supports/frames, 2×4 for heavy-duty frames if desired)
- Wood screws (various lengths, appropriate for wood thickness)
- Wood glue
- Sandpaper (various grits: 80, 120, 220)
- Wood stain or paint (optional, for finishing)
- Polyurethane or clear coat (for durability)
- Wall anchors or lag screws (if mounting to drywall without studs)
Tools:
- Measuring tape and pencil
- Circular saw or miter saw (for straight, accurate cuts)
- Drill/driver with various bits (for pilot holes and driving screws)
- Level
- Stud finder
- Clamps
- Safety glasses and gloves

Step-by-Step Construction Guide
Step 1: Measure and Cut Your Wood
Based on your planning, cut all your wood pieces to size. You’ll need:
- Shelf boards (e.g., 3-5 pieces, depending on desired height)
- Side supports or uprights (2 pieces, vertical height of your shelf)
- Back supports or ledger boards (optional, for wall mounting or added stability)
Ensure all cuts are square for a stable structure.
Step 2: Assemble the Side Frames (If Building a Standalone Unit)
If you’re building a freestanding unit, assemble two ladder-like side frames using your uprights and smaller horizontal pieces as shelf supports. Use wood glue and screws for strong joints. If you’re building shelves directly into an alcove or mounting ledger boards to a wall, this step is different; you’ll attach ledger boards to the wall studs first.
Step 3: Attach the Shelves
Carefully measure and mark the desired height for each shelf. Attach the shelf boards to your side frames or ledger boards. For maximum strength, use wood glue on the contact points before screwing the shelves into place. Drive screws from the outside of the side supports into the ends of the shelf boards, or from underneath the shelves into the ledger boards.
Step 4: Reinforce and Secure
For freestanding units, consider adding a back panel (plywood or thin planks) for increased rigidity, or cross braces to prevent wobbling. If wall-mounting, ensure you’ve hit studs or used appropriate heavy-duty wall anchors. Use a level frequently to ensure your shelves are perfectly horizontal.
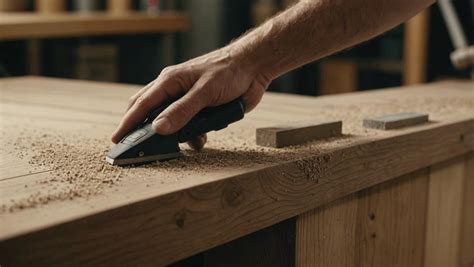
Step 5: Sanding and Finishing
Once assembled, thoroughly sand all surfaces. Start with 80-grit sandpaper to smooth out any rough spots or imperfections, then move to 120-grit, and finish with 220-grit for a silky-smooth finish. This is crucial for a professional look and feel. After sanding, wipe away all dust with a tack cloth.
Apply your chosen finish. For a rustic look, a dark stain (like walnut or espresso) or a whitewash technique works wonderfully. Allow the stain/paint to dry completely according to manufacturer instructions. Finish with several coats of a durable clear coat (like polyurethane) to protect the wood from moisture and wear, especially important in a kitchen environment.
Finishing Touches and Styling
Once your shelf is complete and fully cured, it’s time for the fun part: loading it with your beautiful canning jars! Arrange them by type, date, or color for an organized and appealing display. Consider adding small labels or stenciling the front of the shelves for extra charm and functionality. This shelf isn’t just for jars; it can also hold cookbooks, small kitchen appliances, or decorative items, blending seamlessly into your home.
Conclusion
Building a functional, rustic pantry shelf for your canning jars is a rewarding DIY project that enhances both the practicality and aesthetic of your home. With careful planning, the right materials, and a bit of effort, you’ll create a durable and charming storage solution that will serve your home canning endeavors for years to come. Enjoy the satisfaction of creating something beautiful and useful with your own hands!