


How to build a lasting raised garden bed for organic vegetables?

Why Choose a Lasting Raised Bed for Organic Vegetables?
Raised garden beds offer numerous benefits, from better drainage and warmer soil to easier access and control over soil quality. When you commit to organic gardening, building a bed that withstands the elements for many seasons is paramount. A durable raised bed reduces the need for frequent replacements, saving you time, money, and resources, while consistently providing an optimal environment for your organic produce.
Planning Your Sustainable Raised Bed
Before you lift a single tool, thoughtful planning is essential for a lasting structure. Consider the following:
- Location: Choose a spot that receives at least 6-8 hours of direct sunlight daily for most vegetables. Ensure good drainage and accessibility from all sides.
- Size and Shape: A width of 3-4 feet allows easy reach to the center from either side without stepping into the bed. Length is flexible, but consider standard lumber sizes to minimize waste. A height of 10-12 inches is often sufficient, but 18-24 inches offers deeper root growth and easier bending for gardeners.
- Foundation: The ground beneath should be level to ensure stability. You might need to do some light grading or add a gravel base for exceptionally good drainage.
Choosing Durable & Safe Materials
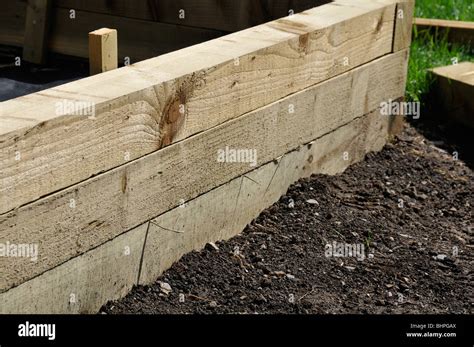
The key to a lasting raised bed lies in material selection, especially for organic gardening where chemical leaching is a concern. Avoid pressure-treated lumber, as it contains chemicals harmful to edible plants.
Recommended Materials:
- Untreated Cedar or Redwood: These woods are naturally rot-resistant and beautiful, lasting 10-20 years. They are more expensive but excellent long-term investments.
- Untreated Douglas Fir or Pine: More budget-friendly, but will require more maintenance or a shorter lifespan (3-7 years). You can extend their life by sealing the exterior with food-safe stains or oils.
- Recycled Composite Lumber: Made from plastic and wood fibers, these are extremely durable, rot-proof, and maintenance-free, often lasting 20+ years. Ensure they are certified safe for food contact.
- Galvanized Steel Panels: Modern and sleek, these are very durable, rust-resistant, and can last 20+ years. They absorb and retain heat well, which can be beneficial in cooler climates.
- Stone, Brick, or Concrete Blocks: Highly durable and permanent, these materials offer excellent thermal mass and can last indefinitely. They can be labor-intensive to install.
For fasteners, use galvanized or stainless steel screws or bolts to prevent rust and ensure structural integrity over time.

Step-by-Step Construction Guide
1. Prepare the Site
Clear the chosen area of weeds and debris. Level the ground using a rake and a spirit level. You may want to lay down a layer of cardboard or newspaper directly on the soil to suppress weeds and slowly decompose, adding organic matter.
2. Cut Materials to Size
Based on your design, cut your chosen lumber or materials. If using wood, consider pre-drilling pilot holes to prevent splitting when assembling.
3. Assemble the Frame
For wooden beds, stand two long and two short pieces to form a rectangle. Use sturdy 3-inch or longer galvanized or stainless steel screws to join the corners. You can use corner brackets for added strength. For taller beds, stack multiple layers, overlapping joints for increased stability.
4. Add Internal Bracing (Optional but Recommended)
For beds longer than 6 feet or taller than 12 inches, adding internal braces across the width can prevent the long sides from bowing outwards under the pressure of the soil. Secure small wooden blocks or metal brackets to the inside of the frame and attach a cross-member.
5. Line the Bed (Optional)
While not strictly necessary, lining the inside walls of a wooden bed with a heavy-duty landscaping fabric or food-grade plastic sheeting (punctured for drainage) can further extend its life by creating a barrier against moisture and soil. This is especially useful for non-naturally rot-resistant woods. Ensure good drainage if using plastic.
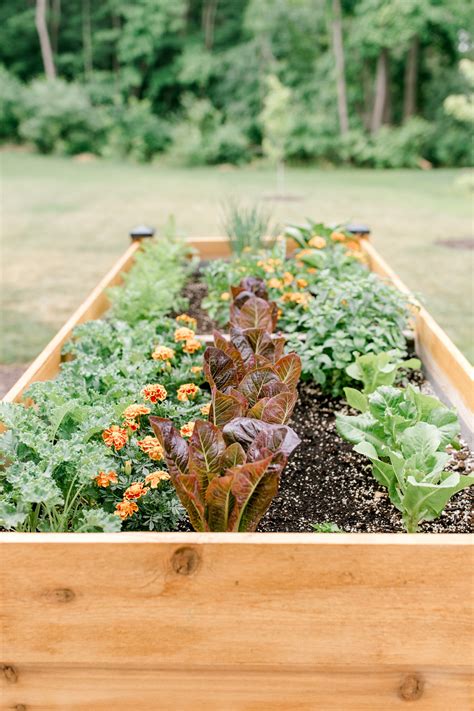
Preparing the Bed for Organic Growth
Filling your raised bed correctly is crucial for organic success and long-term soil health. This method is often called “Hugelkultur lite” or lasagna gardening.
- Bottom Layer (Drainage & Organic Matter): Start with a layer of coarse organic materials like small logs, branches, twigs, or wood chips. This layer aids drainage and slowly decomposes, providing nutrients over time.
- Weed Barrier: Add a layer of cardboard or newspaper (without glossy ink) over the bottom layer. Wet it thoroughly. This suppresses weeds and decomposes into the soil.
- Green & Brown Layers: Add alternating layers of “green” (grass clippings, fresh leaves, kitchen scraps) and “brown” (dried leaves, straw, untreated wood chips). Each layer should be a few inches thick.
- Compost & Topsoil Mix: Finish the top 6-12 inches with a high-quality organic raised bed soil mix. This typically includes a blend of good topsoil, well-rotted compost, and perlite or vermiculite for drainage and aeration. Aim for a mix that is rich in organic matter.
Water each layer as you build it to help settle the materials and kickstart decomposition. Leave about an inch or two from the top edge of the bed to prevent soil washout when watering.
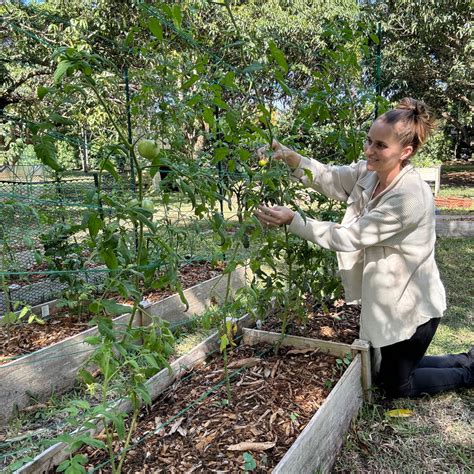
Planting and Ongoing Organic Care
Once your bed is built and filled, it’s time to plant your organic vegetables! Practice companion planting, crop rotation, and integrated pest management to maintain a healthy ecosystem. Replenish the soil annually with fresh compost to maintain fertility.
Maximizing Longevity of Your Raised Bed
- Wood Protection: For wooden beds, apply a food-safe sealant, tung oil, or linseed oil to the exterior surfaces every few years. This helps protect against UV rays and moisture.
- Drainage: Ensure adequate drainage to prevent waterlogging, which can degrade wood and compromise plant health. Consider adding a few drainage holes along the bottom edges if using non-porous materials or liners.
- Winterization: In colder climates, consider covering your bed with a tarp or a layer of straw during winter to protect the wood from harsh weather and prevent excessive nutrient leaching from the soil.
- Regular Inspection: Periodically check your bed for loose screws, rot, or damage and address them promptly. Early intervention can prevent minor issues from becoming major repairs.
Conclusion
Building a lasting raised garden bed for organic vegetables is a rewarding DIY project that pays dividends for years. By carefully selecting durable, food-safe materials and following sound construction practices, you’ll create a resilient gardening space. This investment not only ensures a continuous supply of healthy organic produce but also provides a beautiful, low-maintenance focal point for your garden. Get ready to enjoy the fruits (and vegetables!) of your labor for many seasons to come.


