


How to build a rustic root cellar storage system on a budget?

Embracing Traditional Food Preservation on a Budget
In an age dominated by refrigeration and processed foods, the timeless art of root cellaring offers a sustainable and incredibly effective method for preserving your harvest without electricity. Building a rustic root cellar system doesn’t have to break the bank; with thoughtful planning and a bit of elbow grease, you can create a cool, stable environment perfect for storing vegetables, fruits, and even preserves through the colder months. This guide will walk you through building your own budget-friendly root cellar, ensuring your bounty lasts longer.
Why a Root Cellar? The Benefits of Natural Storage
A root cellar leverages the earth’s natural insulation to maintain consistent cool temperatures and high humidity – ideal conditions for many root vegetables, fruits, and even some leafy greens. Beyond saving on electricity, it significantly reduces food waste, allows you to buy or grow in bulk, and connects you to a more self-sufficient lifestyle. For those aiming for greater food independence or simply a better way to store their garden’s yield, a root cellar is an invaluable asset.
Planning Your Budget-Friendly Root Cellar
The first step is critical: planning. Site selection is paramount. Look for a spot that is naturally cool, well-drained, and ideally on a north-facing slope or shaded area to minimize solar gain. Consider digging into an existing hillside for easier construction, or choose a flat spot for an underground or semi-underground design. Think about the size you’ll need based on your typical harvest and how much you plan to store. Sketching a simple design will help visualize the layout and material needs.
Key Considerations:
- Temperature: Aim for 35-50°F (2-10°C)
- Humidity: Target 85-95% relative humidity
- Ventilation: Essential for air circulation and temperature regulation
- Drainage: Crucial to prevent water accumulation and rot

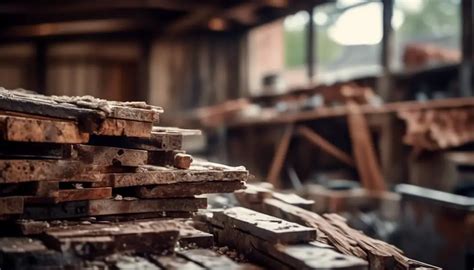
Sourcing Inexpensive Materials
Building on a budget means getting creative with materials. Look for salvaged or recycled items first. Here are some ideas:
- Walls: Concrete blocks (often available used), reclaimed brick, fieldstone, or even treated lumber. For a very rustic approach, compacted earth walls lined with wood can work.
- Roof/Ceiling: Reclaimed lumber, old pallets, heavy-duty plywood, or corrugated metal sheets. These will need to be covered with a thick layer of earth for insulation.
- Insulation: Straw bales, sawdust, wood chips, or even packed earth itself can provide excellent insulation.
- Ventilation Pipes: PVC pipes, old metal ducting, or even sections of large diameter bamboo can be repurposed.
- Shelving: Scrap wood, old pallets, or sturdy branches can be fashioned into simple, effective shelving.
Construction Steps: Digging to Shelving
1. Excavation
Start by digging your chosen spot. The deeper you go, the more stable the temperature will be. For a fully underground cellar, dig a pit to your desired dimensions. For a hillside cellar, dig into the slope to create an alcove. Ensure your floor is level and tamped down firmly. Consider a layer of gravel for drainage.
2. Wall Construction
Erect your walls using your chosen materials. If using concrete blocks or stones, ensure they are stable and mortared (or dry-stacked and reinforced if appropriate for your design). For a simpler earthen cellar, you might only need a retaining wall at the entrance. If using wood, ensure it’s treated or naturally rot-resistant.
3. Roof and Earth Cover
Construct a sturdy roof structure using your reclaimed lumber or pallets. Cover this with a vapor barrier (like heavy-duty plastic sheeting) to prevent moisture from seeping into the structure from above. Then, apply a significant layer of earth (at least 1-2 feet) over the roof for insulation. You can even plant grass or low-growing plants on top to help stabilize the soil and add to the insulation.

4. Ventilation System
This is crucial. You’ll need at least two vents: an intake pipe near the bottom of the cellar and an exhaust pipe near the top. This creates a natural convection current, drawing in cooler, fresh air and expelling warmer, stale air. Cover the openings with fine mesh to keep pests out. For ultimate budget-friendliness, a simple opening and closing system for the pipes can be made with basic caps or cloth.
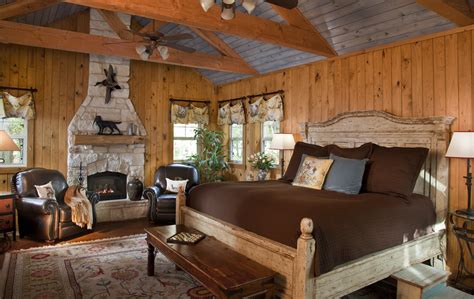
5. Flooring and Shelving
A simple dirt floor works well for humidity, but you can add a layer of gravel or even loose bricks for a slightly cleaner surface. Build rustic shelving from scrap wood, pallets, or even sturdy branches. Ensure shelves allow for good air circulation around your stored produce. Keep in mind that some produce (like apples and potatoes) should be stored separately due to ethylene gas emissions.
Maintaining Your Root Cellar
Once built, your root cellar requires minimal maintenance. Monitor the temperature and humidity, adjusting ventilation as needed. A simple thermometer and hygrometer can be purchased affordably. Inspect your stored produce regularly and remove any items that show signs of spoilage to prevent it from spreading. With proper care, your budget-built rustic root cellar will provide a reliable, sustainable storage solution for years to come.


