


How to build a simple, cost-effective backyard compost system?
Embrace Nature’s Recycler: Why Compost?
Composting is a fantastic way to give back to your garden while significantly reducing household waste. It transforms kitchen scraps, yard trimmings, and other organic materials into a nutrient-rich soil amendment, often referred to as ‘gardener’s gold.’ Not only does it enrich your soil, improving its structure and water retention, but it also diverts waste from landfills, reducing your carbon footprint. Building a compost system doesn’t have to be complicated or expensive; with a few basic materials and a little effort, you can create a thriving hub for decomposition right in your backyard.
Choosing Your Simple Composting Method
When it comes to cost-effective backyard composting, simplicity is key. You don’t need fancy tumblers or expensive bins. The most economical systems often rely on readily available or repurposed materials. Consider the space you have, the amount of waste you generate, and how much effort you’re willing to put in. Here are a few popular, budget-friendly options:
- The Pile Method: The simplest of all, a designated open pile. Great for larger yards with plenty of space.
- Pallet Bin: Using discarded wooden pallets to create a sturdy, breathable enclosure.
- Wire Mesh Bin: Fashioning a cylindrical bin from hardware cloth or chicken wire.
- Repurposed Plastic Bin: A large plastic storage bin or trash can, modified with drainage and aeration holes.
DIY Compost Bin Ideas on a Budget
The Pallet Bin: Sturdy and Free
Wooden pallets are often available for free from local businesses (e.g., nurseries, hardware stores). You’ll typically need 3-4 pallets to create a basic three-sided or four-sided bin. Simply stand them upright and join them at the corners using heavy-duty zip ties, wire, or bolts. This design offers excellent airflow and is robust enough for substantial quantities of compost. Ensure your pallets are ‘HT’ (heat-treated) and not ‘MB’ (methyl bromide treated) for safety.

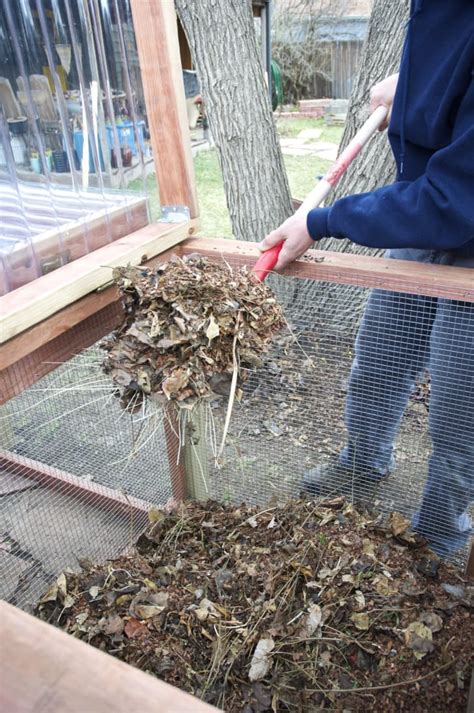
Wire Mesh Bin: Flexible and Easy to Build
A wire mesh bin is incredibly easy to construct and offers fantastic aeration. Purchase a roll of hardware cloth, chicken wire, or even old fencing (at least 3-4 feet tall). Cut a length of about 10-12 feet and form it into a cylinder, securing the ends together with wire or clips. Place it directly on the ground in your chosen spot. Its open structure allows for great air circulation, which is crucial for speedy decomposition. You can easily lift the entire bin to turn your pile.
Repurposed Plastic Storage Bin: Compact and Contained
For smaller spaces or if you prefer a more contained system, an old plastic storage bin or a sturdy plastic trash can can be converted. Drill numerous holes (at least 1/2 inch in diameter) all over the sides and bottom for drainage and air circulation. A lid is useful to retain moisture and keep pests out. This method is often called ‘cold composting’ as it’s slower but requires less active management.
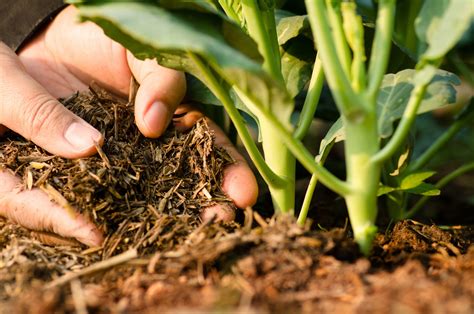
The Composting Recipe: Greens, Browns, and Water
Successful composting relies on a balance of ‘greens’ (nitrogen-rich materials) and ‘browns’ (carbon-rich materials), along with adequate moisture and air. A good rule of thumb is to aim for roughly two parts brown materials to one part green materials by volume.
- Greens (Nitrogen): Kitchen scraps (fruit and vegetable peels, coffee grounds, tea bags), grass clippings, fresh plant trimmings, manure.
- Browns (Carbon): Dry leaves, shredded newspaper or cardboard, straw, wood chips, twigs, sawdust.
Moisture is also vital – your compost pile should feel like a damp sponge. If it’s too dry, decomposition slows down. If it’s too wet, it can become anaerobic and smelly. Regularly turning your pile helps introduce air, preventing compaction and speeding up the process.
Maintaining Your Compost System for Success
Once your system is built and you’ve started adding materials, a little maintenance goes a long way:
- Layering: Try to alternate layers of greens and browns, chopping larger pieces into smaller ones to help them break down faster.
- Turning: Turn your compost pile every week or two with a pitchfork to aerate it and mix the materials. This speeds up decomposition.
- Moisture Check: Add water if the pile feels dry, especially during hot, dry weather. Cover with a tarp if it’s getting too much rain.
- What NOT to Add: Avoid meat, dairy products, oily foods, pet waste, diseased plants, and chemically treated wood, as these can attract pests or introduce pathogens.
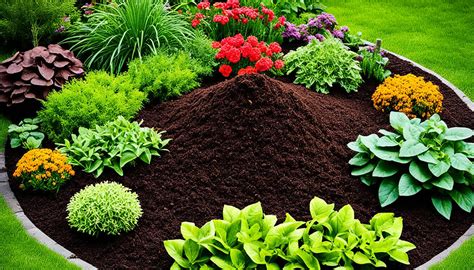
Harvesting and Using Your ‘Black Gold’
You’ll know your compost is ready when it’s dark brown or black, crumbly, and has an earthy smell. There should be no recognizable food scraps or plant matter left. Depending on your method and maintenance, this can take anywhere from a few months to a year. To harvest, simply remove the finished compost from the bottom or sides of your bin. You can then:
- Mix it into your garden beds to enrich the soil before planting.
- Use it as a top dressing around existing plants and trees.
- Add it to potting mixes for container plants.
- Spread it on your lawn as a natural fertilizer.
Start Composting Today!
Building a simple, cost-effective backyard compost system is an empowering step towards a more sustainable and productive garden. It’s a forgiving process, and even imperfect compost is beneficial to your soil. By diverting organic waste from landfills and creating your own nutrient-rich soil amendment, you’ll be contributing to a healthier environment and a flourishing garden with minimal investment.

