


How to build a simple DIY chicken feeder to reduce feed waste?

Keeping backyard chickens is a rewarding endeavor, but one common challenge many poultry owners face is feed waste. Traditional open feeders can lead to spilled feed, contamination, and attract unwanted pests, ultimately costing you more in the long run. Fortunately, building a simple DIY chicken feeder is an effective and economical solution to minimize waste and keep your flock happy and healthy.
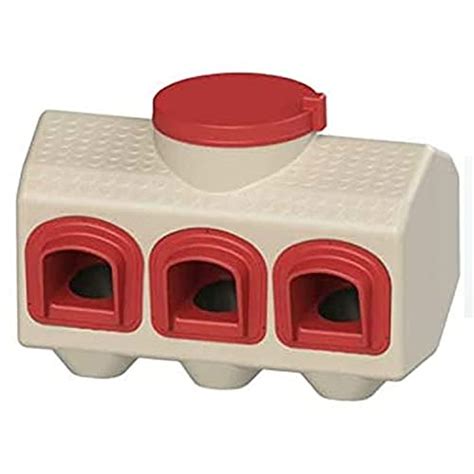
Why Choose a DIY No-Waste Feeder?
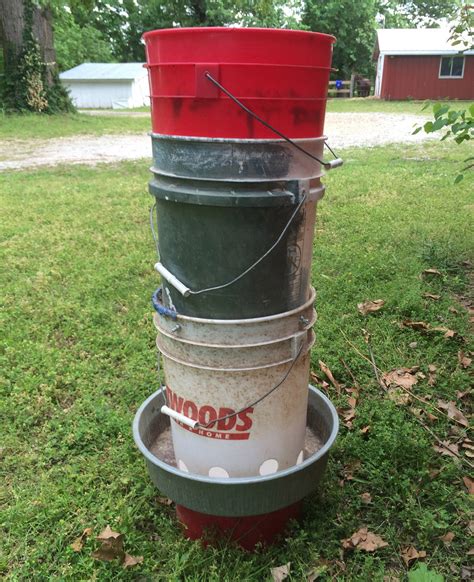
Commercial feeders, while convenient, often don’t address the issue of chickens raking out feed with their beaks. This scattered feed becomes wet, attracts rodents and insects, and is no longer palatable for your birds. A well-designed DIY feeder, often made from readily available materials like PVC pipes or plastic containers, is specifically engineered to prevent spillage by allowing chickens to access feed without being able to kick or scratch it out.
Beyond waste reduction, these feeders can also offer better protection from rain and pests, keeping the feed dry and sanitary. They can also be designed for larger capacities, meaning less frequent refilling, which is a huge time-saver for busy chicken keepers.
Materials You’ll Need
The beauty of a DIY project is its flexibility, and there are many designs for no-waste feeders. For this simple design, we’ll focus on a common and effective method using PVC pipes. Here’s a list of what you’ll typically need:
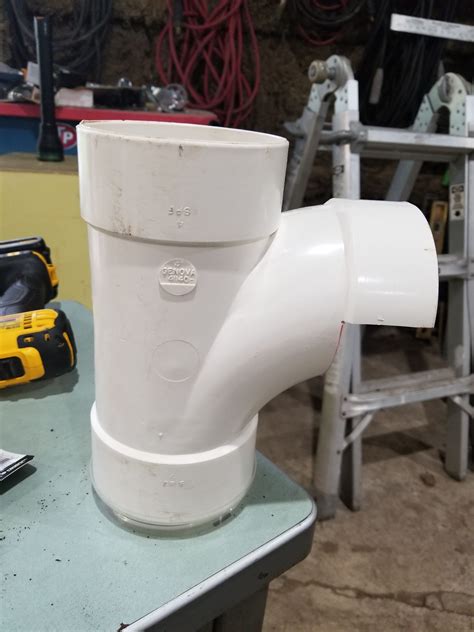
- 4-inch PVC Pipe: A section approximately 2-3 feet long (or longer, depending on desired capacity and flock size).
- 4-inch PVC Wye or Tee Fitting: This creates the feeding port.
- 4-inch PVC Cap: For the top of the feeder to keep feed dry.
- PVC Cement/Primer: For secure, waterproof connections (optional, but recommended for durability).
- Measuring Tape & Marker: For accurate cuts.
- Saw: Such as a hacksaw or miter saw for cutting PVC.
- Drill & Screws/Zip Ties: For mounting the feeder to the coop wall or stand.
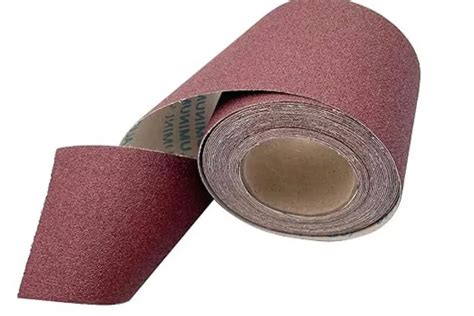
- Optional: Sandpaper (to smooth edges), Funnel (for easier filling).
Step-by-Step Construction Guide
Follow these straightforward steps to build your efficient chicken feeder:
- Cut the Main Pipe: Determine the desired height of your feeder. Cut a length of 4-inch PVC pipe. This will be the main reservoir. A 2-3 foot section is a good starting point, but adjust based on your flock size and how often you want to refill.
- Attach the Wye/Tee Fitting: Approximately 6-10 inches from the bottom of the main pipe (this measurement depends on the height suitable for your chickens to comfortably eat), attach the 4-inch Wye or Tee fitting. The angled or side opening of the fitting should face outwards, forming the feeding port. Use PVC cement and primer for a strong, leak-proof bond, ensuring the opening points slightly downwards to prevent water collection.
- Secure the Bottom: If you want a removable bottom for cleaning, you can leave it uncemented. Otherwise, you can cap the very bottom of the main pipe, though often the Wye/Tee fitting acts as the base with the opening. Ensure there’s enough space for feed to funnel down.
- Add the Top Cap: Place the 4-inch PVC cap on the top end of the main pipe. This cap will protect the feed from rain and pests. You can leave it loose for easy refilling or secure it with a screw if necessary.
- Mount the Feeder: Decide where you want to install the feeder in your coop. It should be at a height where your chickens can comfortably reach the feed port without straining or having to crouch. Use screws to firmly attach the feeder to a coop wall, fence post, or a dedicated stand. Alternatively, heavy-duty zip ties can work for temporary setups.
Tips for Optimal Performance and Maintenance
- Placement is Key: Position the feeder in a dry, sheltered area within the coop or run to protect it from the elements. Ensure the feeding port is at a comfortable height for your smallest chicken to reach.
- Initial Training: Some chickens might need a little encouragement to start using the new feeder. Sprinkling a bit of feed on the ground near the feeder, or even inside the Wye/Tee opening, can help them discover it.
- Regular Cleaning: Even with a no-waste design, it’s important to periodically check and clean the feeder to prevent mold or bacterial growth. Uncemented caps or sections make this easier.
- Monitor Feed Flow: Occasionally, feed can get stuck, especially if it’s dusty or contains larger particles. Give the feeder a gentle shake or tap to ensure feed is flowing freely into the port.
- Adjust for Flock Size: For larger flocks, consider building multiple feeders or a feeder with multiple feeding ports (e.g., using more Wye fittings or larger diameter pipe).
Conclusion
Building a DIY chicken feeder is a simple, cost-effective project that yields significant benefits for both you and your flock. By minimizing feed waste, you’ll save money, reduce pest issues, and provide cleaner, healthier feed for your birds. With just a few basic materials and a little time, you can construct a durable feeder that will serve your chickens well for years to come, making your backyard chicken keeping experience even more enjoyable.

