


How to build a simple, durable raised garden bed for organic vegetable growing?

A raised garden bed offers numerous advantages for cultivating organic vegetables, from better soil control and drainage to reduced weed pressure and easier access. Building your own can be a rewarding DIY project that provides fresh, healthy produce for years to come. This guide will walk you through the steps to construct a simple, durable raised bed that’s perfect for any backyard.
Why Choose a Raised Garden Bed?
Raised beds elevate your garden, literally and figuratively. They allow you to create an ideal growing environment tailored specifically for your plants, independent of your native soil quality. Key benefits include improved drainage, easier weed management, protection from pests, extended growing seasons, and reduced bending for gardeners. For organic growing, they make it simpler to maintain healthy, nutrient-rich soil free from contaminants.

Planning Your Raised Bed
Before you start cutting wood, some thoughtful planning will ensure your raised bed meets your gardening needs.
Location and Size
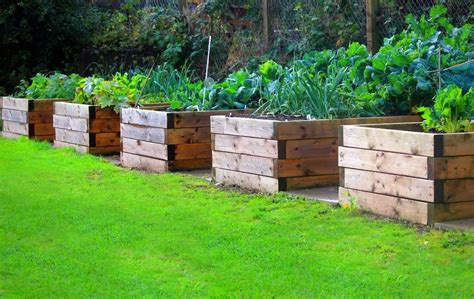
Choose a sunny spot in your yard that receives at least 6-8 hours of direct sunlight daily. Consider proximity to a water source. For size, a common and manageable width is 3-4 feet, allowing you to reach the center from either side without stepping into the bed. Length can vary, but 6-12 feet is practical. A height of 10-12 inches is sufficient for most vegetables, while 18-24 inches provides deeper root space and even easier access.
Material Selection for Durability
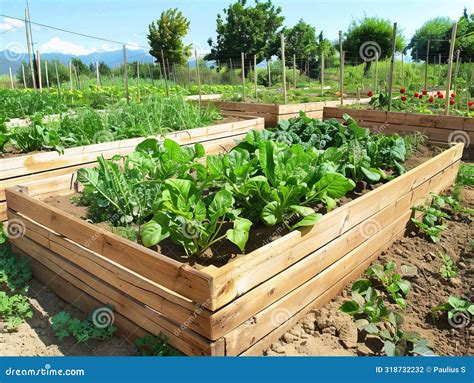
The choice of material is crucial for durability, especially for organic gardening. Avoid pressure-treated lumber, as it contains chemicals that can leach into your soil. Excellent durable and safe options include:
- Cedar or Redwood: Naturally rot-resistant and long-lasting, though typically more expensive.
- Untreated Pine or Fir: More affordable, but will have a shorter lifespan unless treated with an organic-safe sealant (e.g., linseed oil).
- Composite Lumber: Made from recycled plastics and wood fibers, very durable, maintenance-free, but can be costly and less natural-looking.
For a simple, durable bed, cedar is often the best balance of cost and longevity.
Gather Your Tools and Materials
Tools:
- Measuring tape and pencil
- Circular saw or handsaw (if cutting lumber)
- Drill/driver with appropriate drill bits
- Level
- Square
- Shovel or spade
- Wheelbarrow (for moving soil)
- Staple gun (optional, for weed barrier)
Materials (for a 4×8 ft bed, 11 inches high):
- Four (4) 2x6x8 ft boards (for the long sides)
- Four (4) 2x6x4 ft boards (for the short sides – cut from 8ft boards if buying only 8ft lengths)
- Three (3) 2x4x4 ft boards (for corner posts and central support)
- 2.5-3 inch exterior wood screws (rust-resistant)
- Hardware cloth or galvanized wire mesh (to deter burrowing pests, optional)
- Landscape fabric or cardboard (for weed barrier)
- Approximately 1 cubic yard (27 cubic feet) of organic raised bed soil mix
Step-by-Step Construction Guide
Step 1: Cut Your Lumber
If you’re using 8-foot boards and creating a 4×8 foot bed with an 11-inch height, you’ll need to cut your 2x6s. For the 11-inch height, stack two 2x6s. You’ll need four 8-foot boards for the long sides and four 4-foot boards for the short sides. If buying 8-foot boards only, you’ll need six 8-foot boards (four for the long sides, and two to cut into four 4-foot pieces).
Step 2: Assemble the Frame
Begin by laying out two 8-foot boards and two 4-foot boards to form the first layer of your rectangle. Place a 2x4x11-inch post vertically at each inside corner. Use your drill to attach the 2×6 boards to these posts with two screws per board per post. Ensure the boards are flush and square. Repeat this process for the second layer of boards, staggering the seams if possible for added strength, and attaching them to the same corner posts. Add a third 2×4 post in the center of the 8-foot sides for extra stability against soil pressure.
Step 3: Prepare the Site
Once your frame is assembled, move it to its final location. Use a level to ensure the bed sits flat. You may need to slightly dig out or add soil to corners to achieve a level base. If desired, lay down hardware cloth or galvanized wire mesh at the bottom to prevent gophers or voles from tunneling in. Then, place a layer of landscape fabric or flattened cardboard over the entire bottom of the bed to suppress weeds. This allows water to drain but keeps weeds from growing up into your garden.
Step 4: Fill with Organic Soil
This is where your organic growing truly begins. Do not use regular garden soil from your yard, as it may compact and lack nutrients. Instead, fill your raised bed with a high-quality organic raised bed soil mix. A good mix typically includes compost, topsoil, and amendments like perlite or vermiculite for drainage and aeration. You can also layer materials like straw, leaves, and compost at the bottom (known as hugelkultur or lasagna gardening) to reduce the amount of purchased soil and create a self-feeding ecosystem, but ensure the top 6-12 inches are premium organic soil.
Planting and Maintenance Tips
Once filled, your raised bed is ready for planting! Follow organic gardening practices: choose organic seeds or seedlings, use organic fertilizers or compost, and practice companion planting to deter pests naturally. Water regularly, especially during dry spells, and mulch the surface with straw or wood chips to conserve moisture and suppress weeds. Rotate your crops each season to maintain soil health and prevent disease buildup.
Conclusion
Building a simple, durable raised garden bed is an accessible DIY project that pays dividends in fresh, organic produce. With careful planning, the right materials, and a bit of effort, you can create a productive and beautiful garden space that will serve you well for many seasons. Enjoy the satisfaction of growing your own food!


