


How to build a simple, durable raised garden bed with natural materials?

Why Choose a Raised Bed with Natural Materials?
Raised garden beds offer a multitude of benefits for home gardeners, from improved drainage and soil quality to easier access and extended growing seasons. When you opt for natural materials, you’re not only creating a beautiful and harmonious addition to your landscape but also ensuring a sustainable and chemical-free environment for your plants. This guide will walk you through building a simple, sturdy raised bed that will stand the test of time, using materials that are kind to both your garden and the planet.

Planning Your Raised Garden Bed
Before you start building, a little planning goes a long way. Consider these factors:
- Location: Choose a spot that receives at least 6-8 hours of direct sunlight daily for most vegetables and flowers. Ensure good drainage and easy access for watering and weeding.
- Size: A width of 3-4 feet allows you to reach the center from either side without stepping into the bed. Length can vary, but keep it manageable for your space. Heights of 10-12 inches are good for most crops, while 18-24 inches offer better drainage and reduce bending.
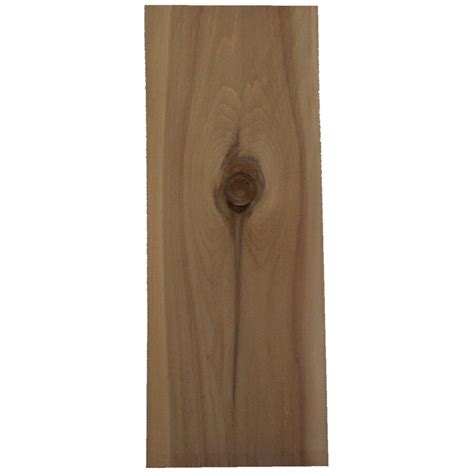
- Materials: Focus on untreated, rot-resistant wood (cedar, redwood, locust) or natural stone (fieldstone, granite, limestone). Avoid treated lumber as it can leach chemicals into your soil. Reclaimed logs or large timbers can also be excellent, rustic choices.
Selecting Your Natural Materials
Untreated Wood: Cedar and redwood are popular choices due to their natural resistance to rot and insects. While often more expensive upfront, their longevity makes them a worthwhile investment. Look for rough-sawn lumber for a more rustic look or smooth planks for a cleaner finish.
Natural Stone: Fieldstone, river rock, or other readily available stones offer incredible durability and a beautiful, timeless aesthetic. Building with stone can be more labor-intensive but results in a virtually permanent structure.
Reclaimed Logs/Timbers: For an organic, woodland feel, consider using large, untreated logs or railroad ties (ensure they are *not* creosote-treated). These can be sourced locally and often offer a very cost-effective solution.
Tools and Supplies You’ll Need
The beauty of building a simple raised bed is that you don’t need a professional workshop. Most of these tools are standard for DIY enthusiasts:
- Measuring tape
- Pencil or marker
- Saw (circular, miter, or hand saw, depending on material)
- Drill and appropriate bits (for wood)
- Level
- Shovel or spade
- Mallet or hammer
- Wood screws or rebar (for wood beds)
- Landscape fabric or cardboard (optional, for weed suppression)
- Gardening gloves
Step-by-Step Construction Guide
1. Prepare the Site
Clear the chosen area of any weeds, grass, or debris. Use a shovel to level the ground as much as possible. While not strictly necessary, some people choose to lay down a layer of cardboard or landscape fabric to suppress weeds and prevent grass from growing up into the bed. This will eventually decompose and add organic matter to your soil.
2. Layout and Mark the Bed
Measure and mark the dimensions of your raised bed directly on the prepared ground. You can use stakes and string to create a precise outline. Double-check that all corners are square.
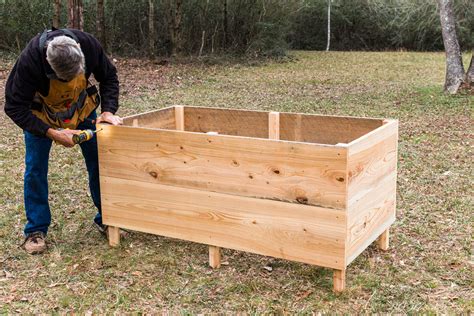
3. Construct the Walls (Wood)
If using wood, cut your lumber to the desired lengths for the sides and ends of your bed. For example, for a 4×8 foot bed, you’d need two 8-foot pieces and two 4-foot pieces per layer. Stack the first layer of boards to form a rectangle. For strength and stability, consider using corner posts (4x4s) or internal bracing. Pre-drill pilot holes to prevent splitting, then secure the boards with long exterior-grade screws. Continue stacking layers until you reach your desired height, ensuring each layer is level and securely fastened to the one below it. Alternatively, you can use rebar pounded through pre-drilled holes in the wood layers for a peg-like connection that’s very stable.

3. Construct the Walls (Stone)
If using stone, begin by laying a stable foundation. Dig a shallow trench, about 4-6 inches deep and slightly wider than your stones, and fill it with gravel for drainage. Lay your first course of stones, selecting flatter, larger pieces for the base. Use a level frequently to ensure the course is even. Dry-stacking (without mortar) is common for garden beds, relying on the weight and interlocking nature of the stones. Stagger joints like brickwork for increased stability. For taller beds, you may want to gently slope the walls inward for added strength. Backfill soil against the outside of the wall as you go for additional support.
4. Add a Liner (Optional)
If using rough wood or if you’re concerned about soil erosion through gaps, you can line the inside of the bed with landscape fabric. Staple it to the inside of the wood or tuck it behind the stones, making sure it extends from the bottom to just below the top edge.
5. Fill Your Raised Bed
Now for the fun part! Fill your raised bed with a high-quality soil mix. A good combination is 60% topsoil, 30% compost, and 10% perlite or vermiculite for drainage. Avoid using just garden soil, as it can be too dense and lack nutrients. Gradually fill the bed, breaking up any large clumps, and moistening as you go. Leave about 2-3 inches of space from the top of the bed to the soil level.

Maintenance and Durability Tips
- Keep Wood Dry: While rot-resistant, prolonged contact with constantly wet soil can shorten the lifespan of wood. Ensure good drainage and consider adding a layer of gravel at the very bottom of the bed.
- Regular Inspection: Periodically check wooden beds for loose screws or signs of rot. For stone beds, inspect for shifting stones and address them promptly.
- Mulch: Apply a layer of organic mulch (straw, wood chips, shredded leaves) to the soil surface. This helps retain moisture, suppress weeds, and regulate soil temperature, further protecting your bed’s materials.
- Winter Care: In colder climates, ensure proper drainage to prevent ice expansion from damaging your bed structure.
Conclusion
Building a simple, durable raised garden bed with natural materials is a rewarding DIY project that enhances your gardening experience and adds rustic charm to your outdoor space. By carefully planning, choosing sustainable materials, and following these steps, you’ll create a thriving environment for your plants that will last for years to come. Happy gardening!
