


How to build a simple, effective DIY root cellar for year-round produce storage?

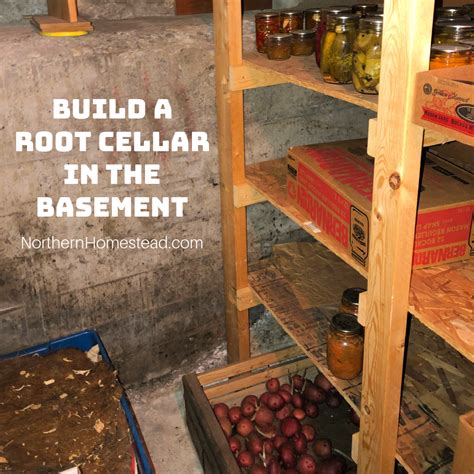
Unlock Year-Round Freshness with a DIY Root Cellar
Imagine enjoying crisp apples, firm carrots, and hardy potatoes months after harvest, all without electricity. A simple, effective DIY root cellar makes this a reality, offering an age-old, sustainable solution for preserving your garden’s bounty. Far from complex underground bunkers, many practical root cellar designs can be easily integrated into your home or yard, providing ideal conditions for a wide array of produce.
Building your own root cellar is an empowering project that not only extends the life of your produce but also contributes to self-sufficiency and reduces food waste. With basic materials and a bit of effort, you can create a natural refrigeration system that serves your household for years.
Understanding the Core Principles of a Root Cellar
The effectiveness of a root cellar hinges on maintaining specific environmental conditions: cool temperatures, high humidity, darkness, and adequate ventilation. These four pillars work together to slow down the metabolic processes in stored produce, preventing spoilage and retaining flavor and texture.
- Cool Temperatures (32-50°F / 0-10°C): Mimicking winter soil, this temperature range slows respiration and ripening.
- High Humidity (85-95%): Prevents produce from shriveling and drying out.
- Darkness: Inhibits sprouting (especially in potatoes and onions) and preserves nutrients.
- Ventilation: Circulates air, prevents the buildup of ethylene gas (which hastens ripening), and discourages mold and mildew.
By focusing on these principles, even the simplest structure can become an incredibly effective storage solution.
Choosing Your Root Cellar Type and Ideal Location
Simplicity is key when starting, and several DIY options require minimal excavation or construction. Consider these popular types:
- Buried Barrel or Bin: A simple, effective solution for smaller yields. A sturdy plastic barrel or galvanized trash can, buried mostly underground, can provide excellent conditions.
- Earth Mound/Clamp: Create a pile of produce on the ground, cover it with straw, and then a layer of soil. This is temporary but very effective.
- Modified Closet or Basement Corner: If you have a cool, damp basement, a dedicated, insulated corner with proper ventilation can serve as an indoor root cellar.
- Under Porch/Deck Storage: A simple enclosed space beneath an elevated structure can be insulated and ventilated.
When selecting a location, look for a spot that is naturally cool, well-drained, and preferably shaded. Avoid areas prone to flooding or where digging might interfere with utility lines.

Essential Materials and Tools for a Basic Build
The beauty of a DIY root cellar is that you can often use repurposed or readily available materials. For a buried bin or a small outdoor structure, you’ll generally need:
- Container: A large plastic barrel, galvanized steel trash can, or a wooden box constructed from rot-resistant lumber.
- Insulation: Straw, leaves, old blankets, or rigid foam insulation.
- Ventilation Pipes: PVC pipes or similar for air intake and exhaust.
- Drainage Material: Gravel or crushed rock for the base.
- Cover/Lid: A sturdy, insulated lid that seals well.
- Tools: Shovel, level, tape measure, utility knife, saw (if using wood).
- Monitoring: A thermometer and hygrometer to track temperature and humidity.
Step-by-Step Construction: A Buried Barrel Example
Let’s outline a simple buried barrel method:
- Dig the Hole: Excavate a hole slightly larger and deeper than your chosen container. Ensure the bottom is level and provides good drainage. Add a layer of gravel for a drainage bed.
- Install Drainage & Ventilation: If desired, a small drain pipe can be installed at the bottom. Position your container in the hole. Install two ventilation pipes – one reaching near the bottom of the barrel for air intake and another higher up for exhaust. Ensure they extend above ground level and are covered with mesh to prevent pests.
- Backfill and Insulate: Backfill around the container with soil, compacting it firmly. As you backfill, incorporate layers of straw or other insulation around the sides. This helps moderate temperature fluctuations.
- Create an Insulated Lid: Fashion a sturdy, insulated lid for your barrel. This could be a wooden disc covered with rigid foam insulation, topped with a weather-resistant material. Ensure it fits snugly to prevent pests and retain humidity.
- Add Shelving (Optional): If space allows, a simple suspended shelf or tiered system inside the barrel can help organize produce and improve air circulation.
- Monitor Conditions: Place your thermometer and hygrometer inside. Adjust ventilation (e.g., partially cover an exhaust pipe) to achieve optimal conditions.

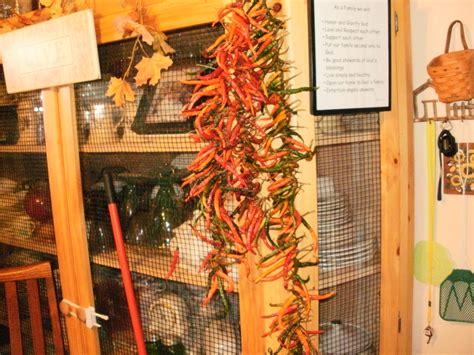
Stocking and Maintaining Your Root Cellar
Once built, a root cellar requires minimal maintenance. Regularly check your thermometer and hygrometer and make adjustments to ventilation as needed. A small bowl of water can be placed inside to boost humidity if it drops too low.
When stocking, remember to:
- Cure Produce: Many root vegetables (like potatoes and sweet potatoes) benefit from a curing period before storage to heal skin wounds and extend storage life.
- Clean but Don’t Wash: Brush off excess dirt, but avoid washing produce before storage, as moisture can encourage rot.
- Inspect Carefully: Only store blemish-free produce. One bad apple (literally!) can spoil the whole batch.
- Separate Incompatible Items: Store items that produce ethylene gas (like apples) away from those sensitive to it (like carrots and potatoes) to prevent premature ripening or sprouting.
Embrace the Ancient Art of Food Preservation
Building a DIY root cellar is a rewarding project that reconnects you with time-honored methods of food preservation. It’s an investment in sustainable living, providing fresh, healthy produce long after the growing season ends, all while reducing your carbon footprint. Start small, experiment, and soon you’ll be enjoying the fruits (and roots) of your labor throughout the year.


